Showing posts with label Tulip 3-D Slick Paint. Show all posts

Wednesday, June 3

DIY Lemon Shirt

Happy Wednesday! I am so excited to show you how I create this yummy Lemon shirt! It's so bright and refreshing you will prolly want to peel them off and eat them! I have sorta been on a "fruit" kick lately. Seriously, fruits are so much fun to paint especially watermelons. I will say after doing this lemon shirt I am in the mood to do a lime shirt now. I might just have to do one with both! Whatddya say!

Let's get started.

Monday, June 2

Boifromipanema: How to braided leather bracelet


Summertime is here and there is no way to better achieve that bohemian accessorized look, than with some chunky wrist candy! I used about two feet of leather cord to braid my bracelet. Then I decided to give it a bit of faux beading details with some Tulip Slick dimensional paints to brighten up the leather.  Check out my video tutorial to see how I made this rad braided leather bracelet! 

Monday, January 27

DIY Neon Friendship Bracelets


Neon is making a comeback and these DIY Neon Friendship Bracelets are one cool way to add some serious color to your arm candy and they have a bit of sparkle!  
OK, so neon is on it’s fourth or fifth come back. But, this time there are so many new and creative ways to incorporate it into your wardrobe without looking completely ‘80’s dayglo! 
These bracelets so quick and fun to make you’ll want to make lots and that’s good because they look amazing stacked together and don’t forget to make them for your friends too!

Tuesday, June 25

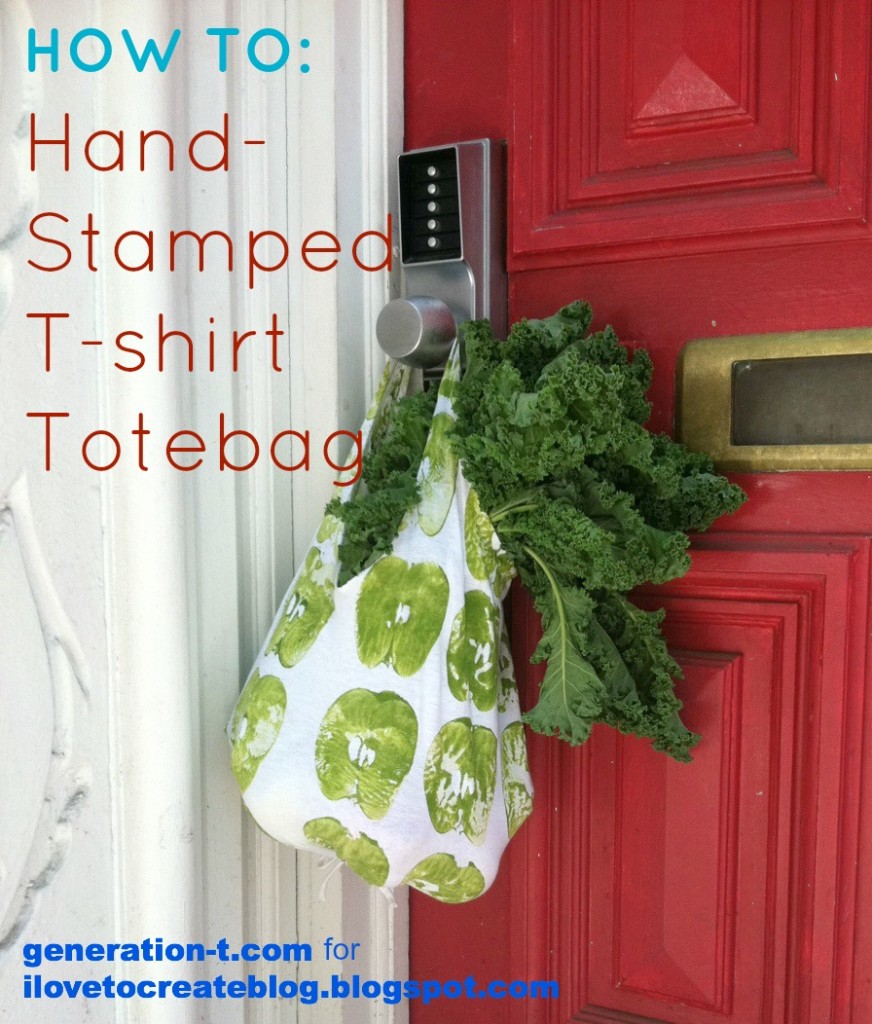
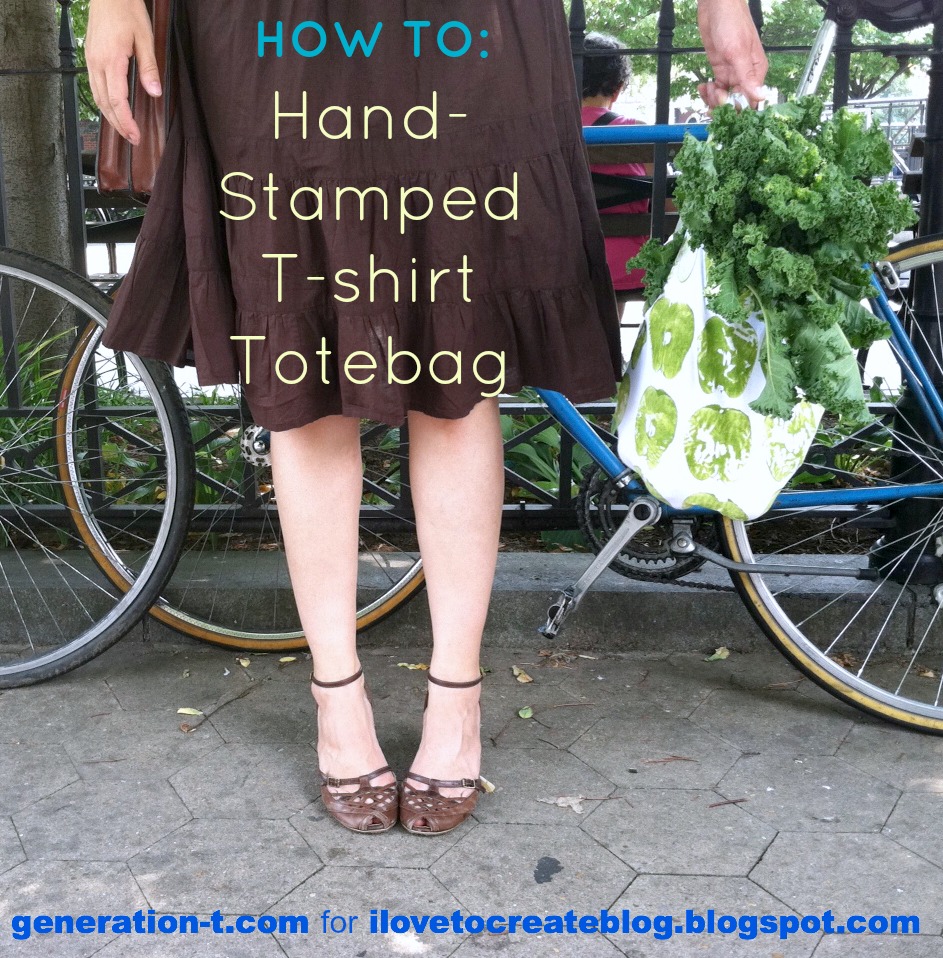
Hand-Stamped T-shirt Totebag (with Fruit!)

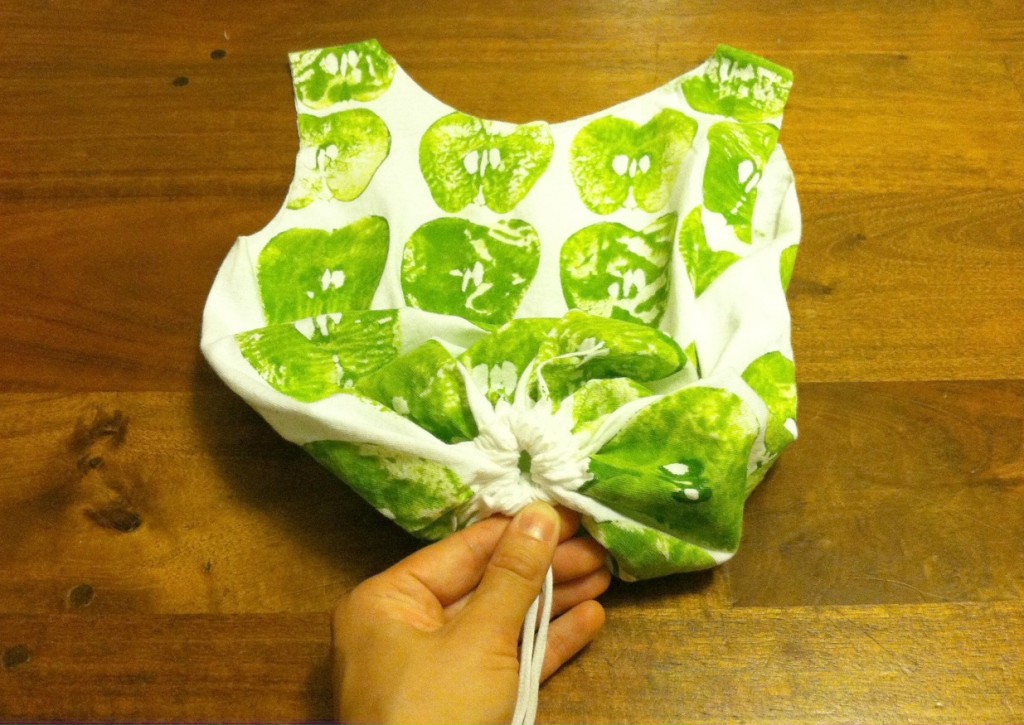
Move over potato stamping! There are some other fruits and veggies that want in on the action. Printing with fruits and veggies is nothing new -- but when applied to a grocery or green market bag, you get a tote that forecasts what should go inside (apples, onions, peppers, celery, corn...). Not to mention, you can construct this sturdy bag from an old T-shirt without sewing--a single safety pin is the closest you'll get to any specialty tools. I worked out the bag particulars while I was in residency at a workshop up in NH (I've since discovered a great tutorial for a very similar technique by Lee Meredith over at Leethal.net, which I imagine works particularly well for larger T-shirts, where the bottom bunching can be redistributed between several gathers). And I was inspired to use an apple after seeing Kayte Terry's lovely apple-printed tote (I wish my apple had had a stem on it!).
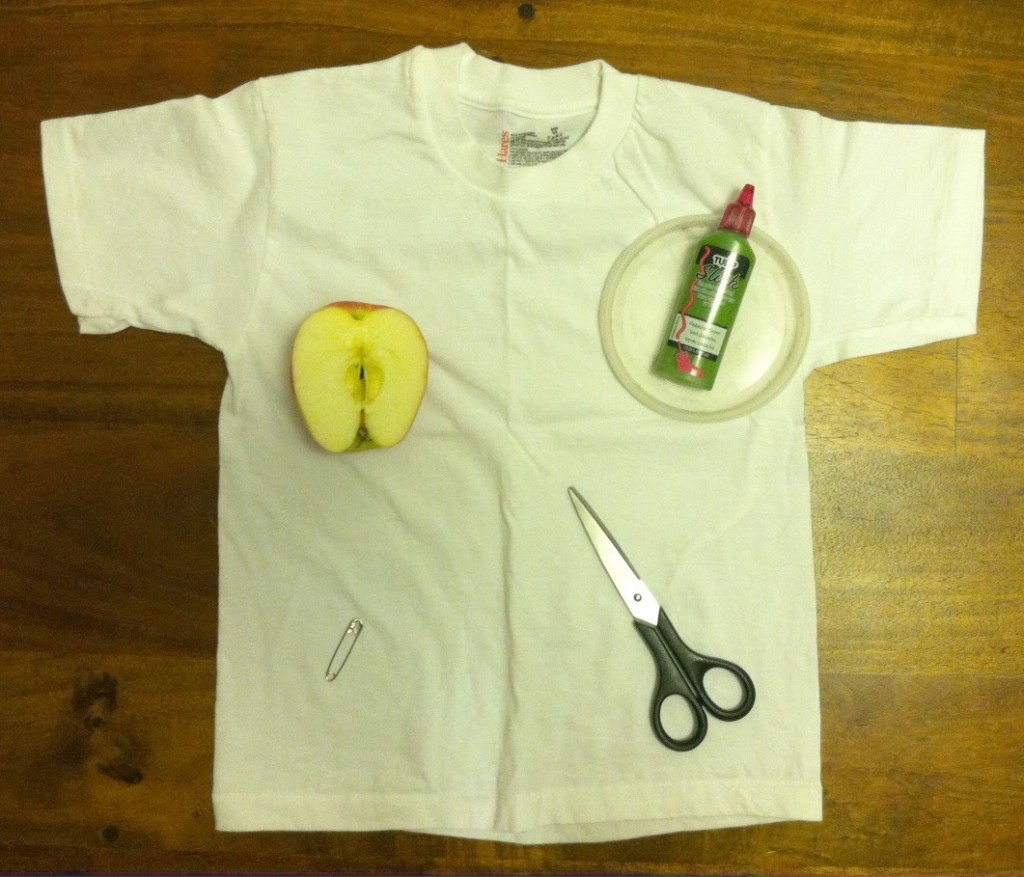
What You Need:
-Plain old T-shirt (I used a kid's size 6-8 for this particular one)
-Tulip Dimensional Paint or Tulip Soft Fabric Paint Tubes
-Plastic lid to use as a paint palette
-Half an apple (or bell pepper, or onion, or...) to use as a stamp
-Fabric scissors
-Safety pin
-Scrap paper
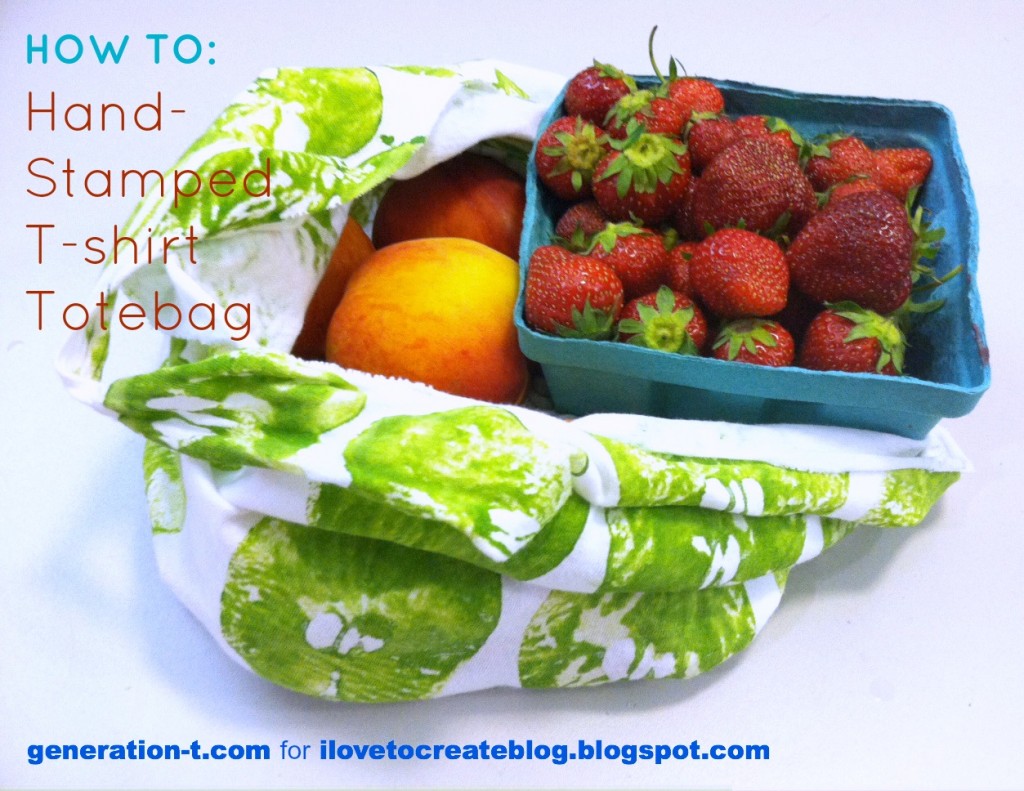
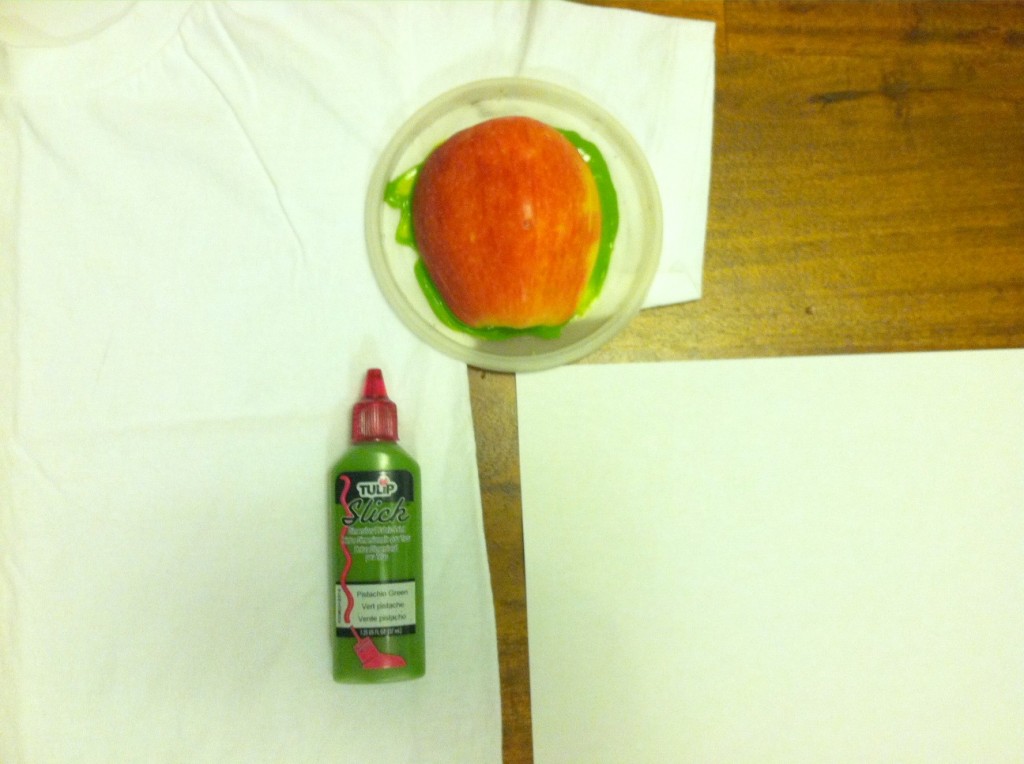
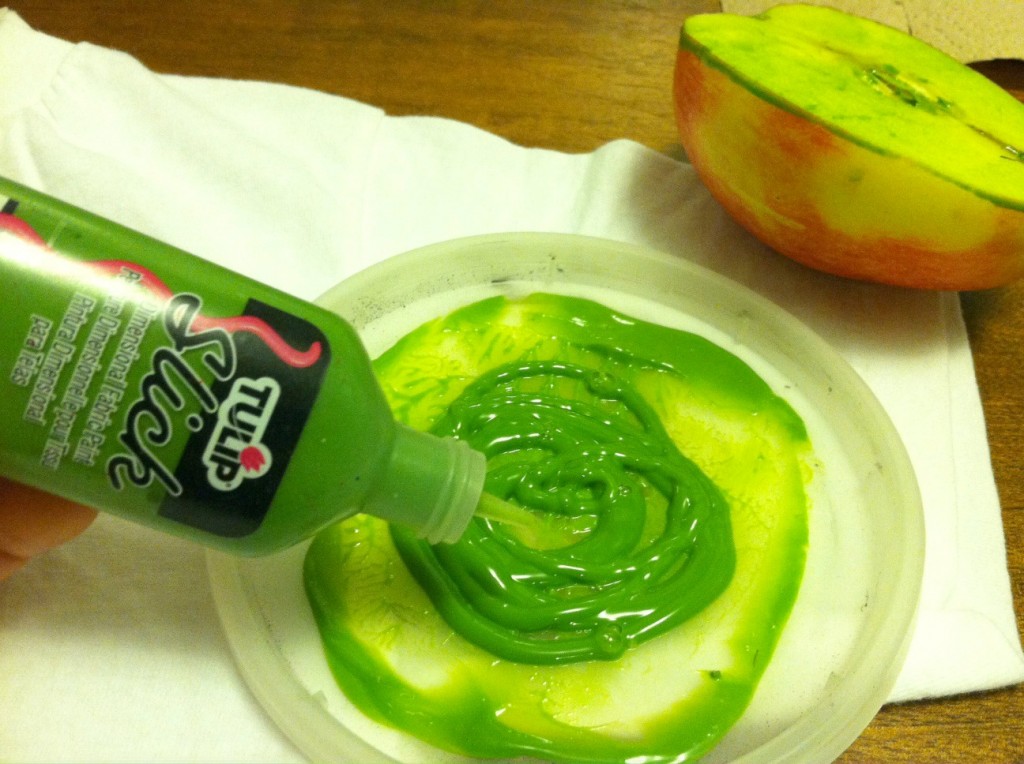
Insert sheets of scrap paper between the layers of the T-shirt so the colors won't bleed through. Squeeze a fairly generous amount of fabric paint onto your paint palette. Place the apple half flat side into the paint and slide it around to make sure it's covered. Make a test print on a scrap piece of paper or the sleeve of the T-shirt (which will be cut off) before printing on your shirt.
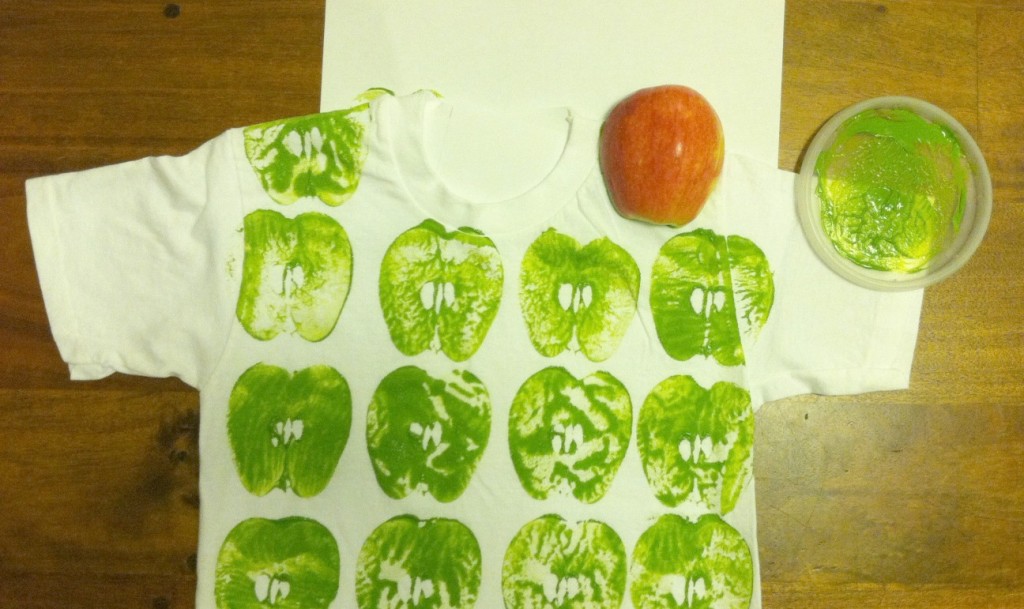
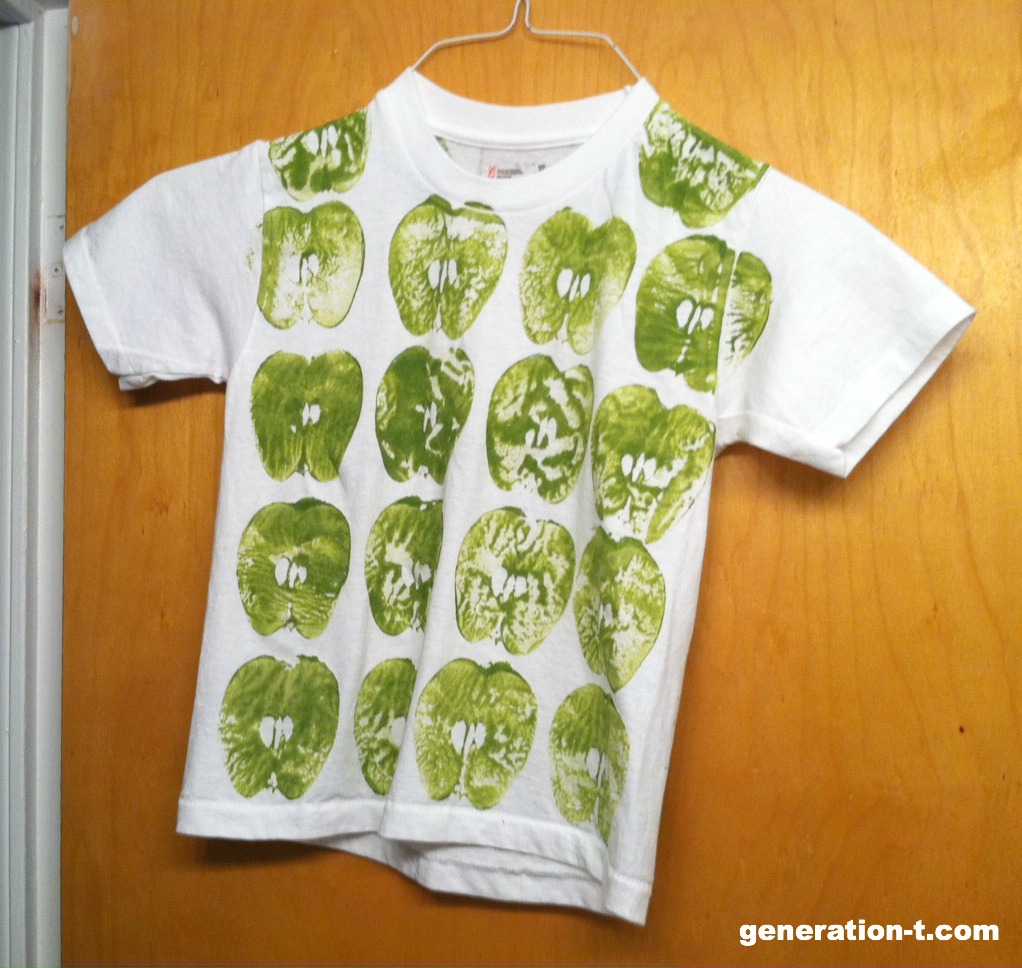
Then print away, starting at the bottom of the tee and working your way up to the shoulders. I re-inked between each pressing of the apple.
Reapply fabric paint to your palette as needed. When the front of the T-shirt is complete, let it dry partially (about 30 mins), then flip it over (onto a protective surface, in case not all the glue is dry) and stamp the back!
Hang the T-shirt to let it dry completely (and decide whether the T-shirt wants to stay a T-shirt now that it's been revived with color!). 
If you choose to continue on to make the tote bag....
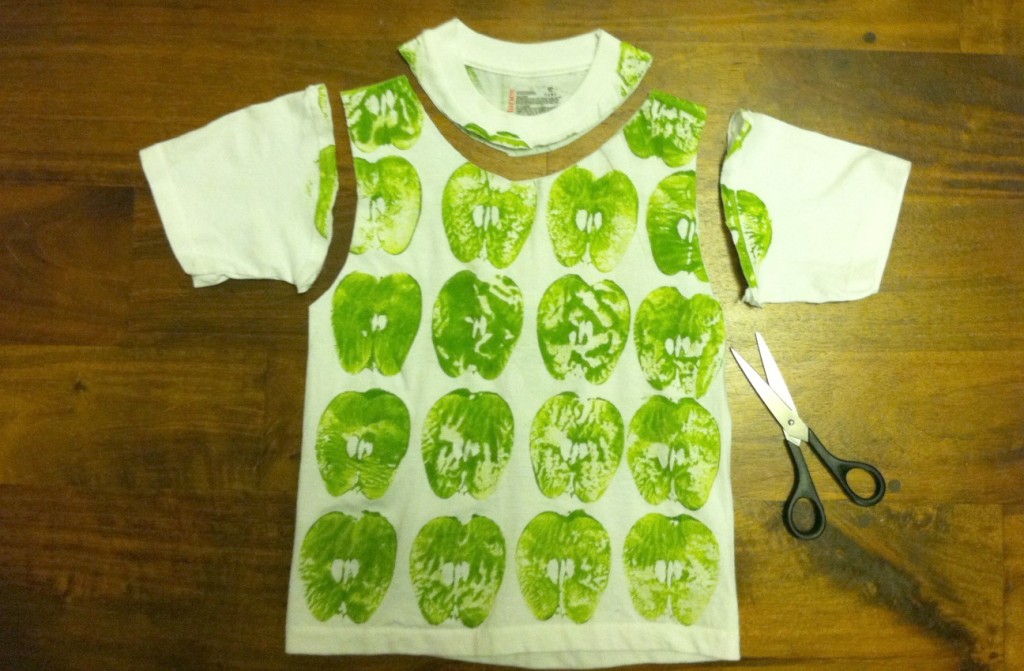
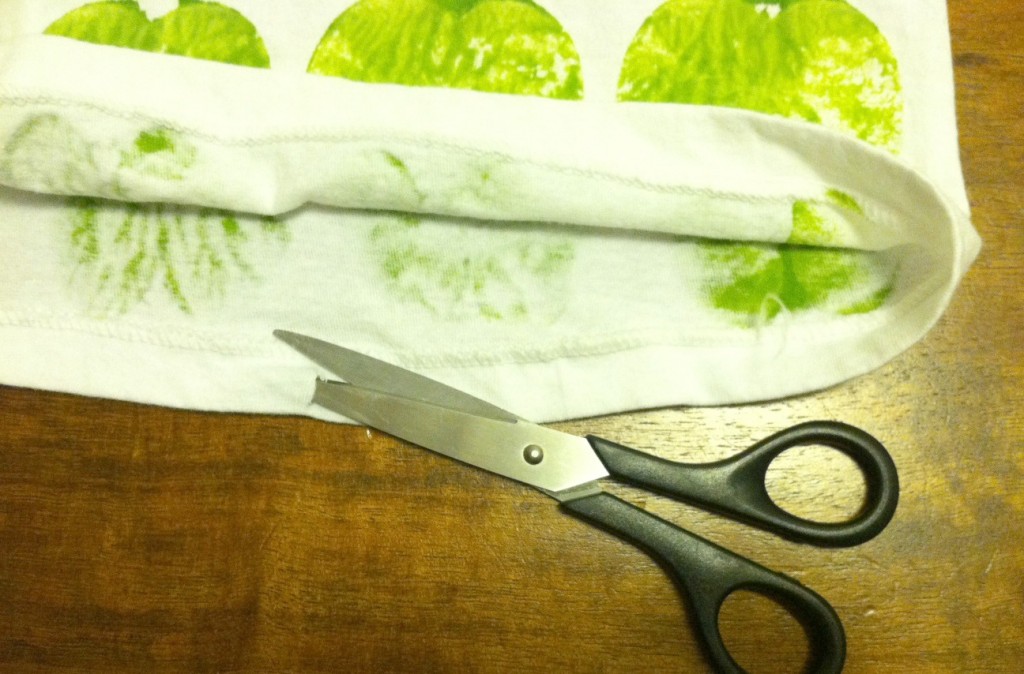
Cut off the sleeves of the T-shirt, just inside the shoulder seams. Then cut out the neckband in a gentle arc, going through both layers.
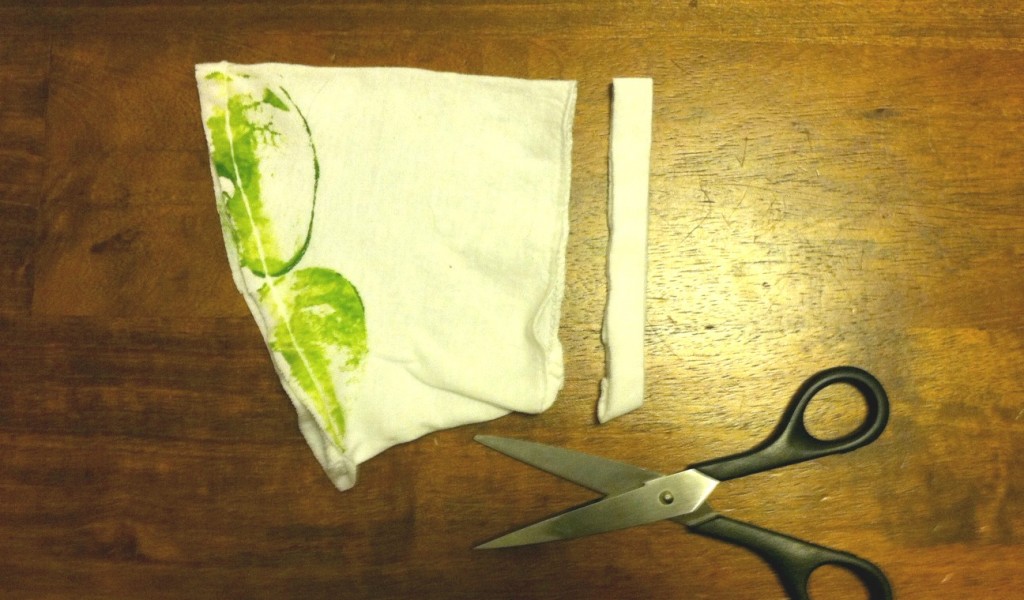
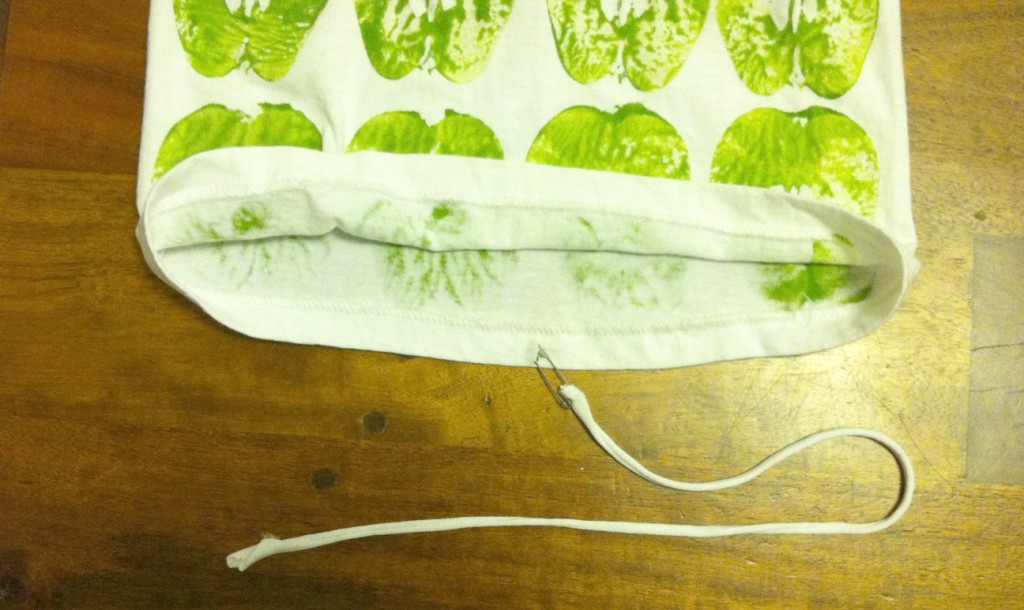
Cut off one of the T-shirt sleeve hems, just outside the seam (so that no stitching remains on the strip that you cut off), and cut through the loop to make a strip. Stretch it out, so it curls in on itself and becomes cord-like. Set it aside.
Use the tips of your scissors to snip a small hole through just the inside of the bottom hem of the T-shirt.
Attach the safety pin to one end of the cord and thread it through the hole in the hem.
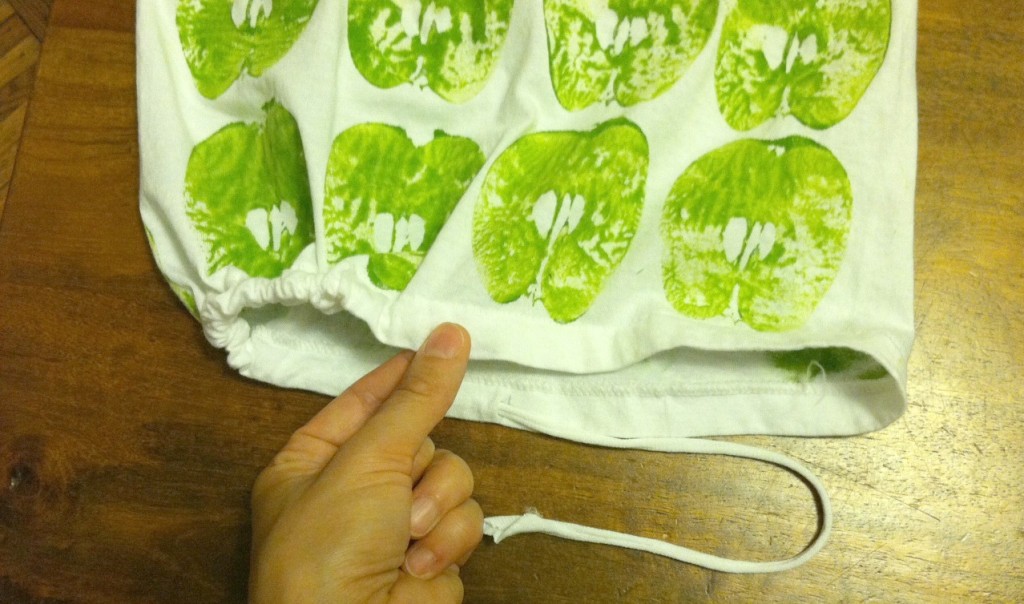
Inch it through, making sure you hold onto the non-safety-pinned end so it doesn't get lost in the hem casing.
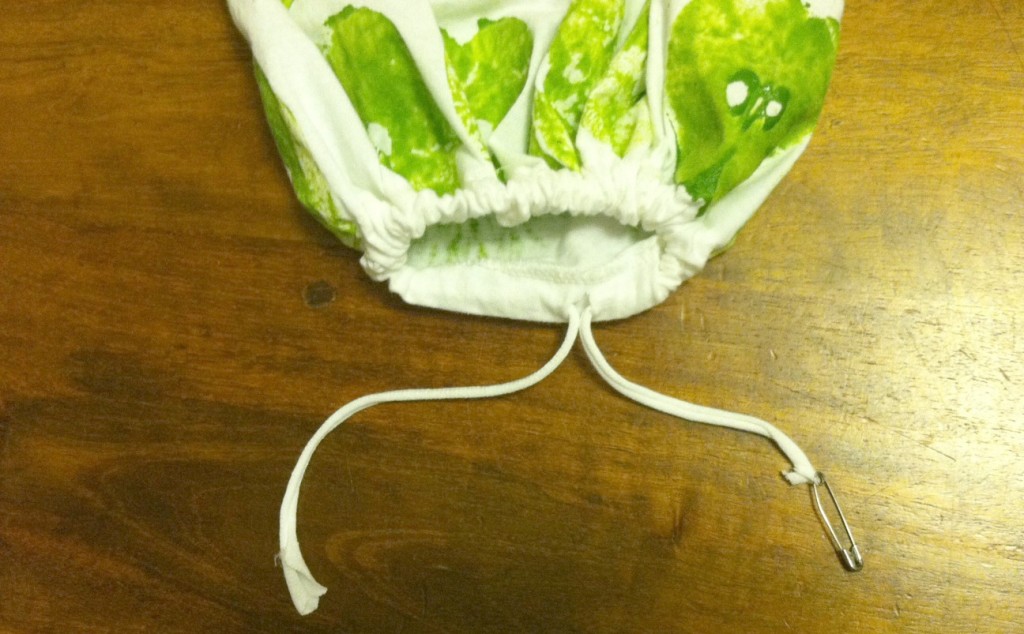
Pull both ends even, remove, the safety pin, and...
...pull tight the drawstring, so that the bottom hem gathers completely. Then tie it in a bow or a double knot.
Now here's to crumpling it up, stuffing it in your back pocket or purse, and hitting the farmer's market! See, now you can FILL it with fruits and veggies.

 Don't forget to share your collected loot!

And stay tuned: Another veggie-printed, no-sew tote bag tutorial is coming your way over on Generation T next week!

Wednesday, June 12

DIY Father's Day Frame


Here's a DIY Father's Day Frame you can make in a flash to show Dad just how much you love him.  I got the frame and vintage edition Hot Wheels toy cars at our local Dollar General for $8.50.  Just make the frame, print the graphic, cut to fit and place in frame.  An awesome reminder that in the race of life, the one who finishes with the most toys love wins.  Aleene's 7800 adhesive and Tulip dimensional paint make it easy to make this race car themed frame. 
What you need:
4 Hot Wheels vintage edition toy cars
5x7 frame (the frame edges need to be wide enough to accomodate the cars without overlap)
Cardboard 
Pencil
Ruler
Heavy duty scissors
 1.  Measure center points of frame from edges, mark.  Mark around frame with pencil, this doesn't have to be perfectly perfect, but try to keep the spacing somewhat even.  2.  Use a heavy duty pair of scissors to cut small segments of cardboards to fit underneath cars.  These will help you glue them down without having to worry about the wheels moving around!  3.  Glue cardboard underneath cards and glue cars to frame.  Each car is one dash from edge, creating the illusion of movement.  4.  Use Tulip Slick Paint to go over the pencil marks.  Allow glue and paint to dry!
Print graphic sized to fit a 5"x7" frame. Cut to fit and insert into frame, you can secure it with a little Aleene's Spray Adhesive to keep it from slipping.
 
Fun, fast, fabulous and just in time for Father's Day!  What are you making for Dad this year?  Need ideas?  We've got lots of great DIY's for Dad on our website.
Don't forget to like the iLoveToCreate.com Facebook Page for more creative inspiration and visit me at DIY Doyenne for Fashion and Style!

Cheers,
Margot

Friday, September 2

Cool2Craft TV - Monday September 5, 2011

Cool2Craft TV for September 5, 2011: Let's Repurpose, ReDo & Redecorate!

Join host Tiffany Windsor for a new episode of Cool2Craft TV. This week's show theme is redecorate. EcoHeidi Borchers transforms glass jars and clear vases with fancy yarn and Aleene's Tacky Double Stick Sheets, Candace Jedrowicz goes kitschy with her clock redo and Tiffany crafts thrift store frames into beautiful floral art in a reverse painting technique featuring Tulip 3D Slick Fashion Paint. It's terrifically tacky and creatively cool!

It’s easy to watch the Cool2Craft TV Channel right from your computer. Airing Monday September 5, 2011 9am Pacific/10am Mountain/ 11 am Central/ Noon Eastern. Go to http://cool2craft.com and find the Livestream player and chat box. See you Monday!

Thursday, February 10

Bedazzled Braille Bangle Bracelet


If you have a hot Valentine's Day date, you need the perfect accessory and I think this bracelet might just be it. You can say I Love You in so many different ways, but have you said it lately in bedazzled braille? I didn't think so.
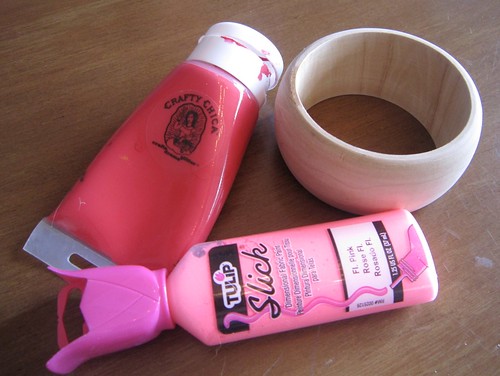

SUPPLIES
Tulip Glam it Up Crystals
Plain Bracelet
Crafty Chica Paint Pack
Paint Brush
Tulip Slick Paint (or Scribbles)
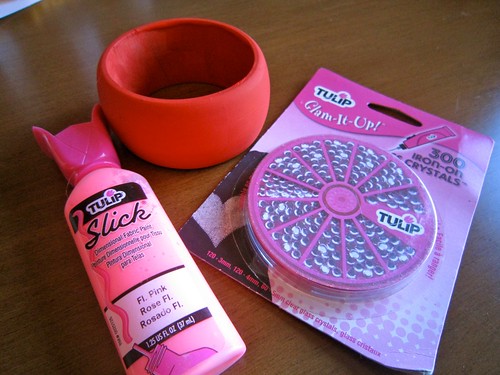

You can find blank wooden bangle bracelets at most craft stores, but feel free to up-cycle an old bangle bracelet in your collection. What about a spent roll of tape? Paint the bracelet whatever color tickles your fancy, I opted for red to go with my Valentine's theme.
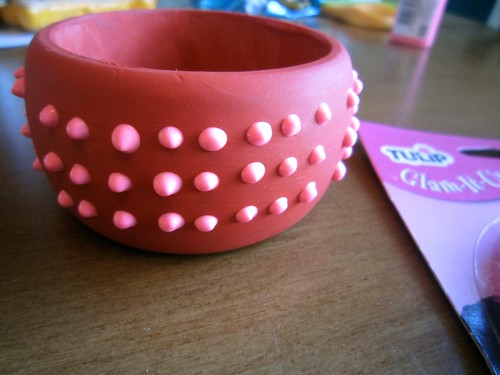

After the paint was dried it was time to add my raised dots. I wanted to use a thicker paint like Tulip Slicks or Scribbles. I looked for how to say I Love You in braille on the internet. I first went through and added a slew of hot pink dots.


While my hot pink dots were still wet I placed Tulip Glam it Up Crystals in the correct spots to spell out I Love You in Braille.

For my hot Valentine's Day date with the hubbs I have the perfect accessory. The trick will be finding a cute outfit that will fit me at 9 months pregnant.


Looking for more I Love to Create projects? How about jewelry ideas? Want more Valentine action? I gotcha covered.

Visit us on Facebook!
Craft on! Click here for today's daily giveaway!

Tuesday, January 25

T-shirt Book for Baby!

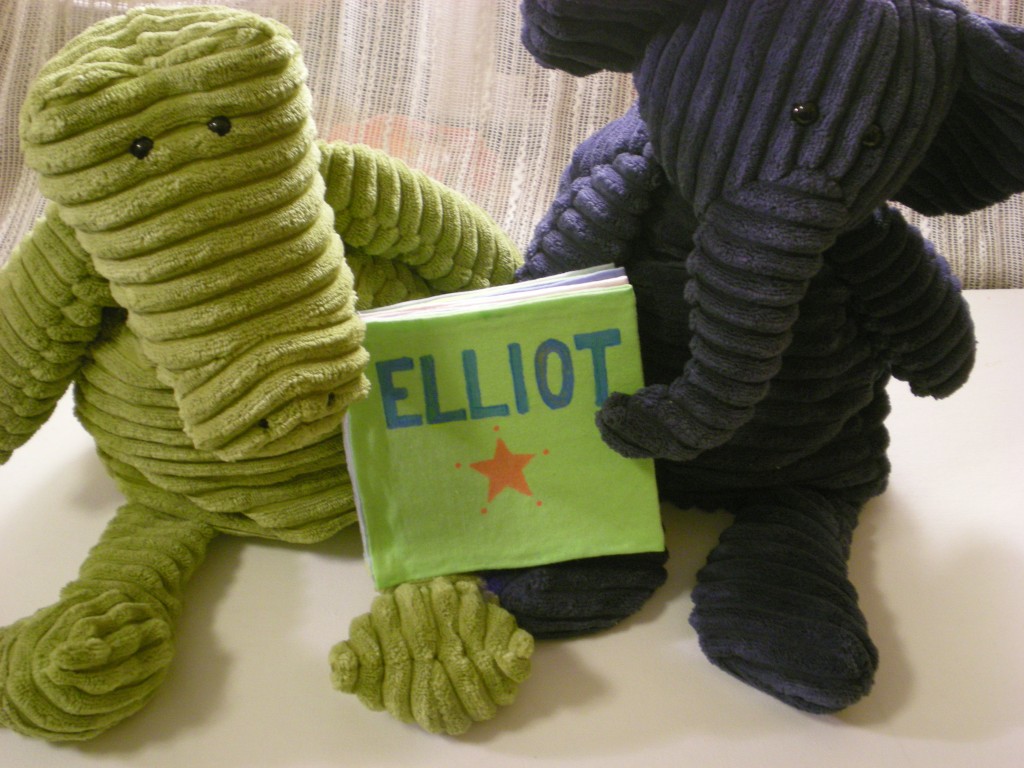
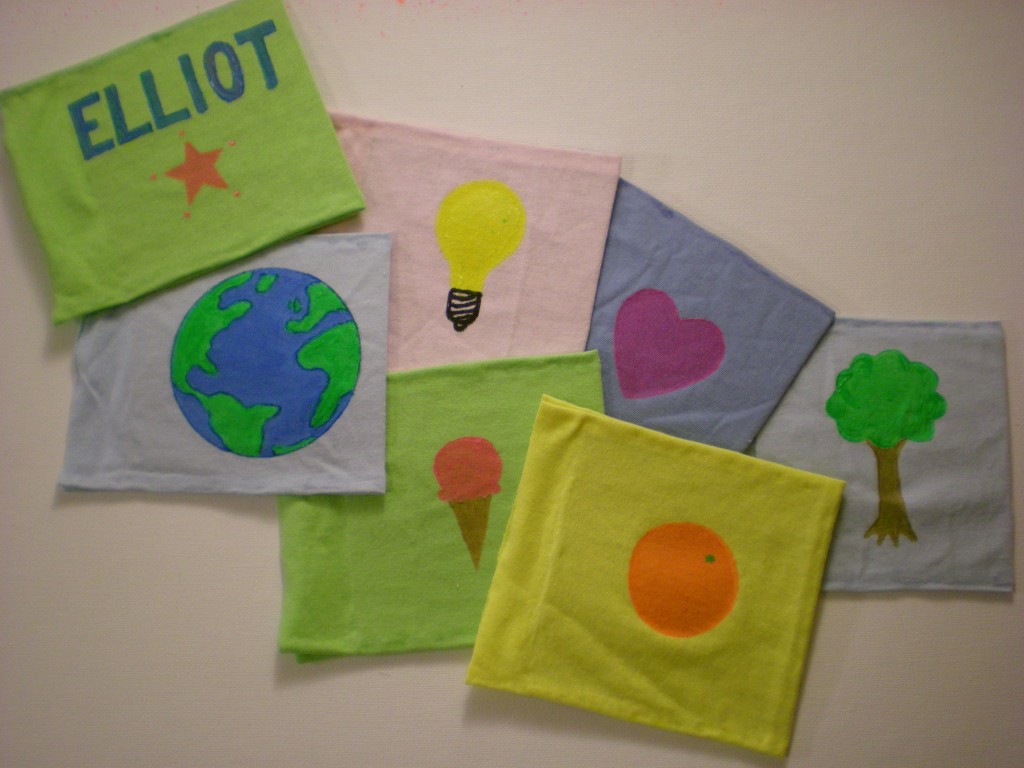
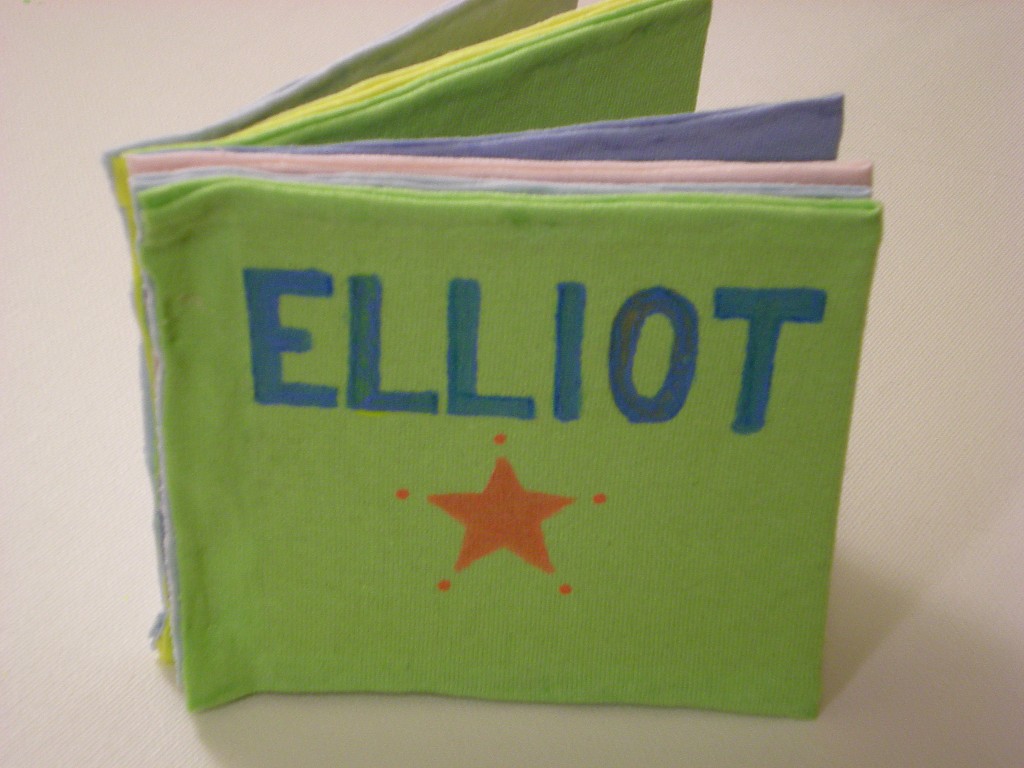
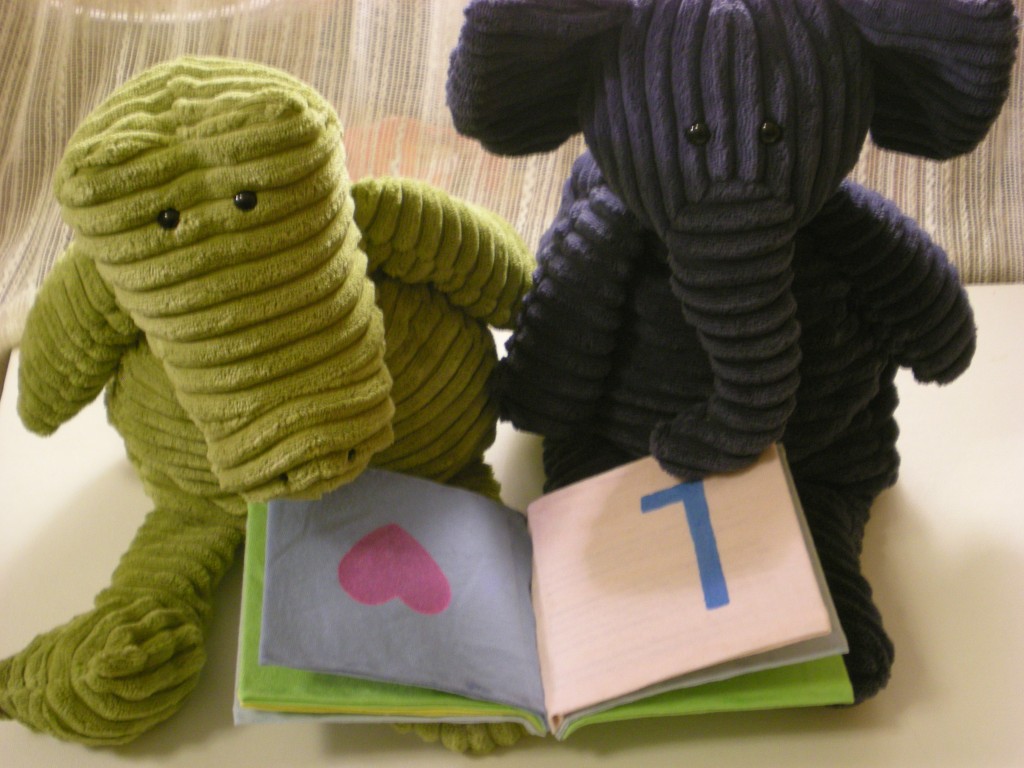
I like projects that help me use up the scraps that threaten to overwhelm my craft space. I also like projects that can be gifted. So this one's a win-win: The T-shirt Baby Book is perfect for using the T-shirt sleeves that have been cut from another project (like a tank top) and it makes a great baby gift. Did I mention it's personalized? Once I picked the recipient (my friend's new baby, Elliot), I enjoyed figuring out what words to have each letter of his name represent (in other words, what could I illustrate easily?). I settled on: E = earth, L = light, L = love, I = ice cream, O = orange, and T = tree. No pictures of baby Elliot and his new book just yet, so the book is presented by these two cute corduroy pals.


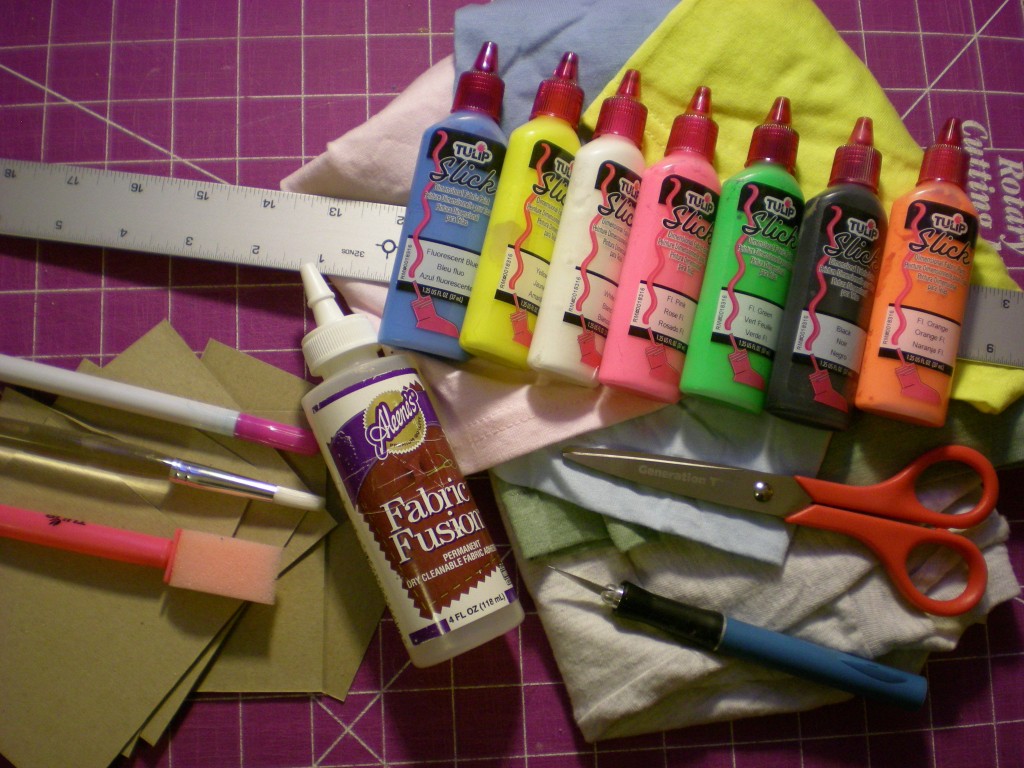
Materials:

-T-shirts or T-shirt scraps (in multiple colors)

-Scissors

-Ruler

-Craft knife

-Cutting mat

-Lightweight cardboard (cereal, snack, or tissue boxes work great!)

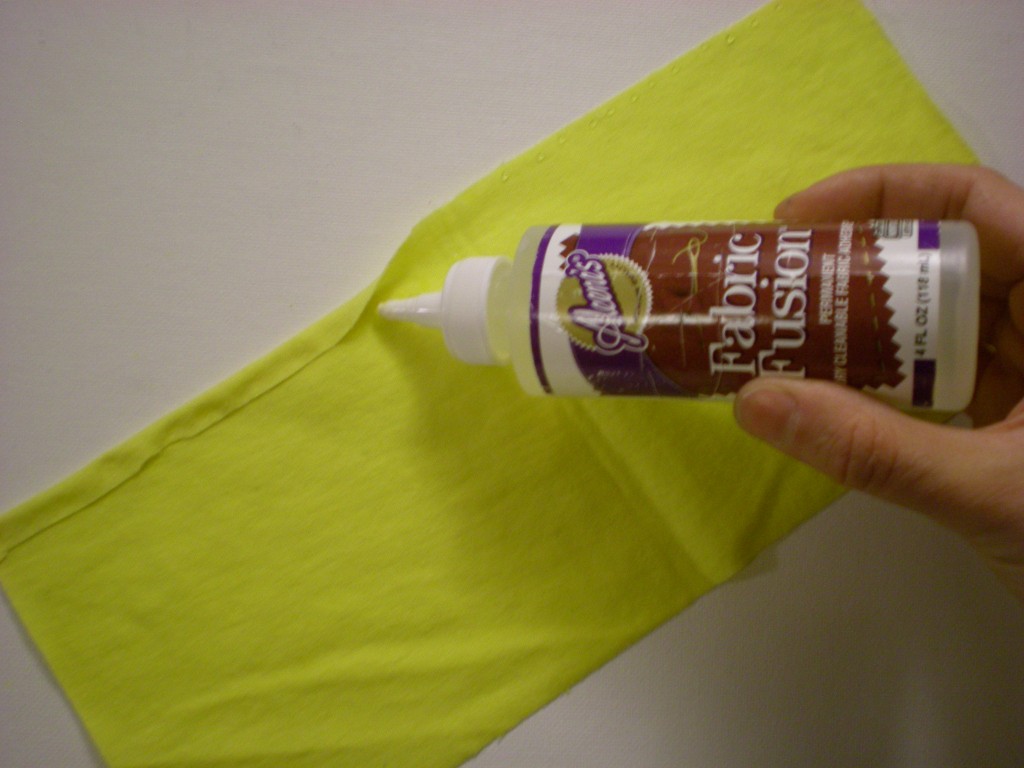
-Aleene’s Fabric Fusion Permanent Dry Cleanable Fabric Adhesive

-Tulip Disappearing Ink Pen

-Fabric paintbrushes

-Tulip 3D Fashion Paint Blazin' Brights (variety of colors)

-Clothespins (optional, for clipping in place while gluing/drying)


Make it:

1. Measure and cut one more 4" x 4" square of cardboard than there are letters in the baby's name. (Example: Elliot has 6 letters, so I cut 7 squares.) Then cut as many 5" x 10" rectangles from the T-shirts as there are cardboard squares.

2. Squeeze a small ribbon of glue along one long side of one of the fabric rectangles. Then fold over the edge about 3/8" and press. Repeat on the other long side.


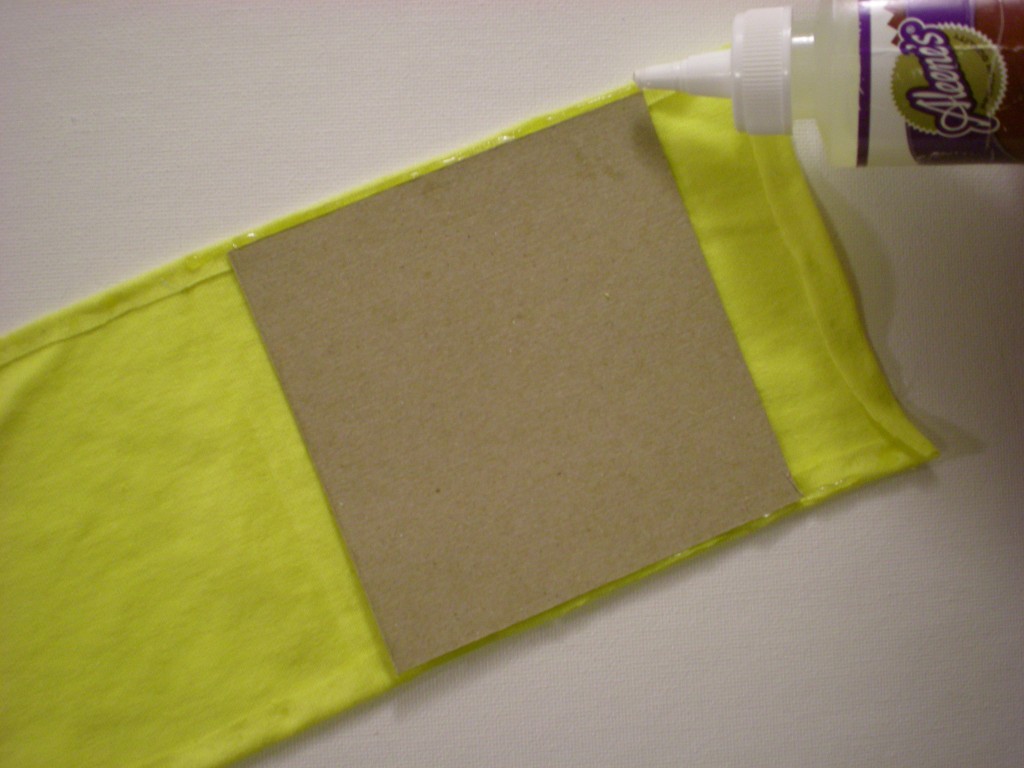
3. Find the center of the rectangle and line up one edge of one of the cardboard squares. Squeeze a small ribbon of glue along the fabric at the top and bottom edge of the cardboard.


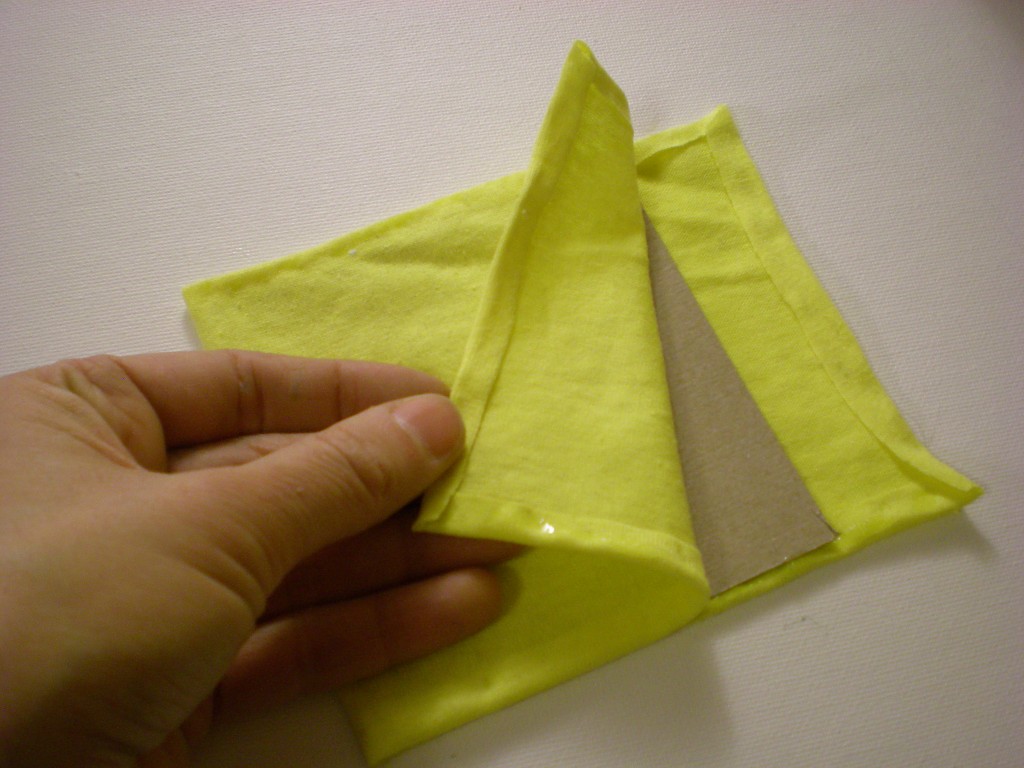
4. Fold the fabric in half, sandwiching the cardboard in between the layers. Press the glue into the edges to seal them. Squeeze another ribbon of glue against the cardboard and between the fabric layers on the open side. Press it closed.


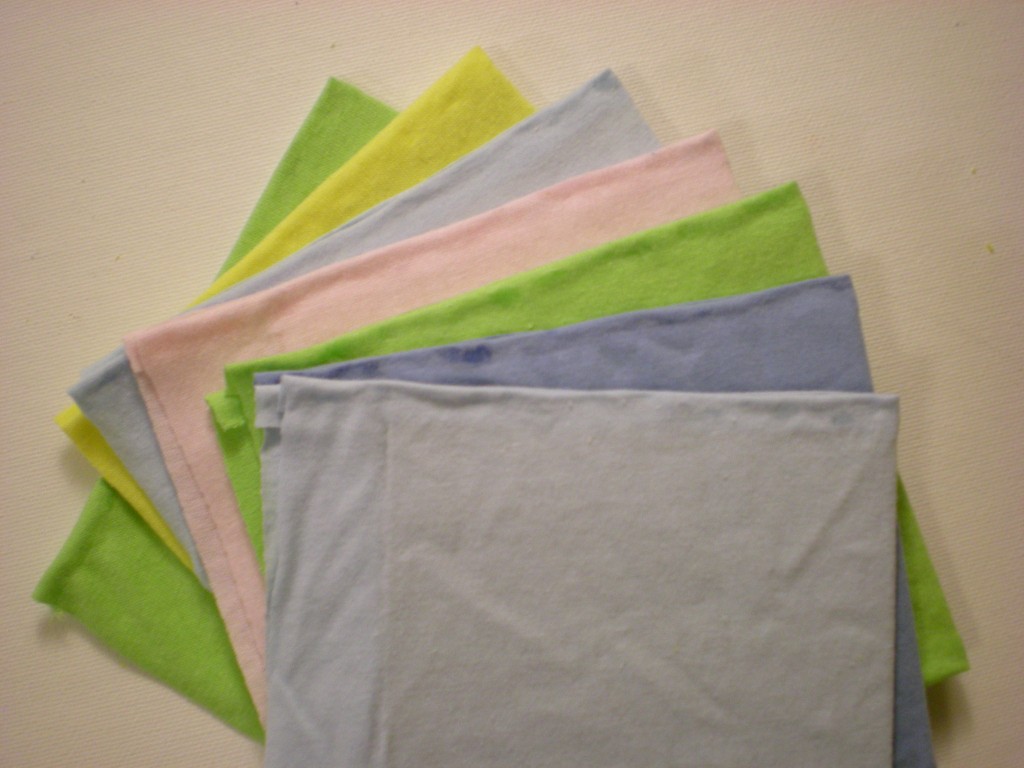
5. Repeat steps 2 through 4 until all of the cardboard squares are covered. These are the pages of the book.


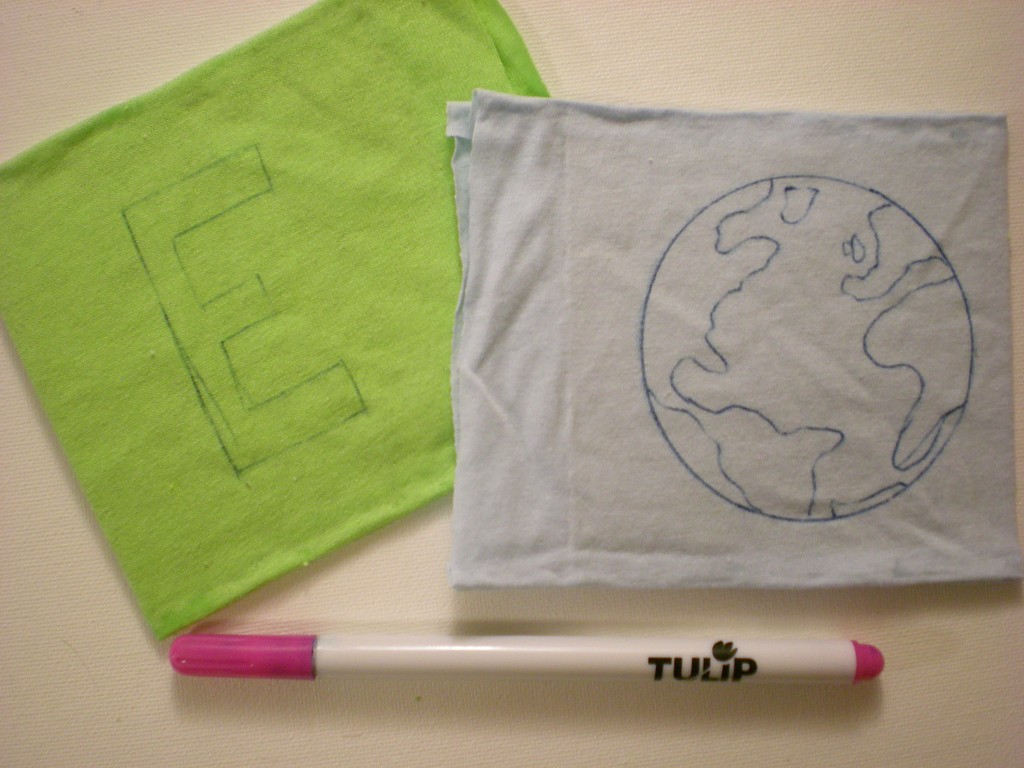
6. Use the air-soluble ink pen to begin outlining the letters and images on the book pages. (Or, skip this step and freehand them with paint--I outlined the earth, but skipped to painting for them rest.)


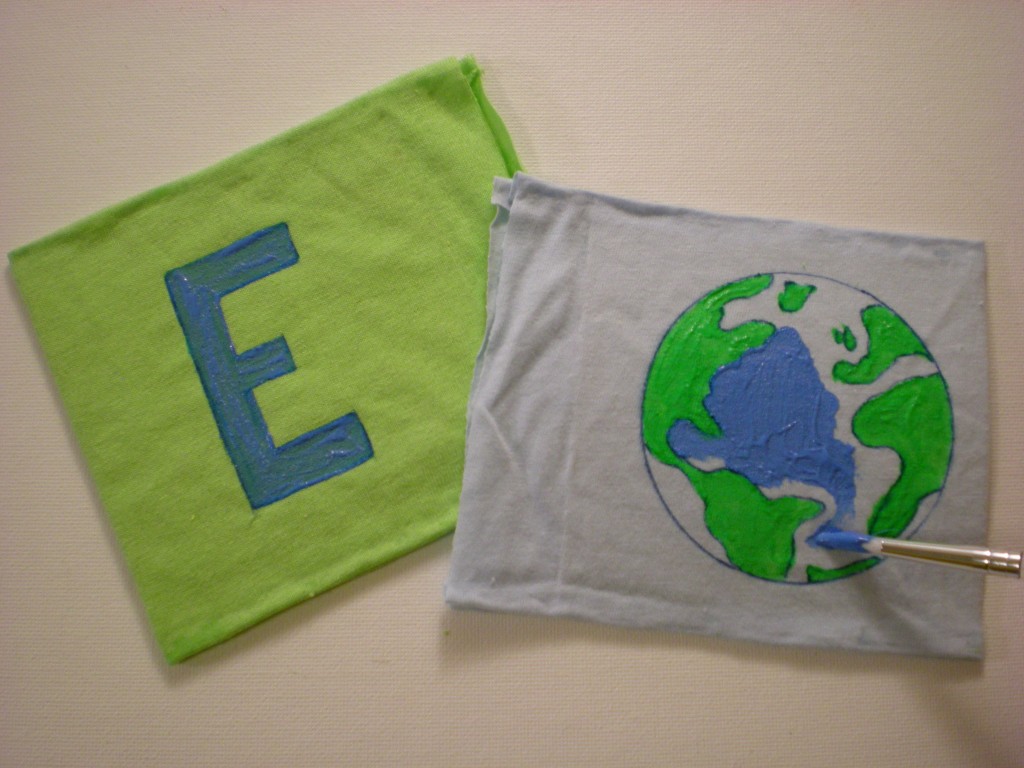
7. Color in the lines with fabric paint!


8. Paint all the right-folio pages first (including the front cover), let them dry, then paint all the left-folio pages, making sure you match up all the letters and images.


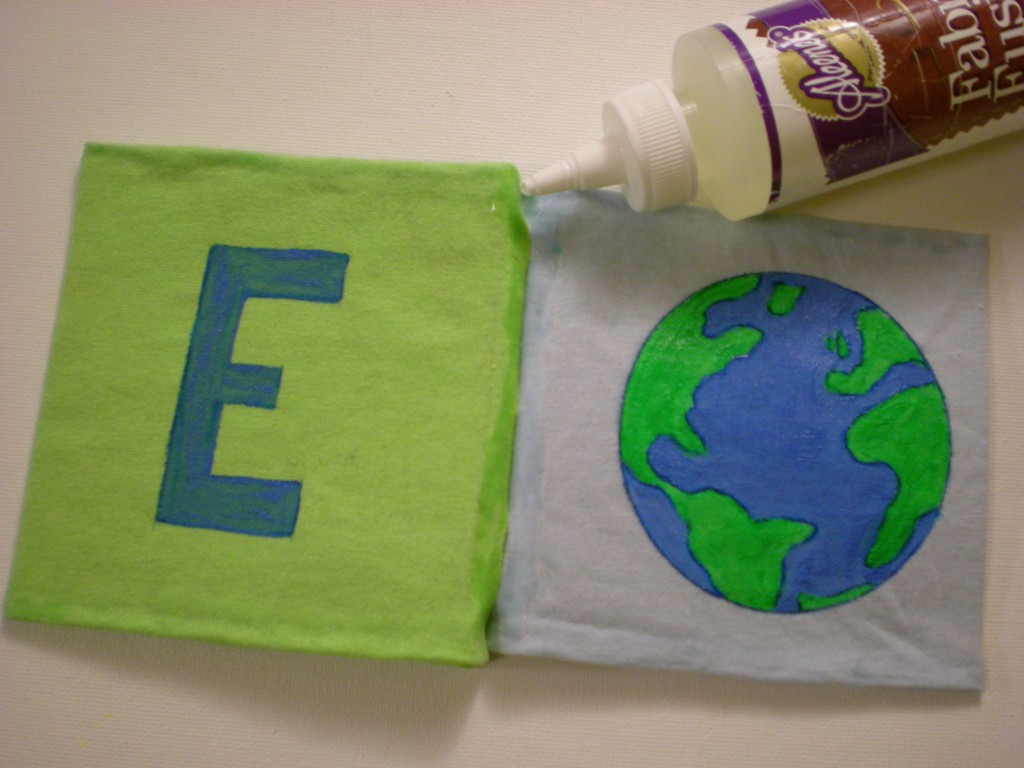
9. Trim the raw edges (the side of the pages that will go into the binding) down to 1/2". Then squeeze a line of glue along one of the edges you just trimmed and press it against the adjacent page. Keep gluing and adding pages (in the correct order!) until the book is complete.


10. Let dry completely. Optional: Clip the binding closed with clothespins while it dries.


11. Then it's story time! E is for earth. L is for light. L is also for love. I is for yummy ice cream. O is also for a delicious orange. T is for Tree (and Totally Terrific and....T-shirt book!).


Visit us on Facebook!
Craft on!Click here for today's daily giveaway!

Tuesday, October 5

Homemade Gripper Socks


Hi everyone!  This is Cheri from I Am Momma - Hear Me Roar.  Today I'm going to show you a unique use for the 3-D Tulip Paints.

We been living in our current home for almost two years.  One thing I loved about this home when we looked through it was the hardwood flooring.  Once we moved in we quickly realized just how slippery it was.  I made sure to buy socks that had some sort of gripper on the bottom for my son.  However, he recently arrived at the shoe size where they don't sell gripper socks in his size anymore.  He's had a lot of wipeouts.  While I could say, "He'll learn," I thought of a better solution so he'd be able to run like the wind.

Homemade Gripper Socks!

This project was fast, easy, and fun.  I got out my Tulip Slick Paints and started drawing all over the back of Rex's socks. 


I applied the paint fairly thick to make the gripping action strong.


I let him pick what designs he wanted so that he would be excited to wear them.


This pair is my favorite.


He likes them, too.


No more wipeouts for us.

Craft on! Click here for today's daily giveaway!
Clicky Web Analytics
Pin It button on image hover

Subscribe to our newsletter

* indicates required
I am interested in products and inspiration for...
Close