Happy HUMP day! I seriously wish I had a baby that I could put these cute onesies on. What I am really wondering is why I didn't think to do this when my now 15 year old was a baby! Well no worries, Jaderbomb is here to save the day. You no longer have to buy those boring store bought onesies because today I will show you how to make your own with minimal products. What makes this project awesome is the fabric markers! Not just any fabric markers, Tulip fabric markers! Who's ready to get started...I know I am! I will be showing you how to make 4 different designs that everyone will LOVE!
Showing posts with label baby crafts. Show all posts
Showing posts with label baby crafts. Show all posts
Wednesday, August 19
Wednesday, April 1
Spring Tie-Dyed Onesies
Holy Schmoley! I have some GREAT news to share with you! I am PREGGERS!!!! Internally I have been wanting a baby so I prayed to the universe and can you believe it happened!!!
APRIL FOOLS!!!!!
But really though I did recently become a mommy to a precious Silkie Chicken. Remember in my second to last post, Nola? If you have not seen her yet then you are in for a it because she is GORG!
I can actually fit a onesie on her so I wanted to create a few summer onesies for her to show off this Summer.
On the real though I know parent's can sometimes struggle with finding fun and whimsical clothes for newborns so I wanted to show you how you can make your own with some awesome products from I Love to Create.
This is also a really great craft for kids to do. You could even let them decorate their own version of a watermelon or you could do a full set of fruits and veggies! How cute would that be!
Let's get started!!!
Thursday, April 5
Baby Easter Basket
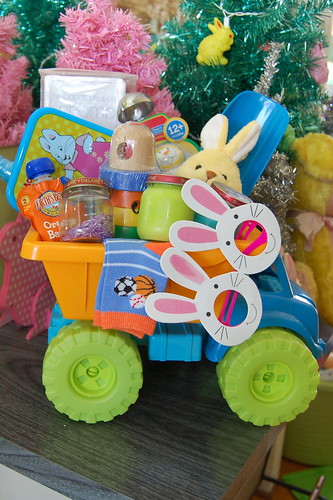

Last week for I Love to Create I made a toddler themed Easter basket for Tallulah and this week I am showing you a few options for the extra wee ones. This is technically Baxter's second Easter, but he was only about a month old last year. This year he is old enough to get a basket full of goodies and maybe even hunt for an egg or two. I was inspired by a post I saw on Modern Parents Messy Kids where they made activity oriented Easter baskets. Now that Baxter has been diagnosed with a fairly severe peanut allergy it is not like I can load the kids baskets up with candy. They don't need candy anyway, but now that we are living in a nut free world it seems like every chocolate Easter bunny is no longer a friend but a foe with hidden nuts. The suggestions I have for my baskets will entertain your kids for a lot longer than a piece of candy and there is no risk of a sugar buzz.
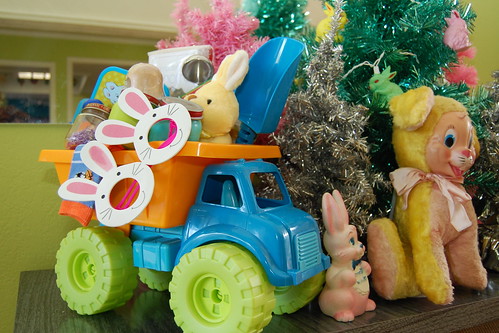
Even your Easter basket should be something fun to play with. Tallulah got the sand pail and Baxter gets a dump truck. Make your basket functional and not something cheap that will get thrown out. Heck, make your own out of recycled paper if you want. Anyway, both kids will get to use their baskets soon enough in the new green turtle sandbox their grandmother got them that I have filled with...wait for it....pink sand.

Like Tallulah not everything in Baxter's Easter Basket is handmade. Here are a few suggestions for baby baskets...
Bubbles (he is a little young for them, but his sister will help)
Socks (Can you really ever have too many?)
Stuffed Bunny (his sister was getting one so I thought he might like something to cuddle)
Bunny Glasses (futures so bright, I gotta wear bunny shades)
Ikea stacking rings (I have a plush version that is getting a little flacid)
My First Crayolas (he always watches Tallulah color longingly)
Board Book (nothing says Easter like pictures of cute puppies)
Flash Cards (who does not like to learn about animal sounds)
Ok, onto the stuff I did make!

Tallulah probably paints every single day. Poor Baxter just gets to sit on the sidelines and watch most of the time. Occasionally I will give him some pudding and put him on a piece of posterboard or in the tub and he has such a good time. Usually he just paints with chocolate pudding, but for Easter I decided to expand his color options.

Using empty baby food jars I used my trusty cheap pudding, but this time I chose vanilla and added food coloring. Nothing fancy, but I know he will love playing with this. I'll set him up outside one hot day soon and just hose him off when he is done. If he does not lick himself clean first.

Have you ever noticed most plastic Easter eggs have 2 small holes on both ends? I'm not sure why, but they do. These holes inspired me to try a version of a project I have seen on Pinterest where you engage a child's sense of smell.
SUPPLIES
Plastic Easter Eggs
Glue Gun
Aleene's Tacky Dots
Spices

I applied 2 Tacky Dots to both sides of the inside of my Easter Egg. Next I shook a separate spice into each egg. Use strong easy to smell spices like curry and cinnamon. I closed my egg and shook the spice around then opened up and dumped out the excess. Plenty of spice stuck to my glue dots. Next use a glue gun to seal your egg closed. I just did a blind smell test with husband and they totally work. A half dozen fit perfectly inside a small Max and Ruby tupperware.

Baxter is a little old for rattles, but I couldn't resist making one of these jars of rice. I have seen them all over Pinterest and Modern Parents Messy Kids made some for their baby basket. You can use the food coloring and alcohol method like I did with the pasta I dyed for Tallulah or you can just spray fabric dye from Tulip.

SUPPLIES
Rice
Tulip Spray Dye
Baby Food Jar
Aleene's Tacky Glue
I spread my rice out on a paper plate and sprayed with fabric dye. I let the rice dry and then tossed and sprayed again. All that was left to do was fill an empty baby food jar and glue the lid on.
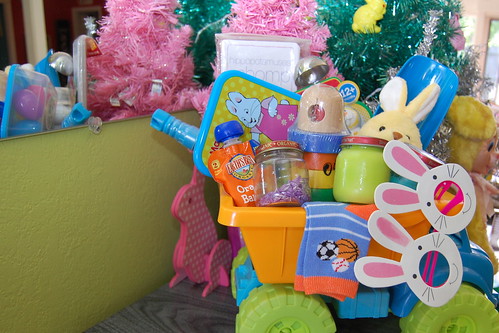
Hopefully Baxter and Tallulah will spend hours upon hours quietly entertaining themselves with their baskets and the contents. Then again, maybe not. I should also mention that you should supervise all these activities with your wee ones. Things like glass rattles should be investigated on grass or carpet not cement or hardwood. You get the drift. Have fun and happy Easter!
Here are a few other suggestions of fun goodies to make for your babies Easter basket: stenciled onesies, customized bibs, sensory bottles, grandparent's puzzle, pull toy, booties.
Visit us on Facebook!
Craft on!
Tuesday, February 28
I'm Totally Crushing on Ryan Gosling's Scorpion Jacket from the Movie Drive
Hey Girl.
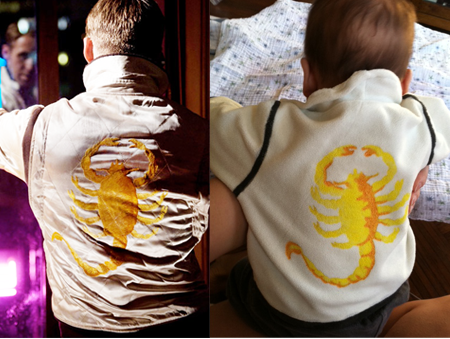
As one popular Tumblr ode to Ryan Gosling says, he's "your favorite sensitive movie dude-turned-meme." Another Tumblr puts it more bluntly. And a recent video by Gosling doppelganger Joey shares "How to Look Like Ryan Gosling." Which got me thinking about snagging Ryan Gosling's style. Forget the hoodie and well-groomed 5 o'clock scruff. I mean, did you see that embroidered scorpion jacket he wore in Drive? (Ahem, in case you can't tell them apart, that's Ryan on the left.)
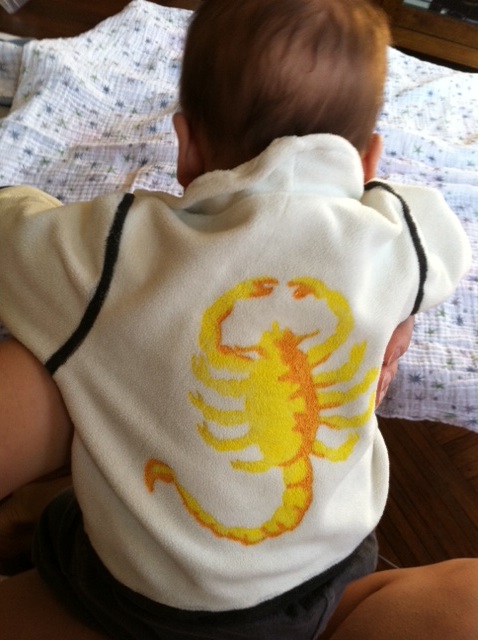
You can actually buy it -- oh, but making it would be so much more fun. And so I set out to make some sweet scorpion threads inspired by that original jacket -- no satin quilting, no embroidery, just a white jacket from a thrift store and some fabric paint. And since my favorite new sensitive dude happens to be pint-sized, I've decided to make it in miniature for my little gosling. (Note: These instructions can produce a version for a full-sized goose as long as you start with a full-sized jacket!)
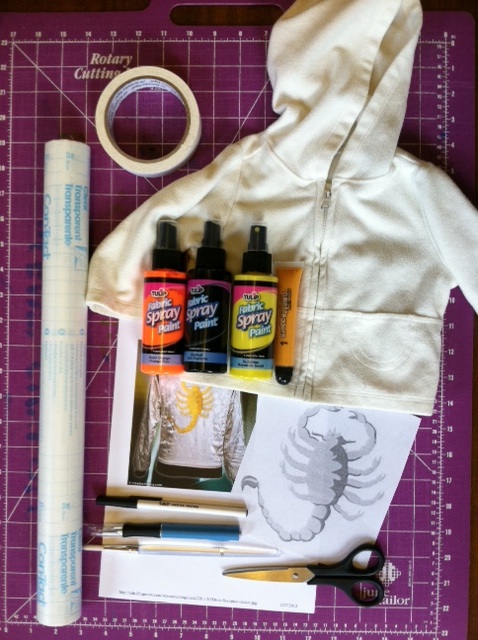
Materials:
-White zip-front jacket or sweatshirt
-Pen
-Contact paper
-Craft knife and cutting mat
-Masking tape
-Yellow fabric paint, brush or spray on (for scorpion)
-Orange fabric paint, brush or spray on (for highlights)
-Black fabric paint, brush or spray on (for trim)
-Paint brushes (optional)
-Sewing machine threaded with white thread (optional)
-Scissors (optional)
Make it:
1. Lay the jacket flat and measure the approximate dimensions of the back panel. Cut a piece of contact paper to those dimensions. Draw or trace the outline of a scorpion onto the paper.
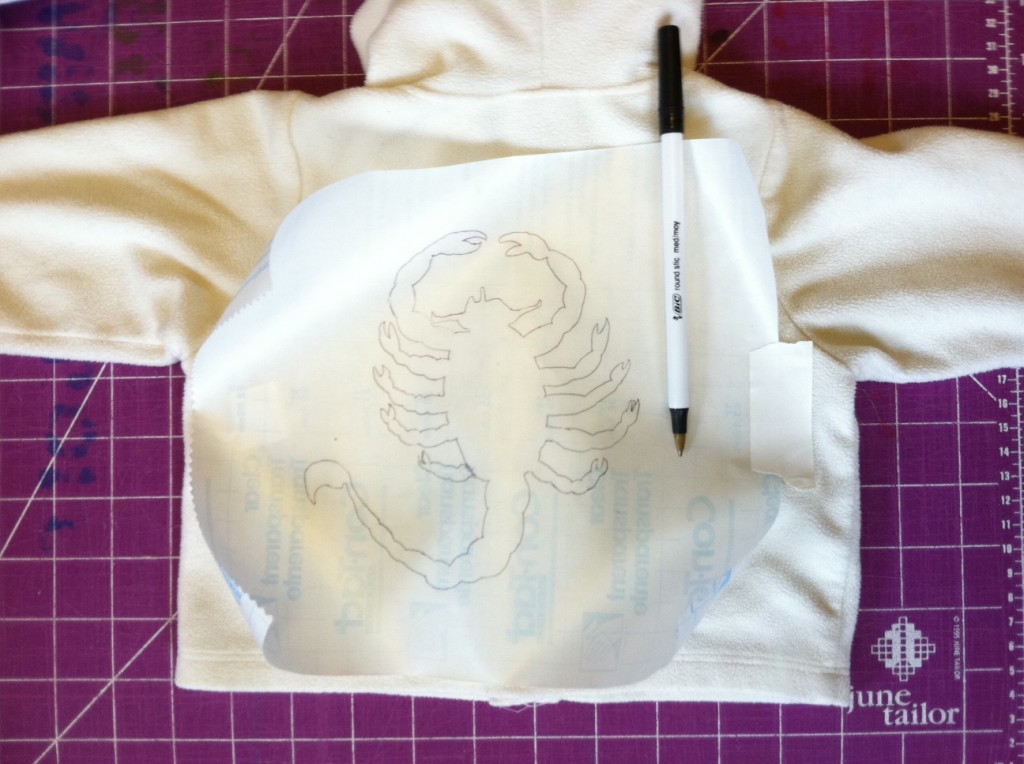
2. Use the craft knife and cutting mat to cut out the contact paper stencil.
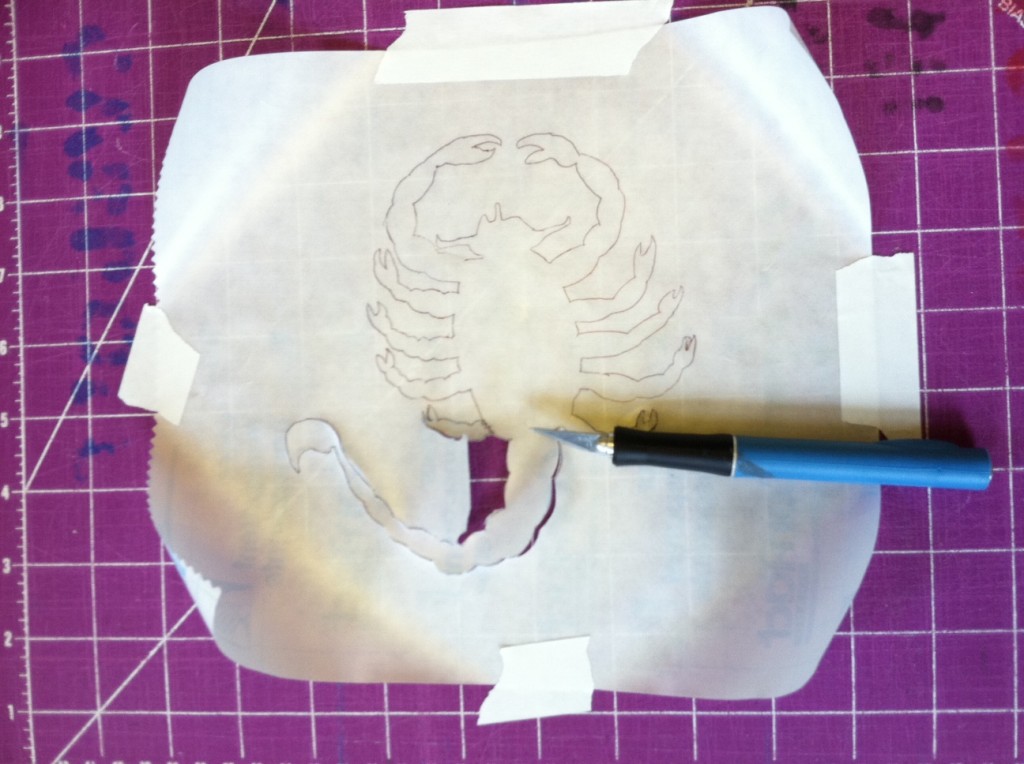
3. Peel off the paper backing of the contact paper and press the stencil onto the back of the jacket.
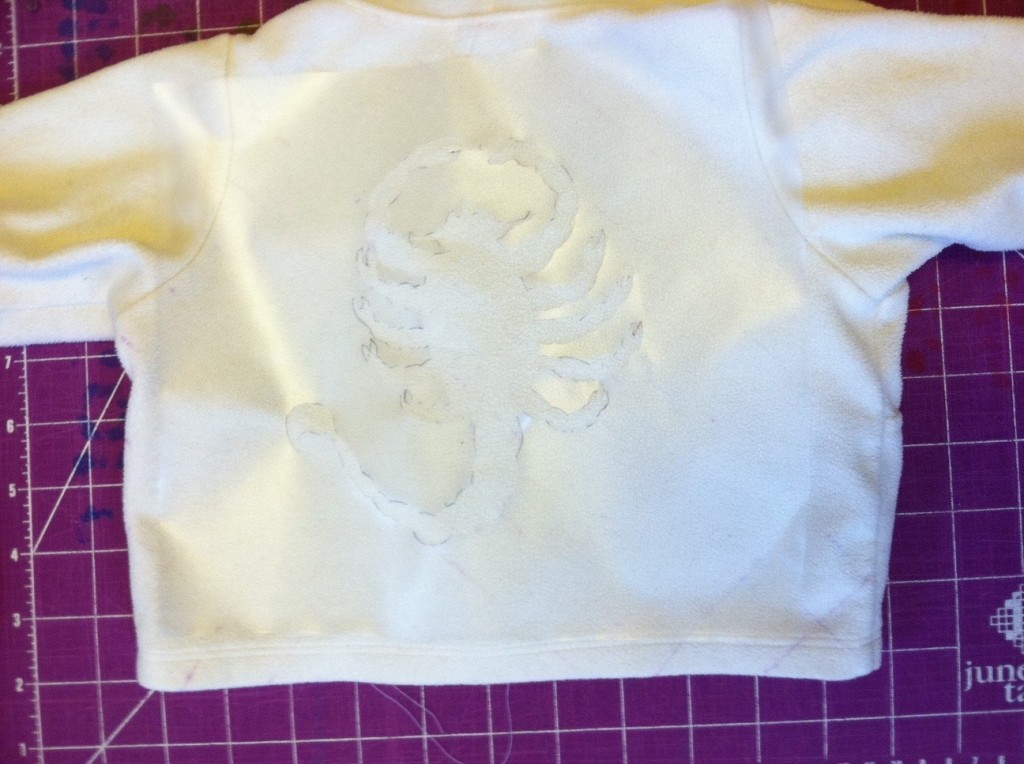
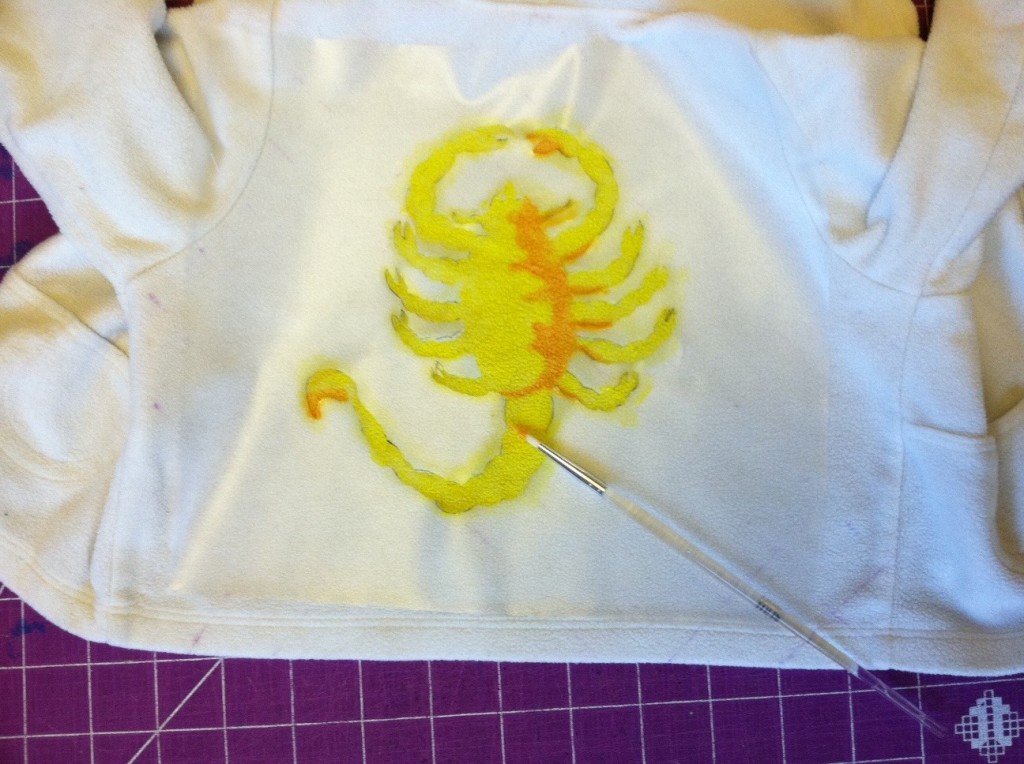
4. Paint the entire scorpion shape with yellow paint. (Use fabric spray paint or paint it on with a brush for more precision.)

5. Paint some highlights on the scorpion with orange paint to show the shadows.
6. Line the bottom edge of the jacket, the sleeve ends, and the shoulder seams with masking tape and paint them black.
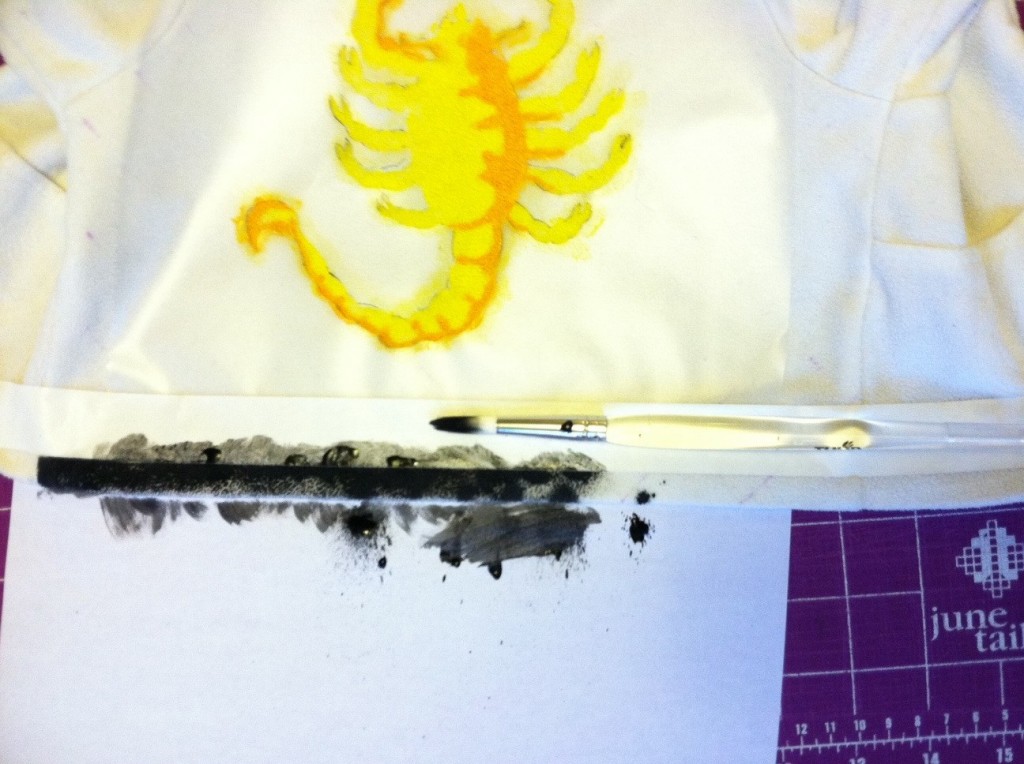
7. Let the paint dry completely and carefully pull off the tape and stencil. Optional: If the jacket has a hood, cut and hem it to create a collar. (Hey, we're going for authenticity here!)
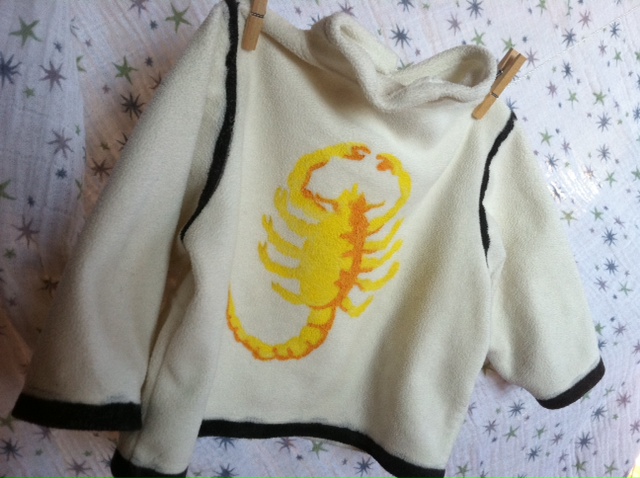
8. Try the jacket on your littler driver. Okay, so he can't even hold his head up yet, but he sure knows how to grip the wheel! Next up: Get him a driver's license...in 16 years.

Photo of Ryan Gosling via FirstShowing.
Visit us on Facebook!
Craft on!
Wednesday, November 9
iLoveToCreate Teen Crafts: Onesie, Twosie

Avalon Potter
"Teen crafted, mom approved."
I was asked to decorate a onesie for an upcoming Baby Shower. I knew right away I wanted to use a Tulip Iron On transfer and the phrase: "Little Love Muffin." I know lots of teens have babies in their families and it's really easy and fun to make onesies using products from iLoveToCreate. My mom was so impressed with my design, she made one too!

Materials
Washed cotton baby onesie
Tulip Fabric Markers
Tulip Iron on Transfers
Tulip Letter Stencils
Small cardboard form to slide inside shirt while decorating
Tools
Tulip Mini Fashion Iron
1. Wash the onesie to remove the sizing. Slide a piece of thick cardboard into the onesie to protect the back from the inks. You can also use a book for this because onesies are so small!
2. Use an iron to attach applique to shirt. Allow to cool.
3. Use the fabric markers and the stencil to write your words.
4. Mom used the Tulip Beads in a Bottle paint to add dimension to her wings, halo and hand written words.
Subscribe to:
Posts (Atom)


.png)
