Showing posts with label scribbles paint pens. Show all posts

Tuesday, April 3

10 Rockin' Projects that use Puffy Paint

When you think of Puffy Paint, you might think back to the eighties or early nineties and recall making your own t-shirt.  While, puffy paint has made quite a crafting comeback and the uses for it have branched out quite a bit.  

While the type of puffy paint might vary from project to project (3D paint, Beads in a Bottle, paint pens) all these cool projects make use of some sort of puffy paint.


1) Easter eggs.  I just made these yesterday.  I got out my white 3D paint and wrote the letters on the eggs.  It's simple and pretty Easter decor that you can do in just a few minutes.  I even tried Beads in a Bottle for one of the eggs.


2) Labeled Mason Jars.  While I believe this source (found HERE at Pure and Noble) actually used hot glue, I think puffy paint would be a lot easier to use.  There's no glue strings to deal with.


Here's another way to use it found HERE on Don't Disturb This Groove.


3) Vases.  In the same vein, here's puffy paint on a vase from P.S. I Made This.

4) Canvas Art.  Isn't this so pretty?  She had a smart technique to get the letters just right and you can find her tutorial HERE at Virginia and Charlie.


Here's another idea of how to use it on canvas (or wood in this case) found HERE at Me and My Three Sisters.


5) Pumpkins.  HERE is my pumpkin from last year and check out a great round up of other puffy paint pumpkins HERE.


6) Clothing.  While clothing might be an obvious use, check out the amazing ways these ladies use it.  So hip.  Alisa Burke works serious magic with this stuff.


Ashley at Lil Blue Boo uses it to look like rhinestones HERE.


I used it to look like metal studs on this Viking tee.


7) Gripper Socks.  I made these a while back for Rex.  He loved them and they helped him slip less.  Find the tutorial HERE (and I added an addendum to that tutorial a while back, advising dots or small shapes instead because the pictures work, but they crack a bit in the wash due to the stretchiness of the socks.)


9) Texturizing Fabric.  I added Beads in a Bottle HERE to make it look like stitched on beads on this clutch.  It's a lot less work than stitching on beads.


10) Novelty Projects.  Check that out.  I'm not ready to do it to my camera, but it looks pretty cool.  It's found HERE.
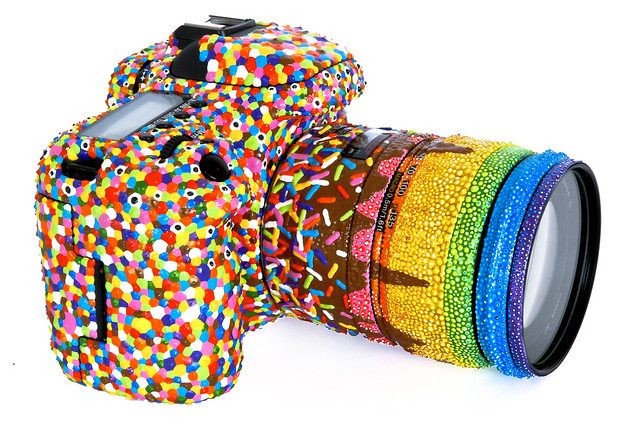
Sprinkles Sundae Zoom

Have you seen any additional ways to use it?  It's pretty fun stuff.


Tuesday, March 13

Painted Mail Bag

Today I'm going to show you how to make some fun, polkadot mail bags.  They are a quick and easy fun project.

Background info: So about a year ago I learned something cool.  You can send mail in cute little bags with tags on them.  My mother-in-law started sending fun packages to the boys in these draw string bags and I was floored.  How did I not know about this?  It's way more fun than an envelope and you can use them again and again.  (If you're looking for some just google "cloth mailing mag" or "drawstring mailing bag."  They'd be easy to make as well.)

Who wouldn't like to get a fun package like this in the mail?


I got out my Tulip fabric paint and my sponge pouncers.  


I poured some paint onto a little plate and then I dipped and pounced.  My son even got in on it and thought it was fun.  I love how each dot looks different and not every dot is filled in perfectly.


And....I started thinking about all the things I could easily put polka dots on.  It would be fun to do little girl leggings or knit headbands or pillows in multiple color dots.


Once the bag dried I wrote "for you" with a 3D paint pen.


Now you just load it up with fun stuff and someone will be thrilled to get a present in the mail.


Happy mailing.


Wednesday, December 14

iLoveToCreate Teen Crafts: Super Cute Santa Mini Canvas

Visit us on Facebook!
Craft on!

Super Cute Santa Mini Canvas Copyright  Avalon Potter

(Mom here: Ho ho ho!  It's day two of the 12 Crafts of Christmas at The Impatient Crafter blog!  Huzzah!  Miss Avalon made an adorable retrofabulous mini-canvas using a permission free Dover clip art image and some collage elements including an acrylic letter, rubber star stamp and a wooden snowflake.  It's all put together with Aleene's Tacky Glue and made sparkly with Traci Bautista's Sparkles Collage Pauge.  Love, love, love that stuff.  I made my own version with a Victorian era postcard image from my ephemera collection, a vintage bottle cap, some new vintage themed collage elements, stacked stars and a sprig of tinsel.  These are so incredibly fun to make...we got the canvases with coordinating easels at Michael's.  You could glue the canvas to the easel, add some wire and make some super cute artist ornaments!)

Super Cute Santa
Avalon Potter for iLoveToCreate
Teen Crafted, Mom Approved

Recently I was out shopping with my mom when I stumbled upon these miniature easels and canvases. I immediately knew that I had to use them for a project because they were so cute. So I bought two, one for me and one for my mom. Since Christmas is right around the corner I added Santa , a snowflake, and the rest is history. I hope you enjoy it!


Materials
Mini canvas and easel
Permission free sized image (Mine is from Dover Books Holiday Clip Art)
Acrylic letter
Wooden snowflake
Tiny star stamp
Traci Bautista's Collage Pauge
Aleene's Quick Dry Tacky Glue
Scribbles 3D Paint Pens Primary Colors (red)

Tools
Computer with publishing software
Printer
Scissors
Foam brush

Instructions
1. Select a bold image, size to fit canvas on a computer and print.

2. Cut image out with scissors.

3. Take your decoupage medium and paint it on the back of your Santa using foam brush. Put the Santa on the canvas and apply more decoupage medium, on top and all over the canvas. Let dry.

4.While that dries paint your snowflake red. Let dry.

5.Take your letter and attach to the bottom right of your canvas. Apply glue to the back of your snowflake and attach to the top left of your canvas.


6.Use your red paint and little star stamp to stamp the top right and bottom left of your canvas.

7.Enjoy!

Victorian Mini Canvas Copyright Margot Potter 
(So many sparkles, I couldn't get a clear pic!  Go Sparkles Pauge!)
Clicky Web Analytics
Pin It button on image hover

Subscribe to our newsletter

* indicates required
I am interested in products and inspiration for...
Close