Showing posts with label embellishing. Show all posts

Tuesday, October 1

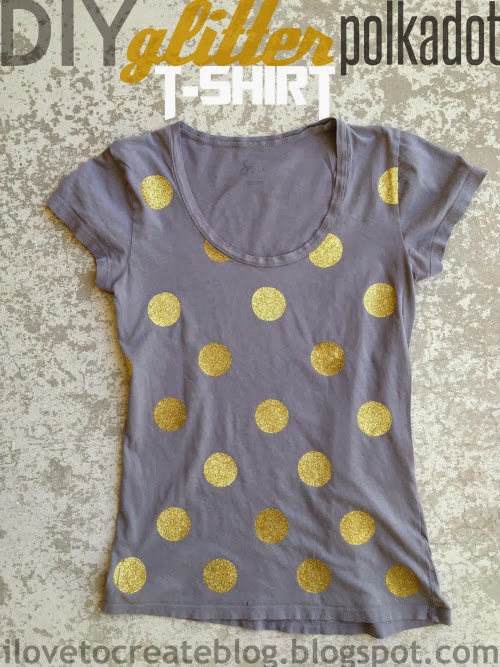
DIY Glitter Polkadot T-shirt

One of my very favorite Tulip products is the fashion glitter transfer sheets.  I think it's so cool that you can easily put glitter anywhere without making a big mess.  The transfer sheets made this glitter polkadot shirt really easy to make.

Tuesday, June 11

No Sew Embellishing

Embellishing clothing is such a fun way to personalize things.  However, even if you don't sew there are still lots of ways to embellish clothing.  All of Aleene's adhesives can help you get that hand-sewn look without even picking up a needle and thread.

Here are a couple of ways I embellished some onesies without sewing.  For the first onesie (pictured above) I got out some lace and Aleene's Fabric Fusion.
I ran a line of fabric fusion down the sleeve and another line parallel to it since my lace was fairly wide.  I pressed on the lace, allowed it to dry well, and it was done.
While I did sew to make the hat, I actually used fabric fusion on the hat as well so that the petals on the flower wouldn't flop around or fall downward.
On another onesie I pulled out some leather I had, a Tulip fabric marker, and Aleene's Peel and Stick Sheets.
I cut a small heart out of the leather and used my Tulip fabric marker to create stitch marks.
I traced the heart onto the peel and stick sheet to cut the adhesive the same size as the heart.  
Then I peeled off the backing and pressed the heart onto the shirt.  Done.
You could even add a name right below the heart with the fabric marker for a personalized look.
So what will you embellish next?

Tuesday, October 9

the "All By Myself" Tee - part 2

Due to the great response on the original "All By Myself Tee," I thought I'd show you a different version that's just as easy for kids to make.  My kids are getting a little older and more than having me make something for them, their greatest thrill is when I let them make something for themselves.  This one even my three-year-old was able  to do.


We got some blank tees and I got out some painter's tape.  I taped diagonal lines on both shirts as shown.  I even extended the tape a little so that the actual was taped to the table.  That way it wouldn't shift on them if they got a little aggressive with the paintbrush :)


Then I got out a plate of Tulip fabric paint for each boy.  I picked colors they liked, but also ones that I thought would work well on the shirt they had.  Then I let them go for it.  


They actually did pretty well.  The paint went under the tape in a couple little spots, but the overall t-shirt design lends itself to that messy skater look.  The boys also mixed colors as they painted, which turned out really cool.  It's funny how they are so unlimited in their design process as kids.  They just have fun.  If their paint was really blotchy I smoothed it over for them, but other than that they did it themselves.


I think their favorite part was taking off the tape.  Then they begged to try on the shirts.  We got out a blowdryer to speed up the dry time.  


And they were pretty impressed with themselves.


This is how they roll.


And that's a wrap.


Tuesday, October 2

Fun With Fabric Stamp Pads

The other day I spent some more time playing with the Scribble Fabric Stamp Pads.  They are pretty versatile and they make a really easy project.


Today I'm going to show you two things I did with them.  

Scribbles also carries a ton of really cute foam stamps you can use with them.


I like press the stamp pad onto the stamp (instead of the reverse) so I can see what I'm doing.


I also recommend checking the stamp before you stamp it down to make sure you have enough ink on it.  Gently wipe the edges of the square so they don't mark up your project.


First, I created a personalized baby gift with them.  I stamped a burp cloth and a onesie...


...and then I wrapped it up for a super easy baby gift.


With the stamp pads you can also use any rubber stamps you have.  I have a thing for cute stamps and so I got out some of my own to use on a little library tote for the boys.  (I got both of these from Anthropologie a few years ago.)


And here's the bag front and back.


The stamping is kind of a nice, instant-gratification craft that anyone can do.  It's easier and faster than sewing or freezer paper stenciling.  Plus if you have (or make your own) stamps, you can use them over and over again.

Tuesday, April 3

10 Rockin' Projects that use Puffy Paint

When you think of Puffy Paint, you might think back to the eighties or early nineties and recall making your own t-shirt.  While, puffy paint has made quite a crafting comeback and the uses for it have branched out quite a bit.  

While the type of puffy paint might vary from project to project (3D paint, Beads in a Bottle, paint pens) all these cool projects make use of some sort of puffy paint.


1) Easter eggs.  I just made these yesterday.  I got out my white 3D paint and wrote the letters on the eggs.  It's simple and pretty Easter decor that you can do in just a few minutes.  I even tried Beads in a Bottle for one of the eggs.


2) Labeled Mason Jars.  While I believe this source (found HERE at Pure and Noble) actually used hot glue, I think puffy paint would be a lot easier to use.  There's no glue strings to deal with.


Here's another way to use it found HERE on Don't Disturb This Groove.


3) Vases.  In the same vein, here's puffy paint on a vase from P.S. I Made This.

4) Canvas Art.  Isn't this so pretty?  She had a smart technique to get the letters just right and you can find her tutorial HERE at Virginia and Charlie.


Here's another idea of how to use it on canvas (or wood in this case) found HERE at Me and My Three Sisters.


5) Pumpkins.  HERE is my pumpkin from last year and check out a great round up of other puffy paint pumpkins HERE.


6) Clothing.  While clothing might be an obvious use, check out the amazing ways these ladies use it.  So hip.  Alisa Burke works serious magic with this stuff.


Ashley at Lil Blue Boo uses it to look like rhinestones HERE.


I used it to look like metal studs on this Viking tee.


7) Gripper Socks.  I made these a while back for Rex.  He loved them and they helped him slip less.  Find the tutorial HERE (and I added an addendum to that tutorial a while back, advising dots or small shapes instead because the pictures work, but they crack a bit in the wash due to the stretchiness of the socks.)


9) Texturizing Fabric.  I added Beads in a Bottle HERE to make it look like stitched on beads on this clutch.  It's a lot less work than stitching on beads.


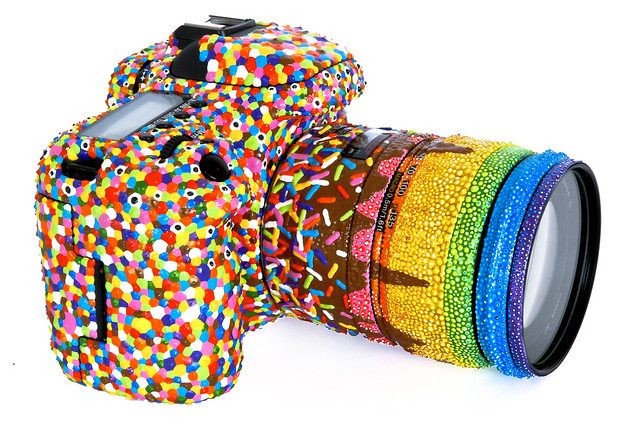
10) Novelty Projects.  Check that out.  I'm not ready to do it to my camera, but it looks pretty cool.  It's found HERE.

Sprinkles Sundae Zoom

Have you seen any additional ways to use it?  It's pretty fun stuff.


Clicky Web Analytics
Pin It button on image hover

Subscribe to our newsletter

* indicates required
I am interested in products and inspiration for...
Close