Watch the below video featuring Pattiewack and Traci Bautista and see everything our cool glues can do. This video features several wonderful projects that you will want to make! Check it out!

Friday, January 29
Valentine Heart Bottle

 I am a sucker for these dollar store bottles. I never have anything to put in them, but they just look so cute on a book shelf or in a bathroom, etc. Maybe you could put little love notes inside, or a wish list of what kind of partner you want to come into your life!
Supplies:
1 glass heart-shaped bottle
Crafty Chica Mojito Papers (newsprint design)
Crafty Chica Loteria (milagro heart image)
Crafty Chica Glossy Gloss Varnish (doubles as a light adhesive)
Crafty Chica Pink Glitter
A small chunk of cardboard (to make heart stand out)
A bead for the top of the bottle
hot glue
Directions: Cut a heart shape from the paper, glue it on the front, add the cardboard to the center. Cut out the heart from the game, hot glue it to the bottle to cover the cardboard. Add dots of glue, sprinkle on the glitter. Add the bead to the top of the bottle.
Thursday, January 28
Extreme Spray Painting at the CHA Supershow
This girl had a blast making this sprayed tie dye scarf at the CHA Supershow! Check out the hilarity below!!
Do you think extreme tie dyeing should become an Olympic sport? Haha.
Do you think extreme tie dyeing should become an Olympic sport? Haha.
Aleene's Glue Mannequin!
Swelldesigner and Pattiewack show you how an awesome mannequin was made for the iLoveToCreate booth in CHA Winter 2010 Tradeshow! Check it out!
Craft Corps Stencil Kits + Craft SuperShow= True Love Always

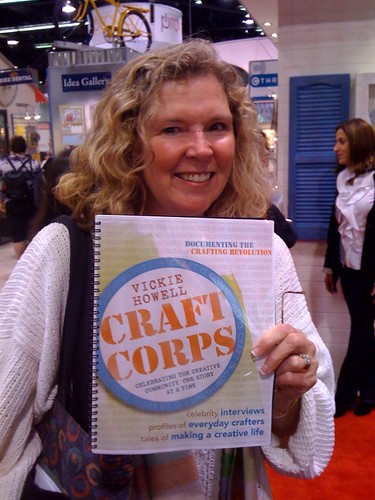
 I'm back from the CHA Craft SuperShow in Anaheim, where got to spend loads of time spreading the Craft Corps gospel. With a website housing more than 300 profiles of crafters like you, and less than 5 months until my book celebrating both professional and hobbiest hand-makers alike hits shelves, I can't tell you how excited I am to see the enthusiasm out there for the Craft Corps movement. Thanks to everyone who continues to let me document and share their crafty kick-assness as well as spreading the word themselves, that they've joined "The Corps".
Thanks to I Love to Create and Lark Books, I was able to spend much of my time at the Craft SuperShow seeing old friends, meeting new ones and using Craft Corps Stencil Kits to make our mark! Here's just a glimpse of the experience.
Craft Corps, Chapter 12 : Traci Bautista

My friend, featured C.C. artist, and face of Collage Pauge, posing with me and a bind-up of a few chapters from the upcoming book.
Craft Corps, Chapter 23: Sandi Genovese
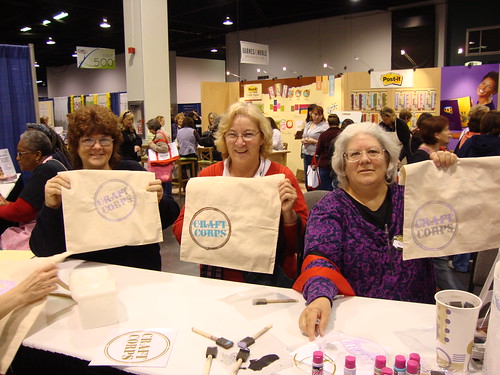
Craft SuperShow Attendees Stop by the Lark Books Booth to Paint
Craft SuperShow Theater
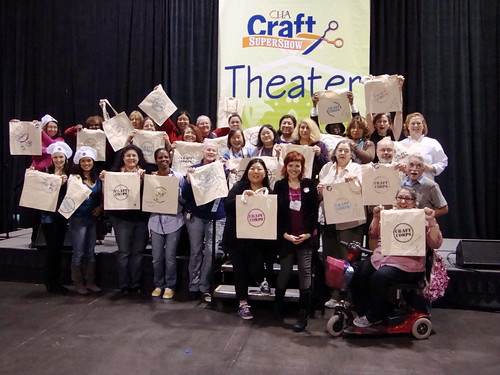
Craft Corps Stencil Kits

Join the Corps by telling your story here, then nab a stencil kit to make your own Craft Corps gear!
Need something to watch while you're painting? Take a look at a few of the quickie videos I shot of crafters sharing with me, what crafting means to them!
Candi Cooper
Kate Richbourg
Dianne Shiozaki
See more videos like these on my YouTube channel!
Craft(Corps).Rock.Love,
Vickie
Groundhog's Day Pop-Up Puppet


We made Snow Globes for Halloween, Necklace Cupcake Toppers for Valentines Day and Customized Beer Bottles for Father's Day -did you really think we were going to let Groundhog's Day pass like a ship in the night? Heck no! Who needs Punxsutawney Phil when you could make your own Groundhog pop up puppet to check for a shadow on February 2nd. That's right, today for I Love to Create we are revamping one of my favorite Kindergarten crafts.
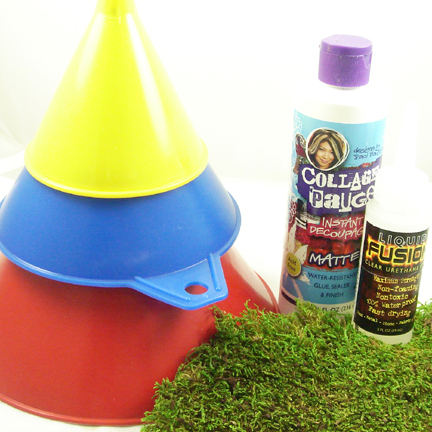
SUPPLIES
Funnel
Crafty Chica Little Chica Paint Packs
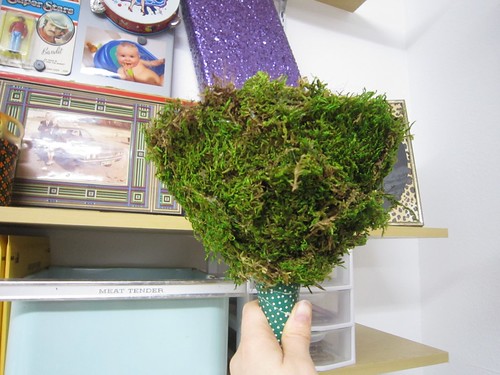
Moss
Paint Brush
Hot Glue Gun
Knitting Needle
Collage Pauge Instant Decoupage
Fun Fur
Brown Felt
Liquid Fusion Glue
Sewing Machine
foam Ball
A GOOD GROUNDHOG HEAD ON YOUR SHOULDERS
What you use as the head of your groundhog is up to you. I opted for a foam ball because I had some leftover from the Black Cat Bobble Head Project. You could also use a wooden dowl for your puppet, I opted for a knitting needle. What can I say I don't knit and it saved me a trip to the store.

PAPER MACHE
Using paper from my shredder and collage pauge I covered the foam ball. I also used Liquid Fusion glue to attach the ball to the knitting needle.

FELT BODY
Lucky for me my younger sister Hope Perkins stopped by and drew me a groundhog body pattern. If only she had staid long enough to paint a groundhog face, more on that later. First I cut out two pieces of brown felt. You need to make sure your pattern is large enough to cover the mouth of your funnel which will act as the ground that your groundhog pops out of. I stitched the felt together on my sewing machine and then turned the felt right out.
SWITCH-A-ROO
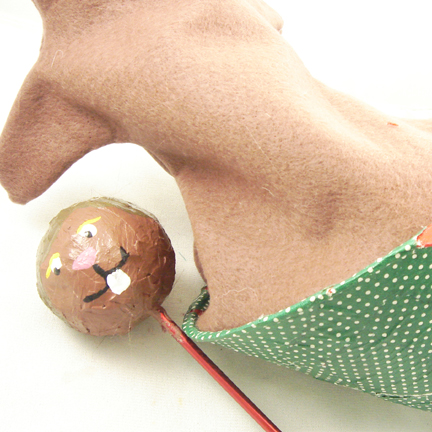
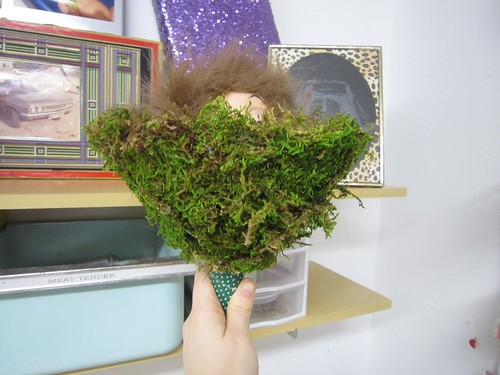
A lot of things happened in the next step that later changed. The idea to use a funnel as the ground for my groundhog came to me from an episode of Craft Lab I filmed with the adorable Claudine Hellmuth where she taught me how to make Victorian Cone Puppets. I covered the funnel with green paper so there would be a background for my moss. I used Liquid Fusion and a hot glue gun to attach the felt body to the inside rim of the funnel.
Also as you can see in the picture I painted a little groundhog face. This was the part where I wished my sister was still there to do the face painting for me. I actually hated my little face so much I decided to cover him up.
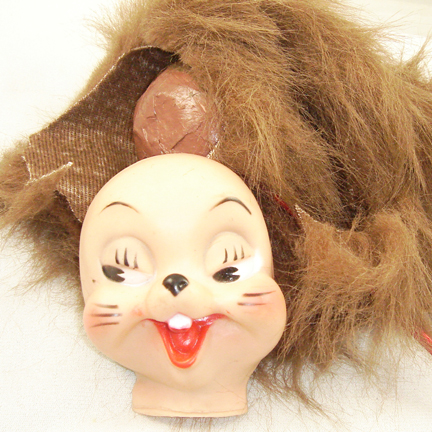
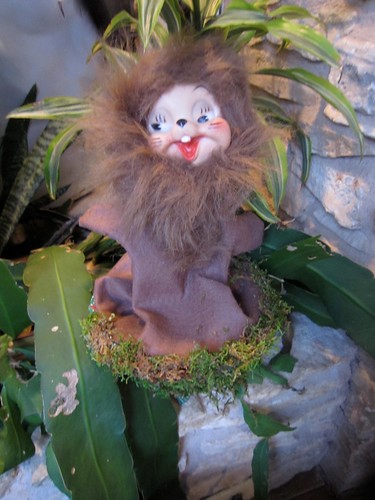
GROUNDHOG FACE LIFT
I just happen to have a whole storage bin full of doll parts and faces (like the ones I used on the Kitschy Hair Covered Earmuffs). In that bin was one loan vintage animal face that looked close enough to a groundhog to suit my needs.
First, I attached the plastic face to my painted foam ball. The next step was to get heavy handed with the glue and the fun fur. I covered the entire head and even added a little patch on the groundhog's tummy.
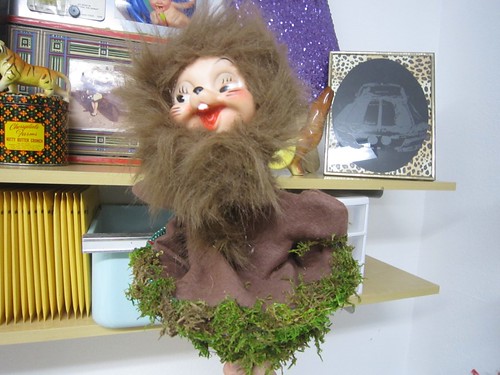
POP YOUR PUPPET
Using your knitting needle you can make your groundhog pop up from his grassy funnel home and check for his shadow. Remember if on February 2nd you pop your groundhog puppet and he does not see his shadow summer is on the way. If on the other hand it is a bright and sunny day and your groundhog puppet sees his shadow, bummer 6 more weeks of winter.
Tuesday, January 26
iLoveToCreate Graffiti Canvas


I Love To Create
Graffiti Canvas
Avalon and Margot Potter
Teen Crafts
“Kid crafted, Mom approved.”
I’ve spent the past few weeks preparing for a major trade show called CHA. It’s the big industry event for arts and crafts and all of the biggest companies will be there showing their new product lines, including the fine folks from iLoveToCreate. I asked Avalon if she’d like to do a ‘guest project’ for this week’s Teen Crafts post using the fab new Fashion Graffiti line from Tulip. She spent several hours making this awesome canvas for her BFF Emma. I think she did a terrific job.
I whipped up my own quick canvas using the headphones stencil, sea sponge dabbed pink paint tagger and the Tulip Fabric canon spray in black with the Tulip Fabric Paint Canon.
You can find these mini-canvases at arts and craft stores and there really great fun . Who doesn’t like a blank canvas?!

Materials
Blank canvas
Tulip Fashion Graffiti letter stencils
Tulip Fashion Graffiti city skyline stencil
Tulip Fashion Graffiti chain link fence stencil
Tulip Fashion Graffiti peace sign stencil
Tulip Fabric Paint Canon
Tulip Fabric Paint Canon paint neon green
Tulip Fashion Graffiti Big Phat markers black, purple, hot pink, blue
Tulip Fabric Spray Paint neon orange, hot pink
Tools
Heat tool
1. Being by spraying a layer of neon green with the paint canon. Allow to dry. Use heat tool to speed trying if the paint is too wet.
2. Use skyline stencil and purple phat marker to add a skyline to the bottom left corner and repeat having the stencil upside down on the top right corner of the canvas.
3. Use chain link fence stencil and black market on the top left and bottom right corners with the black phat market. (Angle stencil across edge.)
4. Use letter stencils to add words to the open areas of the canvas working to the right side.
5. Use peace sign stencil and orange fabric spray on bottom left corner of canvas.
6. Repeat on the top left with purple spray and on the bottom right with light
Saturday, January 23
Crafty Chica's Make & Take at the CHA Supershow!
There were always people at this Make & Take today. They loved making the silk fans Kathy a.k.a. Crafty Chica was giving out!
Behind the Scenes at iLoveToCreate booth!
Check out the cool make&takes we did at the CHA Craft Supershow in Anaheim using Aleene's Tacky Glue, Tulip Tie Dye, and Duncan Ceramics!
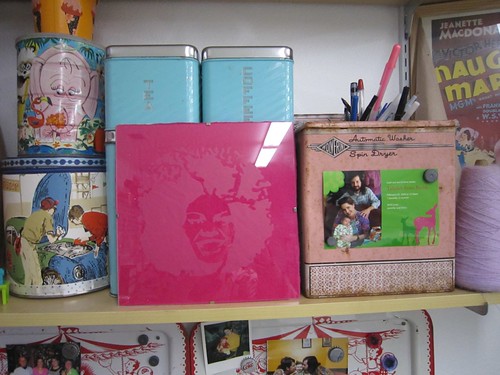
Crafty Chica Shrine at CHA Supershow!
Our Crafty Chica Shrine was a hit with all the Crafty Chica's of the the 2010 Craft Supershow! Check out the video along with fun pics of people posing with it :)

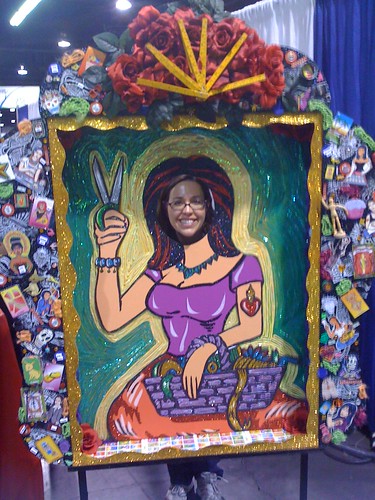
And here's a few detail shots of it!
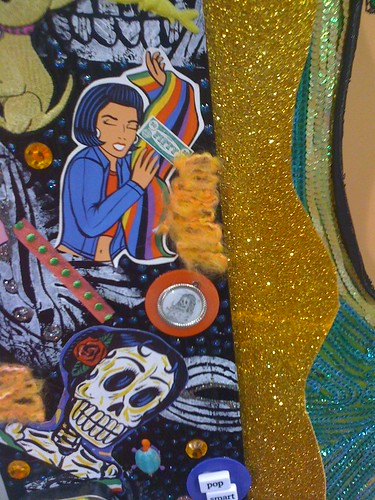
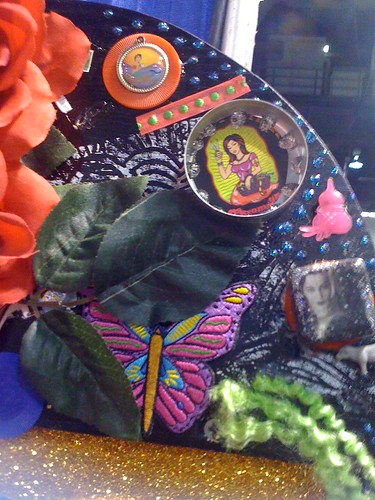
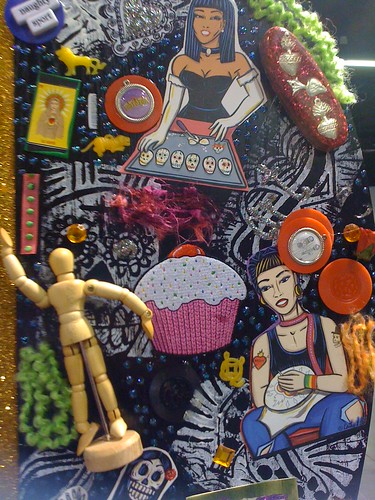
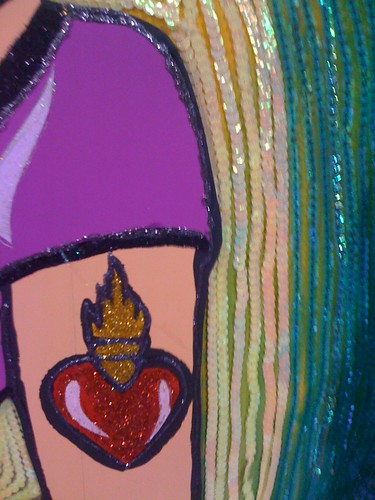
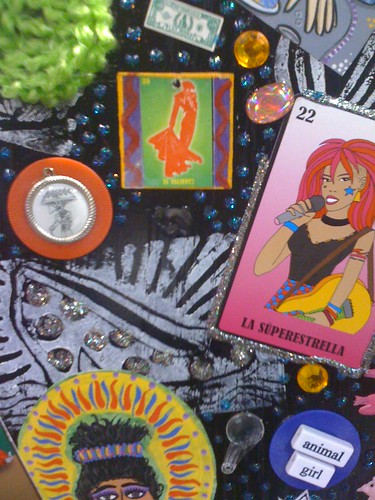
Everyone had a blast being a Crafty Chica for a day!
And here's a few detail shots of it!
Everyone had a blast being a Crafty Chica for a day!
Friday, January 22
Tricked Out Tee


One of the biggest rewards of crafting is seeing a high priced item at a swanky boutique and grinning - because you know you can go home and make it for a fraction of the cost. On a recent trip to New York City, I came across a wildly adorned (and very expensive) rock star T-shirt that had all kinds of hand-applied crystals all over it.
Talk about going from grunge to glam!
I could hardly wait to get home just so I could make my own version. I decided to take it up a notch by starting with a faux-vintage tee and adding on some sequins and glitter too. The various sparkly textures play off each other nicely without being too over the top. Note: This project will take one solid afternoon (or two chick flick DVDs), but will be worth every second of effort.
Supplies:
1 T-shirt with a simple image
1 piece of cardboard lined with freezer paper to slide inside the shirt
1 large package of Tulip® Glam-It-Up!™ Iron-On Crystals™ that match the image color (you will need about 100 of them, depending on how much you want to apply)
Tulip® Cordless Heat Setting Tool™
1 crayon
Crafty Chica™ Chunky Glitters™
Sheet of paper
Sequin trim
Crafty Chica™ Extreme Embellishment Glue™
Directions:
1. Slide the cardboard inside the shirt.
2. Working on a flat surface, open the crystals and lay them in front of you.
3. Working on a small section at a time on the shirt's image, pick up a crystal with the crayon and place it on the fabric. Use the heat tool to adhere it by pressing it on the crystal until its adhesive backing melts.
4. Place more crystals where you want them (in groups of four or five work good), and then continue applying them the with heat tool.
5. Add the glitter. Work over a sheet of paper. Fill in other areas of the image with the glitter by painting the surface with the permanent fabric adhesive, and pouring the glitter over it before it dries. Tap off excess.
6. For other areas, apply the fabric adhesive and add the sequin trim. Let it all dry.
7. When finished, remove cardboard. Gentle wash, inside out, hang dry.
Tips and Variations: If you don't want to fill the entire areas with crystals, just use them on the outline of the image. You can choose to apply the crystals very close together, or spread out a bit. The closer they are, the more you will need and the longer it will take. If you do not have a heat tool, you can apply them with a mini-iron, standard iron, or permanent fabric glue.

Thursday, January 21
Glass Etching is my New Jam
Glass etching may very well be the easiest craft of all time. That being the case no plain glass surface in my house is now safe. Drinking Glasses, picture frames and vases are not only abundant at the thrift store if you look hard enough you probably have tons around your house begging for a face lift. The hardest part is finding cute stencils to use. Luckily I Love to Create just came out with an all new line of stencils called Tulip Fashion Graffiti which made my life a lot easier.
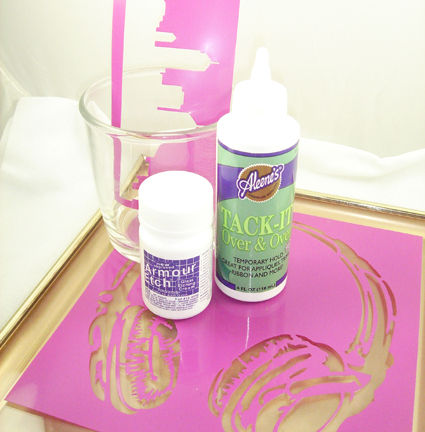
SUPPLIES
Tulip Fashion Graffiti Stencils
Glass
Armour Etch
Paint Brush
Aleene's Tack-It Over and Over Glue
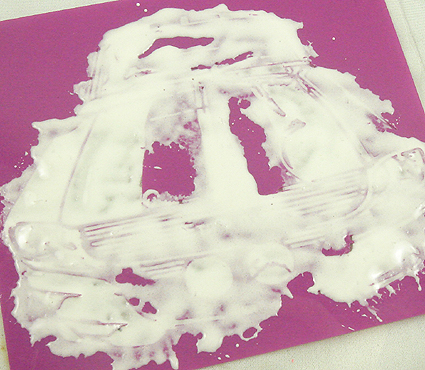
I decided to raid my own stash of picture frames and glasses, a little up-cycling never hurt anyone. Once you choose your stencil apply Aleene's Tack-It Over and Over to back side and attach the stencil to your glass surface. The glue will hold your stencil in place long enough to apply your Etching Medium. All you do is apply the medium to your surface, allow to sit for 5 minutes and rinse. Now that is what I call a quickie craft!
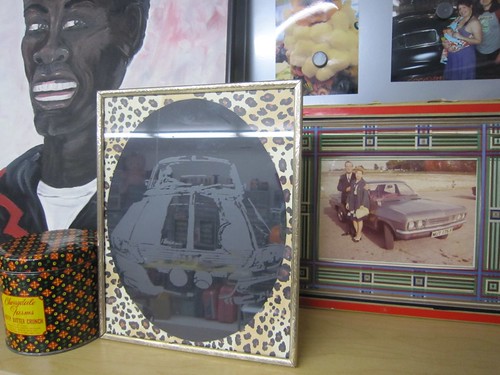
I used this fun car stencil on an old picture frame. I put two pieces of paper in the frame one black and one leopard print for a trim.

Some stencils come already sticky like this one with a guitar and lightening bolt which makes things that much easier. One word of warning is be sure to get a thick coat of the etching medium onto your surface.

Lotta Jansdotter has a fantastical new kit out called Lotta's Printing Studio Tools, Projects, and Inspiration for Five DIY Printing Techniques. The book comes with not only adorable stencils like this one I used on a mirror of two birds and an apple but also carving tools so you can make your own stamps.
You have seen me use Ed Roth's amazing stencils to make my own fabric, applique a skirt and even as a baby shower activity. This sassy lady from Stencil 101 begged to be etched onto a frame. I mounted a piece of hot pink felt behind her. Another tip, solid darker color backgrounds work better than light colors and prints.
I'm debating on etching some of the larger wall stencils from Ed Roth's Stencil 101 Decor: Customize Walls, Floors, and Furniture with Oversized Stencil Art onto my sliding glass doors. From time to time birds don't realize it's glass and run into the doors and maybe this would help them. Has anyone ever etched a large surface?
Wednesday, January 20
Fun with Fashion Graffiti!

Tulip's new Fashion Graffiti line is out and let me tell you, it's a blast to work with; literally! Yesterday I got the chance to play with the box of goodies that the I Love to Create crew were kind enough to send me. The tongue-and-cheek "urban-ness" of the Fabric Paint Taggers, Graffiti Stencils and Phat Markers had me giggling (in a good way), but it was the brilliance of the Paint Cannon that lured me into a late-night paint party!

The Paint Cannon is an innovative bottle that allows you to pour in fabric paint, pump air into the chamber and blast it out onto your garment giving a similar effect as traditional spray paint, but without the fumes or environmental hazards of an aerosol can. It can be used inside, it's safe for kids (supervised, of course) and is re-fillable which means, less waste. Oh and using this tool, and a little paint goes a long way; the black portion of all 4 projects you see here came from only ONE, 3.3 oz bottle of Cannon Fabric Paint! Very cool.
Here's a rundown of what I made in hopes that it'll inspire you to do a little Fashion Graffiti-ing, yourselves!
"Peace" Onsie
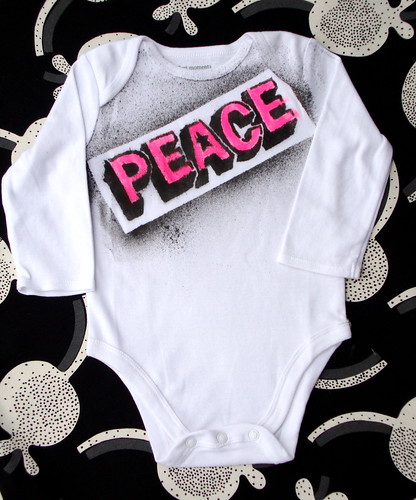
Tools: Fabric Paint Cannon/Paint, Grafitti Stencil & Pink, Phat Marker.
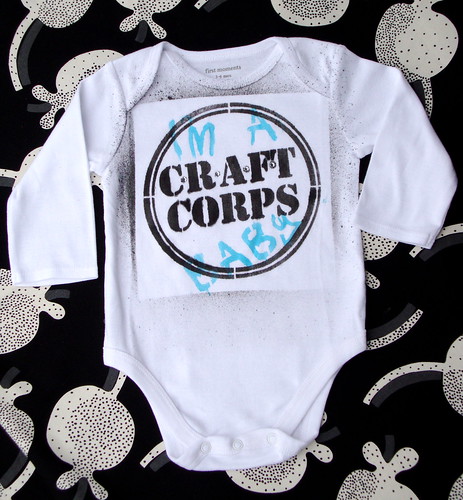
Tools: Craft Corps Stencil, Fabric Paint Cannon/Paint, Glam-it-Up Iron-On Crystals, Graffiti Stencil Letters Turquoise, & Paint Tagger, . Psst! I dug how the Tagger applied more like a stain than a paint, making it really easy to blot on and remove immediately as I spelled out my saying.
"Scissors" Tee
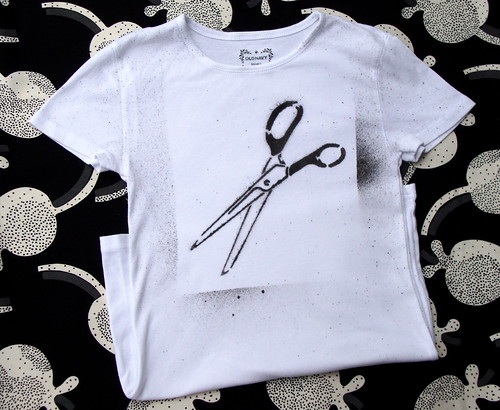
Tools: Fabric Paint Cannon & Paint and Ed Roth's Scissor stencil.
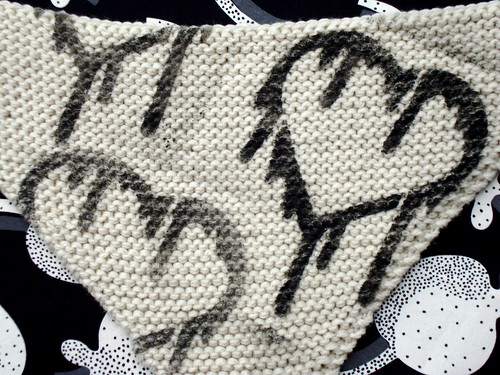
"Bleeding Heart" CowlKercheif (get pattern here)

Tools: Fabric Paint Cannon/Paint & Fashion Graffiti Stencil.
This one was my favorite piece of the night to work on! As you may know, I have a thing for yarn so I'm always THRILLED when I find a way to mix it with mediums not usually associated with knitwear.
If you're going to the Craft Super Show in Anaheim, CA this weekend, don't forget to stop by the I Love to Create booth to play with these products and more. I'll see you out there!
Craft.Rock.Love,
Vickie
Tuesday, January 19
iLoveToCreate Teen: UnValentine's Day Card


Love can rock harder than a Nine Inch Nails CD...or it can quite frankly to paraphrase a popular 80s band...stink. If you're in love, Valentine's Day is a wonderful cotton candy colored day of smoochy goodness. If you've been dumped, it's a nightmare. As a teen, I had more than my fair share of crappy Valentine's Days, and I'm sure I wasn't alone. If you've got a BFF who has been unceremoniously dumped, why not give them a Happy Un-Valentine to cheer them up a little and let them know you've got their back?
iLoveToCreate's new Fashion Graffiti line gives you all of the cool tools you need to whip up a funky card in a flash. Here's the 411:

Materials
Red Cardstock
Tulip Fashion Graffiti Chain Link Fence Stencil
Tulip Fashion Graffiti Love Stencil
Tulip Fashion Graffiti Drippy Text Stencil
Tulip Fashion Graffiti Dimensional Fabric Paint Taggers Black, White and Silver
Tulip Slick Dimensional Fabric Paint White
Aleene's Quick Dry Tacky Glue
Kiss Me, Kiss Me, Kiss Me Font (dafont.com)
Tools
Bone Folder
Paper Cutter or Ruler and Scissors
Sea Sponge
1. Cut cardstock on a paper cutter to a 5.75"x11.5" rectangle.
2. Fold long section of paper on the center to form a card. Use a bone folder to score the card edge.
3. Place "LOVE" stencil across card from top right to bottom left. Squeeze black paint tagger on a disposable surface. Use sea sponge to dab paint on stencil. Carefully remove and allow to dry.
4. Use chain link stencil to cover entire front of card, you'll have to place it on each quadrant to get full coverage. Repeat process with sea sponge using silver paint. Allow to dry.
5. Use letters to spell "S T I N K S" with white paint and sea sponge. While still wet, add dimension and drips to the letters using a Tulip Slick Dimensional Fabric Paint in white. Allow to dry.
6. Use all three paint colors on the sea sponge to stipple around the edges of the card in layers. Allow to dry.
7. Use word processing software and the Kiss Me, Kiss Me, Kiss Me font in 36pt to write:
Love may stink...
but friendship doesn't.
BFFs 4-ever.
xoxo,
Print it out and cut with a paper cutter to 5.5 wide by 4" tall.
8. Place a thin layer of glue along the edges and adhere to the top center of the inside of your card. Allow to dry.
9. Spread a thin layer of glue along the edge of your cut paper and adhere to top center of inside of card.
Subscribe to:
Posts (Atom)