Showing posts with label DIY teen accessories. Show all posts

Tuesday, September 25

Happy, Shiny Pixie Headband!

I attended a photo shoot recently and was inspired to make this headband after I saw a similar one in the stylist's stash of goodies! While hers was glittery gold and mine is iridescent (I also doubt that hers was fashioned from an old T-shirt sleeve), it's the Lady-liberty-inspired shape that's so compelling to me.

I mean, it's so bright and sunshine-filled (and a little prehistoric?), and I have to admit, though I was begging for cool temperatures back in the heat waves of July (and couldn't be happier that nature has complied!), the shorter days are already threatening to change my mood. I'm already missing the sun! This happy, shiny, pixie headband brightens up the day wherever you are.

Materials:
-T-shirt sleeve (or T-shirt scrap of equivalent size)
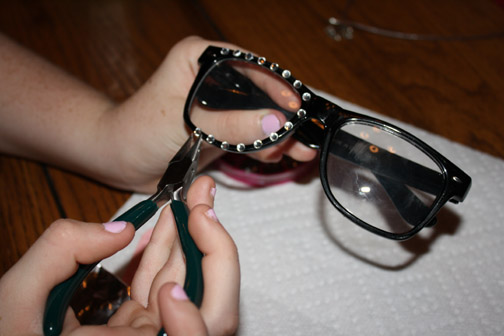
-scissors
-Tulip Fashion Glitter transfer sheets
-ballpoint pen
-ruler
-Aleene's Fabric Fusion
-warm iron and pressing cloth-blank headband (preferably metal rather than plastic)
-Tulip Soft Fabric Paint in gold metallic (optional)
-toothpick (optional, to use as a paint applicator)


Make it:
1.
Cut out the underarm seam of the sleeve, and lay it flat, right side up. Measure, mark, and cut two 1 1/4"-wide to 1 1/2"-wide strips from the iron-on transfer sheets.

2. Sandwich the two strips together and cut out a series of triangles from one edge (through both layers), leaving a zigzag that runs the width of the strips.

3. Separate the strips and align them along the straight edges, about 3/8" apart. Use a pressing cloth and iron the strips onto the fabric.

4. Make parallel cuts through the fabric, separating each pair of triangles from the row of zigzags.

5. Determine how many rays of sunshine you'd like (I debated between 5 and 6, and ultimately went with 6), and arrange them evenly around the arc of the headband. Working one ray at a time, spread fabric glue evenly along the inside of the headband, and wrap the flexible fabric piece around the headband, lining up the triangles. Apply glue evenly to the inside of the strip of fabric and press the triangles together (the triangles should seal beyond their edges).

6. Finish gluing each ray, and let them dry flat. (Note: If the fabric is pulling apart, use a clothespin or paperclip to pinch it while it dries.)

7. When the glue is completely dry, trim the fabric to the edges of the triangles.

8. As an optional finishing touch, apply the metallic paint carefully with a toothpick along the fabric edges of the rays. Let it dry.

9. Try on the headband to spread a little sunshine both indoors and out!

Thursday, August 9

Pretty in Pasta Headband

Tallulah and I have been on a pasta painting kick lately. Some people make their noodles into necklaces around here we have been working the hair clip angle. Today for I Love to Create I'll show you an updated spin on noodle art.

SUPPLIES

Bow Tie Pasta

Aleene's Tacky Glue

Headband

Tulip Glam-It-Up Iron On Crystals

Scribbles Paint

Crafty Chica Paint

Finding the right paint to stick to your pasta can be tricky. I used two coats of Crafty Chica paint on my noodle.

Once my noodle paint was dry I went in with Scribbles paint and Glam-It-Up Crystals to add a little sparkle.

Once all the paint was dry using Aleene's Tacky Glue I attached my little bow to the side of my headband.

Who says that you can't be pretty in pasta?

Wednesday, September 28

iLoveToCreate Teen Crafts: Nerds Rule Glasses


Visit us on Facebook!
Craft on!Click here for today's daily giveaway!

Avalon Potter for iLoveToCreate Teen Crafts
Nerds Rule Glasses
"Teen crafted, mom approved."

I got these nerd glasses a couple of years ago when I started a nerd club at my old school. I still wear them sometimes for fun and this week wore them for Nerd Day at my new school. Plain nerd glasses were cool, but adding Tulip Glam it Up Crystals made them even cooler! I love these now! You can do this to any pair of glasses you have, even the not so nerdy ones! But hey, let's face it...

Nerds RULE!


Materials
Black plastic 'nerd' glasses
Tulip Glam it Up Crystals in clear
Aleene's Platinum Bond Glass and Bead Adhesive
Sand paper or soft nail file

Tools
Chain nose pliers OR Tulip Fashion Art Tweezers

1. Rough up the surface of the areas where you'll be attaching crystals. Don't go overboard! You may want to tape the lenses of the glasses to prevent accidentally scratching them.


2. Put some glue into a piece of tin foil and dip the crystals into the glue one by one using tweezers.


3. Adhere them evenly around the rims of your glasses. Take your time and if you want to, mark crystal placement in advance.

4. Allow glue to dry overnight and then wear your nerd glasses with pride!

Wednesday, July 27

ILovetoCreate Teen Crafts: Fun Feathered Fascinator

Fun Feathered Fascinator by Avalon Potter for ILovetoCreate

Visit us on Facebook!
Craft on!Click here for today's daily giveaway!

ILovetoCreate Teen Crafts
Fun Feathered Fascinator
Copyright 2011 Avalon Potter

Recently I have noticed a fashion trend toward feathers. They are on clothes, jewelry, they are even glued into people’s hair! I didn't feel like the little skinny feather in your hair made much of a statement, so I made this week’s project as an over the top salute to the new feather trend. It’s fun, crazy, and creative so I hope you have as much fun making it as you do wearing it!


Supplies
Aleene's Liquid Fusion
Aleene's Jewel-It Adhesive
Tulip® Glam-It-Up!™ Iron-On Studs™
Multicolor felt bird scrapbook sticker
Black plastic headband
Feathers (Hot Pink, Yellow, Green, Red)

Instructions

1. Attach three feathers together by applying Liquid Fusion to the bottom of the feathers. It should be spread slightly so it has almost a fan effect but no gaps between the feathers. Let dry for 2-4 hours.


2. Next take your felt bird and lay out your seven crystals around the tail to the head. It should go in this order: purple, light pink, red, orange, dark yellow, light blue. Then put a dark blue on the eye. Put a dab of Jewel-It on each crystal, apply to the felt bird in pre-determined spot. I used glue since the felt was made of man made fiber. Allow to dry for 10 minutes.


3. Use the Liquid Fusion to glue you felt bird to the bottom of the feathers and let set for a few minutes before the next step. Now on the back of your feathers apply a line of glue on the middle feather and attach to the side of the headband. Let dry for 2-4 hours.

Tuesday, June 28

How to: Sparkle Kitty Ear Barrettes!

Today, it's clip-on cat ears for when you're feeling a little bit feline! The occasion? Well, to be perfectly honest, I set out making these for my niece's 5th birthday (she happens to love cats--her cat, Mo, in particular), but I didn't finish them in time (yes, despite the fact that they only take about 10-15 minutes to complete!). It turns out, though, that there was a higher power (called glitter) at work and the delay was well worth it: I recently got a delivery of Tulip's new iron-on glitter sheets and I realized that the delay was meant to be (because what would these ears be without the sparkle?--I know the Crafty Chica would be proud.)


Save these for Halloween if you want, but why wait? I wholly believe in wearing fun accessories whenever the mood strikes--because, hey, some days you just feel like a cat and here's the perfect accessory to let you indulge. And talk about fun in the sun--these ears sure do sparkle!

Materials:
-Pen or pencil
-Scrap of paper
-Colorful felt
-All-purpose scissors
-Fabric scissors
-Metal snap barrettes
-Aleene's Fabric Fusion fabric glue
-Tulip Fashion Glitter Shimmer Transfer Sheets
-Pressing cloth
-Iron


Make it:
1. Use the pen and paper to sketch out a slightly rounded triangle, about 2" high. Add 1/2" at the base of the triangle and then mirror the shape below it to create the template. Cut it out with the all-purpose scissors. (You can also fold the paper at the base after you've drawn the top triangle and the extended base, and cut around the shape through both layers.)


2. Fold over the felt and lay the template on top of the folded section. Use the fabric scissors to cut around the template, through both layers.


3. Mark and cut a second template, in the shape of a rounded triangle, about 1/4" smaller on all sides than the original triangle in Step 1.


4. Select a color from the iron-on glitter sheets and trace the second template twice onto the shiny surface. Use the all-purpose scissors to cut them out. Peel away the shiny surface layer and arrange them on the felt ear pieces. Lay a pressing cloth over the ears, and press firmly with the iron for about 40 seconds. (Repeat if necessary to set the glitter transfer.)


5. Clip the metal barrettes in the center, on each side of each felt ear piece, so that the top of the barrette corresponds to the wrong side of the ear piece and vice versa. Generously apply fabric glue around the edge of the wrong side of the ear piece. (Felt absorbs a lot of the glue, so don't hold back!)


6. Fold the ear piece around the top of the barrette to seal the glue, and repeat on the second barrette.


7. Let dry. Optional: Clip the layers together with extra barrette clips while the glue dries!


8. Quick! Try them on before the actual cat who's been helping you craft gets a little too interested and starts batting them off your workspace!

(Special thanks to Tulu the cat for "helping.")


Visit us on Facebook!
Craft on!Click here for today's daily giveaway!

Wednesday, November 17

MAYA IN THE MOMENT TEEN CRAFT: Homework Book Bag


I have my SAT test for college in two weeks! Aside from my regular high school homework, I now have an extra load of studying to worry about. To help me stay organized, I decided I needed a separate book bag to hold all my SAT-related paperwork and stuff. I couldn't use any old bag, I had to make my own special "good luck" one.

I started with a white canvas book bag. You can find them at Walmart or Target or other stores like that. I knew I wanted a distressed kind of look, so I decided to go with the Tulip® Dye Techniques Kit™.

It comes with these cool things to add patterns to your fabric, like doilies and animal print stencils. I used brown and hot pink dye and sprayed all over the bag in different areas.(the kit comes with spray bottles too) At first I was kinda scared to use the fancy kit, but I'm glad I tried it, it was super easy and I like how colorful the dyes came out. Actually, I liked it almost better than usual tie dye because you don't have to rubber band or tie anything. You just spray and go! You have to let it set for four hours and then wash and dry it. 

What I was looking forward to the most was decorating the front flap of the bag! I used a transfer.

I learned that there are two types of transfers, cold peel and hot peel. This one was a hot peel, that means that as soon as you are done ironing it on, you  have to quickly peel off the plastic backing before it cools.

For the top center of my bag, I felt like it needed something so I used a Tulip stencil of a bird. I added a layer of Tulip Glitter Bond and then Tulip Fashion Glitter.

You pour the glitter over the wet glue...

...and then peel away the stencil!

Isn't it cute? The glue dries clear.

Here is my finished bag. I added a silk flower in the center of the doily design. I love it! I think my bag good enough to get me into college!


Craft on! Click here for today's daily giveaway!
Clicky Web Analytics
Pin It button on image hover

Subscribe to our newsletter

* indicates required
I am interested in products and inspiration for...
Close