Showing posts with label Tulip Glam It Up Crystals. Show all posts

Monday, April 14

Hex Nut Cuff DIY


Create a cool honeycomb design on a cuff using hex nuts with this hardware store inspired Hex Nut Cuff DIY tutorial. Turn up the chic factor even more by adding Tulip glam-it-up crystals to the centers of some of the hex nuts. 

Wednesday, March 12

Gold Dipped Glitter Clutch


A black clutch should be a staple in every girls wardrobe, but no one ever said that staples had to be boring, did they? This gold dipped glitter clutch is definitely not boring, but I would still consider it a staple. It is functional and fabulous at the same time; Perfect for everyday use as well as a night out on the town.

Monday, January 27

DIY Neon Friendship Bracelets


Neon is making a comeback and these DIY Neon Friendship Bracelets are one cool way to add some serious color to your arm candy and they have a bit of sparkle!  
OK, so neon is on it’s fourth or fifth come back. But, this time there are so many new and creative ways to incorporate it into your wardrobe without looking completely ‘80’s dayglo! 
These bracelets so quick and fun to make you’ll want to make lots and that’s good because they look amazing stacked together and don’t forget to make them for your friends too!

Monday, January 13

'Beaded' Heart Beanie DIY


Polar Vortex got you feeling a little chilly? This Heart Beanie will warm your head and spread love with a cute 3 dimensional heart using Tulip’s Beads in a Bottle. Hearts are a huge trend right now (especially with Valentine’s Day right around the corner)! Inspired by Moschino’s heart beanie, you can create your own for a lot less. Stay warm and fashionable with this simple and chic hat embellishment.

Wednesday, February 27

iLoveToCreate Craft Haul Video with The Impatient Crafter

Craft Haul Video for iLoveToCreate  

(from The Impatient Crafter!)


One of my favorite freelance gigs is working as a blogger for the fine folks at iLoveToCreate. They make some of the coolest products in the craft industry and they're some of the nicest people you'll ever meet. Their team is unparalleled, creative, visionary and smart. So when I get a box filled with new goodies to use in my blog posts and designs, it's always a party at Casa de Potter. This time, we decided to film the most auspicious opening of the latest box of awesome. 

Yup, it's an iLoveToCreate Craft Haul Video!  Huzzah!

Be forewarned, I try to keep my tongue firmly planted in my generously rouged cheek at all times.  So if you're looking for a straight forward haul video, this isn't it.  If you're looking for a little chuckle, a lot of chutzpah and a bevy of bodacious products including Tulip Body Art, Tulip Tie Dye, Tulip Glam-it-Up and more...well you've come to the right video!

Enjoy!

xoxo
Madge a.k.a. Margot Potter

Friday, February 15

Embellish your iPad cover!

"Eh, I don't need one of those," I said. Inside, as I watched my creative friends dabble away on their iPads, I secretly longed for one. There was no legitimate reason for me to splurge on an iPad. I wanted one, but could certainly live without. But that didn't stop me from entering contests to win one. And my friends, I'm here to tell you - that day finally arrived!It was at CHA last month in Anaheim. I attended a blogger party for FloraCraft, yes to see all their fancy new products (great use with Aleene's Original Tacky Glue!), but also because they were giving away an iPad Mini. When I wrote my name onthe entry form. I almost folded it up, but then added one more sentence under my name: PICK ME!!!

It worked! When I found out I won, I squealed, jumped in the air and did the Price is Right money dance. When I got home, of course I had to buy a cover. Of course I had to embellish it!

There are a gazillion ways to personalize your iPad cover. You can stud it outpaint your dog's portrait on it, give it a decoden makeover, or add your monogram.

As for me, I decided to add a stripe of multi-colored crystals!
To get this look, you'll need:
OR if you have a fabric surface, you can use

Start at one end of your case. Spread the glue over a one-inch area and begin to apply the crystals one-at-a-time. For the multi-colored look,make sure to mix up the colors in a random pattern. Keep working one-square at a time, otherwise the glue will dry before you can apply the crystals and create a gunky mess.
I used the stitched stripe that was already on the cover as a guide. Maybe later I'll add more, but for right now, I really like how it looks! My husband even got in on the fun and painted a cover in his Day of the Dead style! He used our Tulip Soft® Fabric Paint!

Wednesday, February 6

MAYA IN THE MOMENT: DIY Crystal Phone Charger!

I've been in a sparkly mood lately and have been gluing Tulip Glam It Up Crystals on just about everything! Not only my iPhone case and headphones, but now even my charger. Think I'm crazy? Check out "crystal phone charger" on Etsy, Pinterest and eBay and you'll see from the listings that I'm not the only one. People are charging big bucks for these and now I'm going to show you how to do it on the cheap!

Side note - yes, I blinged my headphones too. Don't judge!
Aside from your charger, you'll need Aleene's Tacky Glue but you can also use Liquid Fusion. You'll also need Tulip Glam It Up Crystals in your choice of color, a toothpick and a paper plate to squeeze the glue onto.

Use your toothpick to add a layer of glue to one side of the charger. Next, spread out your crystals. Use a crayon or Tulip® Glam-It-Up!™ Fashion Art Tweezers™ to pick up and apply each one. NOTE: The mini size of crystals works best!
Apply your crystals one-by-one.
You can decide what pattern you like - flowers, ribbons, circles or just all random and mixed up like the one I made.
 
Halfway finished!

 
I also did the other end of the charger too.
Done! I love it, it makes me feel so Hollywood. Like, if I happened to be walking the red carpet and needed to charge my phone, I could whip this out and still feel glamorous!

Thanks for checking out my project! come join me on my Facebook page! http://facebook.com/mayainthemoment


Friday, January 18

CRAFTY CHICA: DIY Crystal Eyeglasses!

A couple of years ago, I noticed my vision was starting to...well, SUCK. I couldn't zero in with precision like I used to. That's what a life of beading, sewing, painting and gluing will do to a chica. Instead of pouting, I decided to embrace the fact that I needed reader glasses and am now a collector of cool specs.

But when it comes slaving away in the art studio, I don't want to use my spendy finds. I go for the cheapies, but then those can be boring. Life is so hard!!!! (lol)

Call it procraftination on another project, but one day I sat down and embellished all my low-budget reader glasses...and made a video tutorial! Now I have sparkly energy at all times!

These are great to give as gifts, or for your favorite bookworm or girls night for crafting. Next, I want to make fabric sleeves for them too!

Supplies:Tulip® Glam-It-Up!™ Iron-On Crystals™ 
Tulip® Glam-It-Up!™ Fashion Art Tweezers™
Liquid Fusion® Clear Urethane Glue 
A chopstick or toothpick
Paper plate

Directions: Squeeze out some glue and apply to the top of the frames and then add the crystals, one-by-one. Check out my video to make the process super easy - plus a couple other insider tips!


LINK

Wednesday, December 26

Butterfly Kisses DIY Silk Pouch


Butterfly Kisses DIY Silk Pouch
Margot Potter for iLovetoCreate

The fabulous Miss Crafty Chica shared this technique with me this past summer and I absolutely love it!  All you need is a silk pouch, Tulip Fabric Markers, Tulip Glam-it-up iron-on studs and Tulip cordless heat setting tool and your imagination.  The design is done in layers, let the colored part dry before you add black outlines. Let the black layer dry before you add your crystal accents.  The silk fibers allow the markers to bleed, which gives this a pretty watercolor appeal.  Embellish both sides, and then make a bunch of these!  You can do this with silk scarves or ties too...or make your own one of a kind fabrics! It's a breeze using products from iLoveToCreate!


(Click on images to see close up and read text.)

Wednesday, October 24

Hooty Owl Hallowe'en Cards


Hooty Owl Hallowe'en Cards
Margot Potter for iLoveToCreate


Avalon has been busy as a little bee getting straight A's in her honors classes!  Can you say proud mama?  I can!  Go Avalon!  So I stepped in to whip up some fun and festive Hooty Owl Halloween cards today.
These are so easy to make and you can layer them however you please with whatever papers and embellishments you have at hand.  The lenticular owl came off a panel on a Puff's tissue box, which I simply could not throw away!  The other owl is a permission free Art Deco era image from Dover to which I've added text and is here for you to download if you'd like to use it.  I can't resist the urge to add googly eyes whenever possible.  Teens can use these for party invitations or greeting cards or even frame them for room or locker decor.  Fun, fast...and fabulous!


Materials  Hooty Owl Upcycled Hallowe'en Card
Lenticular owl image from Puff's tissue box
Cardstock
Patterned coordinating papers
Jute or hemp twine
Clear acrylic tile
Large orange rick rack or other ribbon trim
Glam-it-Up crystals
Googly eyes
Tulip fabric marker in black
Aleene's Tacky Glue
Aleene's Tacky Dot Runner
Aleene's Jewel It Glue

Tools
Paper trimmer
Scissors
Bone folder

Remove image from tissue box.  Create a frame for image out of patterned scrapbook paper using paper trimmer or scissors.  Cut cardstock with a small border around edge of framed image, fold and crease with bone folder, marker or scissor handle.  Adhere image and frame to front of card using tape runner.  Cut rick rack to fit along the bottom edge of framed window.  Adhere with tape runner.  Cut twine to fit edges of frame, adhere with Tacky Glue.  Attach patterned paper behind acrylic tile using tape runner.  Cut a small piece of paper to fit center of tile and adhere to front of tile with tape runner.  Write Boo! on front of paper with marker.  Use Jewel-It glue to attach crystals to right edge of tile.  Attach googly eyes to owl's eyes using Jewel-It glue.  Use marker to add details to frame.


Materials Hoot Hoot Card
Hoot, hoot owl printed on white paper
Coordinating scrapbook papers
Orange cardstock
Plastic rhinestone accents
Googly eyes
Aleene's Tacky Dot Runner
Aleene's Tacky Glue
Tulip fabric marker in neon orange

Tools
Paper trimmer
Scissors
Bone folder
FREE DOWNLOAD!


Print owl image.  Cut, fold and crease cardstock.  Cut coordinating scrapbook papers for background and right edge of image.  Use marker to add orange accents to owl image.  Adhere paper layers to card with Tacky Dot Runner.  Use Tacky Glue to adhere faux rhinestones on bottom and top edge of owl image.  Attach googly eyes to center of owl's eyes with Tacky Glue.
This blogger was compensated and provided products for this post.  All opinions are 100% my own!

Thursday, August 9

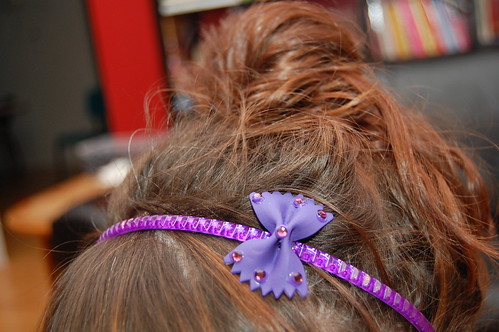
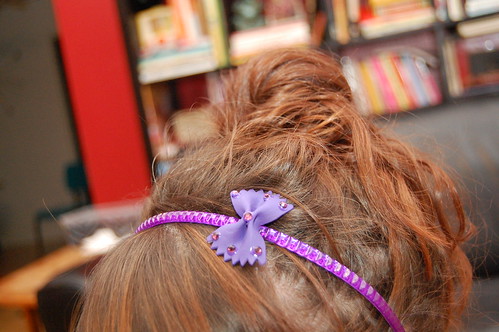
Pretty in Pasta Headband

Tallulah and I have been on a pasta painting kick lately. Some people make their noodles into necklaces around here we have been working the hair clip angle. Today for I Love to Create I'll show you an updated spin on noodle art.

SUPPLIES

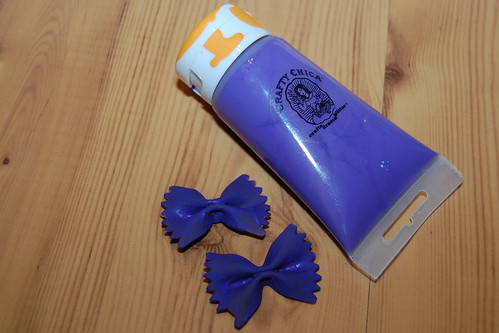
Bow Tie Pasta

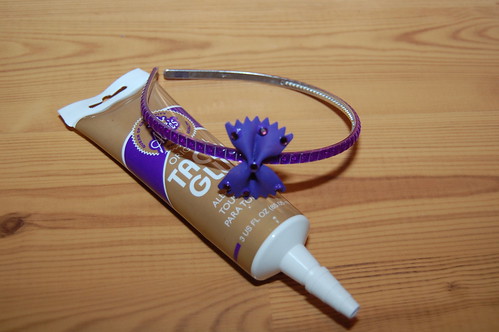
Aleene's Tacky Glue

Headband

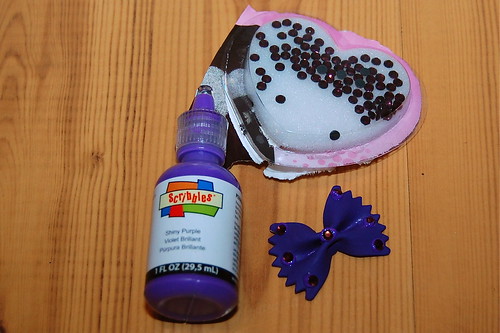
Tulip Glam-It-Up Iron On Crystals

Scribbles Paint

Crafty Chica Paint

Finding the right paint to stick to your pasta can be tricky. I used two coats of Crafty Chica paint on my noodle.

Once my noodle paint was dry I went in with Scribbles paint and Glam-It-Up Crystals to add a little sparkle.

Once all the paint was dry using Aleene's Tacky Glue I attached my little bow to the side of my headband.

Who says that you can't be pretty in pasta?

Monday, July 2

iLoveToCreate Retrofabulous Embellished Straw Tote


iLoveToCreate Retrofabulous Embellished Straw Tote
Margot Potter
'These ARE your grandmother's crafts...ya gotta problem with that? 
I didn't think so."

I'm afraid I have always had a serious soft spot for retro beachy looks.  Straw hats, straw totes, sundresses and seersucker rompers all make my little heart go pitter pat.  When I saw this plain straw tote in the dollar section at Target, I could not resist.  I knew immediately how I would DIY it into a retrofabulous summer bag!  Some felt, rick rack trim, pom-pom fringe and a judicious smattering of sparkly crystal accents take a plain bag from drab to fab and with the help of Aleene's Tacky Glues literally in seconds flat!  Now THAT's retrofabulous!

Materials
Plain straw tote
Craft felt in four colors
Coordinating pom pom fringe
Coordinating rick rack trim
Tulip Glam-it-up Crystals in Metallics
Aleene's Quick Dry Tacky Glue
Aleene's Tacky Glue Dots Singles 3/16"

Tools
Scissors
Ruler
Marker
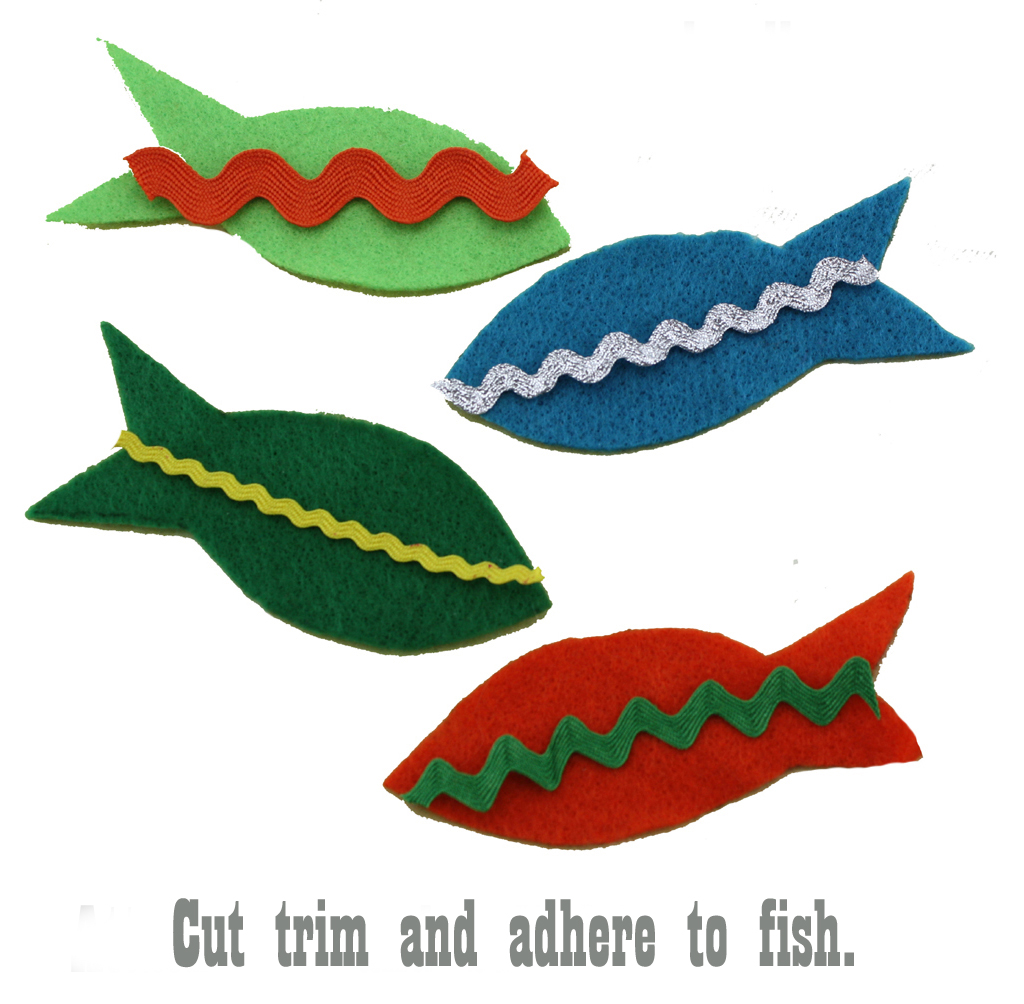
Hand draw a simple 4"lx1.5"w fish shape, cut out to use as a template.


Place template on felt, trace and cut out four fish.
Cut rick rack and adhere to fish.


Glue fish and pom pom trim to tote with Aleene's Quick Dry Tacky Glue.  Finish one fish with metallic crystal accents using Aleene's Tacky Glue Dots.  Allow it all to dry, toss on your favorite vintage or vintage inspired sundress and sunglasses and ta da...go get 'em, you retrofabulous creature, you!

Clicky Web Analytics
Pin It button on image hover

Subscribe to our newsletter

* indicates required
I am interested in products and inspiration for...
Close