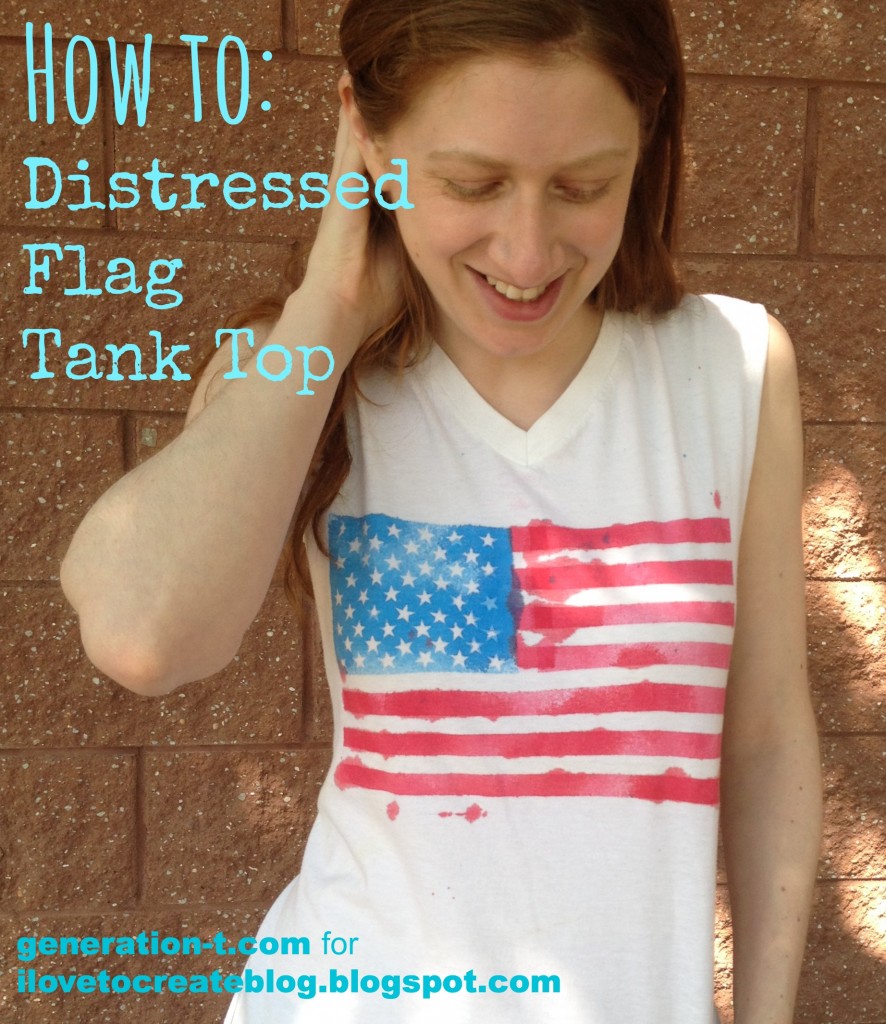
Between cheering on Team USA in the World Cup and all the 4th of July barbecues just around the corner, this project is at least a fashion twofer (at least -- you can save it for next Memorial Day picnic, Flag Day...or whenever you're feeling stylishly patriotic!). With just a plain white T-shirt, some classic gold star stickers (50 of them, to be precise), clear tape, and fabric spray paint, you can, for just a few bucks, make a T-shirt that might otherwise retail for umm...$84(!!!). Here's how.
Showing posts with label Fourth of July. Show all posts
Showing posts with label Fourth of July. Show all posts
Tuesday, June 24
Thursday, June 19
American Flag Inspired Tie Dye
The 4th of July is going to be here in just a couple of weeks. I am going to a family reunion that weekend and wanted to wear something that would show off my creative personality. I love the American flag and have made several projects using it as inspiration, and thought "why not dye?"
Labels:
amanda formaro,
crafts by amanda,
Fourth of July,
tie dye
Wednesday, June 26
DIY American Flag-Inspired Shorts
Fourth of July is right around the corner, and if you're like me you want to look fly for the holiday weekend..
.
because let's face it Jeshua...you're single and you need to make an effort... at some point.
-_-
The other day I was shopping at an overpriced boutique store - and by shopping, I mean looking at everything saying "I could make that"- and I came across some denim cut-offs with an American (USA) Flag pattern painted on it.
I decided to do my own take on the painted denim. It's subtle enough to be worn all summer long and patriotic enough to be an Independence Day statement piece.
– A pair of denim shorts
– Sand paper
– Painter's tape
Tuesday, June 26
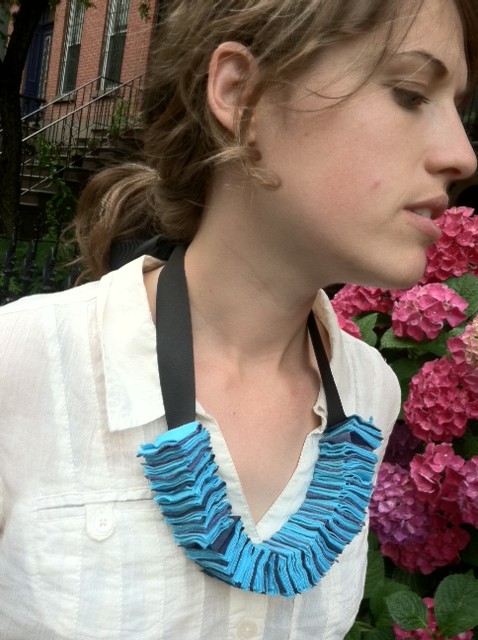
T-shirt Confetti Necklace!
Interestingly, the inspiration for this festive, soft, Fourth of July
necklace came from south of the border -- while I was on vacation in
Oaxaca, Mexico, we happened upon a small gallery where I spotted an
orange folded paper bracelet made by women in a local artist collective.
The paper was so soft and fibrous, it reminded me of fabric. So when I
set to re-imagining that bracelet stateside in my Generation T workshop
(as a necklace of fabric and glue!), I was pleased that the results are
even cozier -- a wonderfully celebratory accessory fit for a summer
barbecue! (I was intentionally playing it subtle with the shades-of-blue
color palette, but a bold red, white, and blue color scheme would
really pop.) And it's comfy, too, for when the sun goes down and it's time
to snuggle up and watch the fireworks.
Materials:
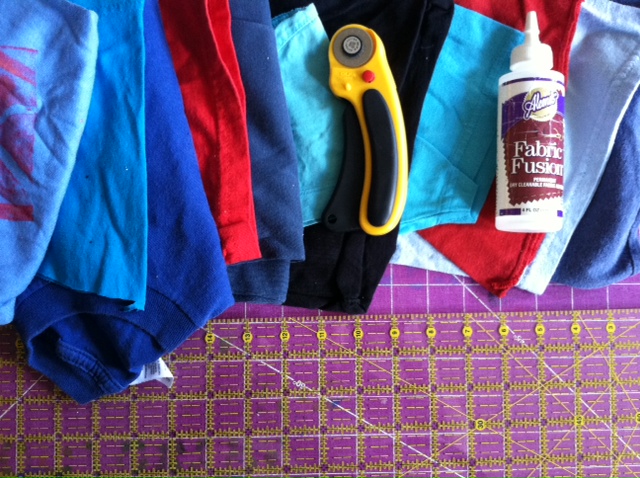
-T-shirt scraps (sleeves work well!), including one long one to use as the fastener
-Rotary cutter and cutting mat
-Quilting ruler
-Aleene's Fabric Fusion glue
-Ribbon (optional, in place of the long piece of T-shirt scrap to fasten the necklace)
Make it:
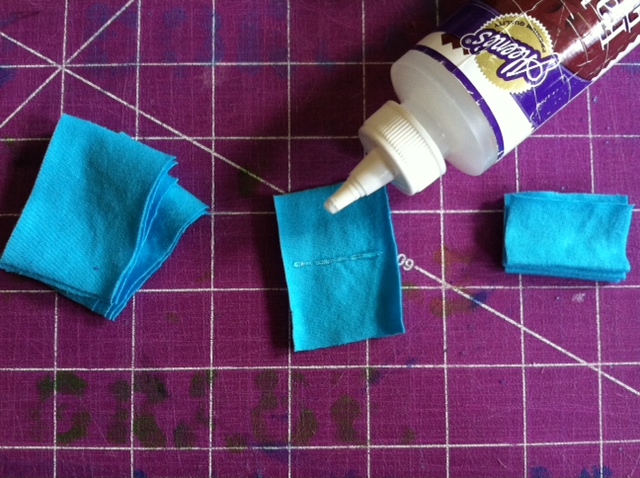
1. Cut 1 1/2"-wide strips from the T-shirt scraps.
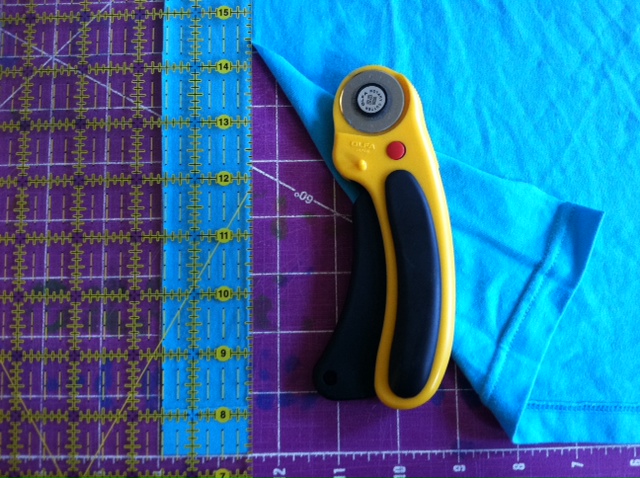
2. Cut the strips into 2" pieces to make rectangles that are 1 1/2" x 2". (I cut about 124 rectangles in two different colors to make an approximately 9"-long necklace segment.)

3. Lay one of the rectangles flat, wrong side up, and spread a thin line of glue slightly off-center and parallel to the short ends. Fold it in half so that the glue line retains the crease. Let the glue dry and repeat for the remaining rectangles.
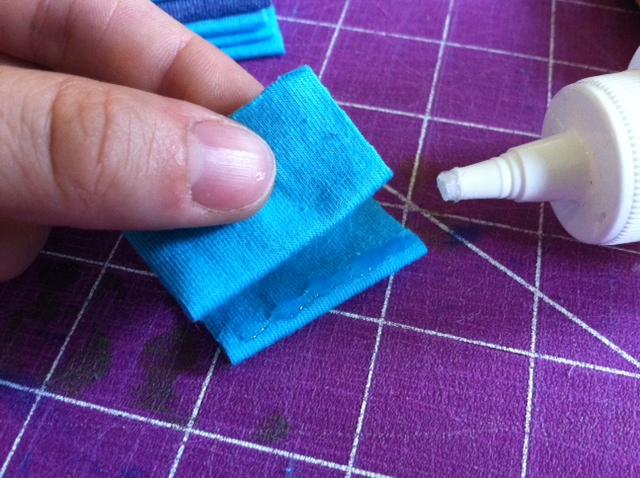
4. Squeeze a thin line of glue close to the folded edge of one of the rectangles and press another folded rectangle over it.
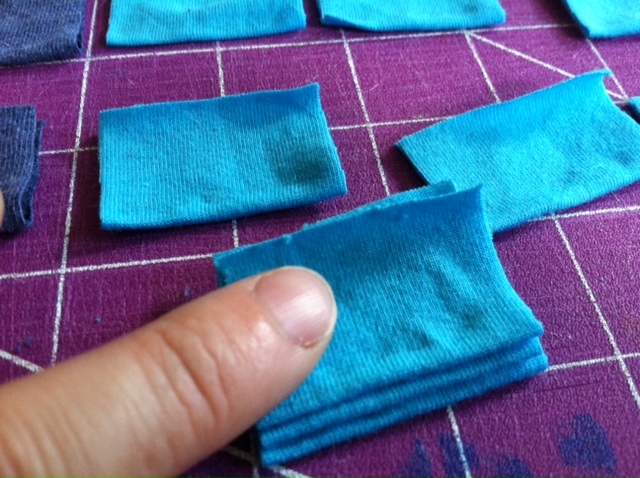
5. Repeat step 4 as many times as needed, to attach more rectangles together and create the necklace piece. (Arrange different colors to create a pattern!) Reserve two folded rectangles to use in step 7.
6. Let the necklace piece dry, then touch up any gaps as desired.
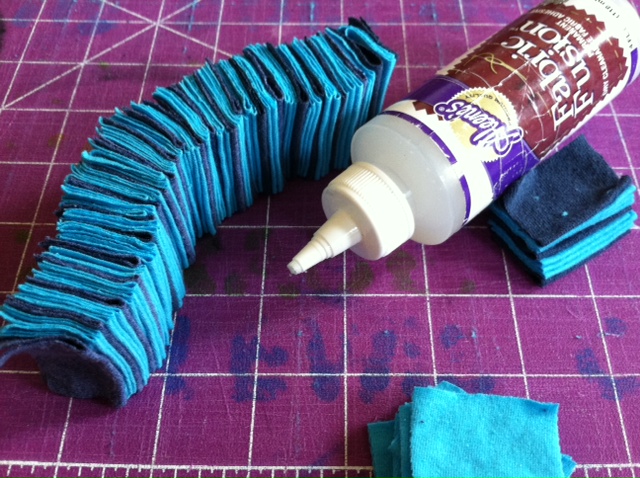
7. Spread glue along the end of a long T-shirt strip or ribbon (shown here), and center and press it along one of the spare rectangles from step 5.
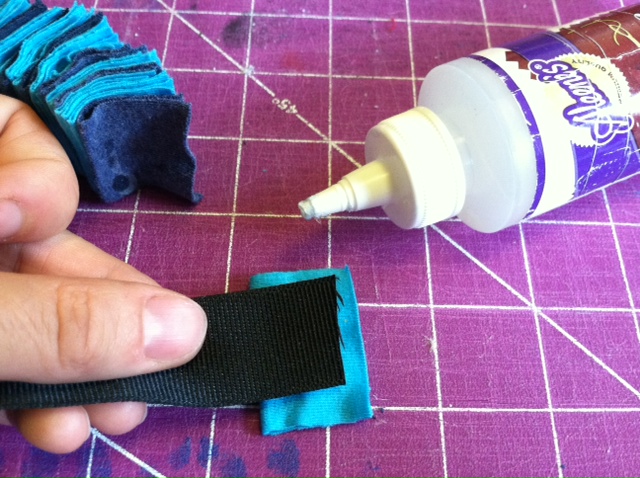
8. Then add more glue to the ribbon and press it against one end of the necklace piece, aligning the T-shirt rectangles (the ribbon end should be sandwiched in between T-shirt material). Repeat on the opposite end of the necklace piece. Let dry completely. Then snip the T-shirt strip or ribbon in the middle so you have two ends for tying.

9. Tie the ends in a bow at the back of your neck.
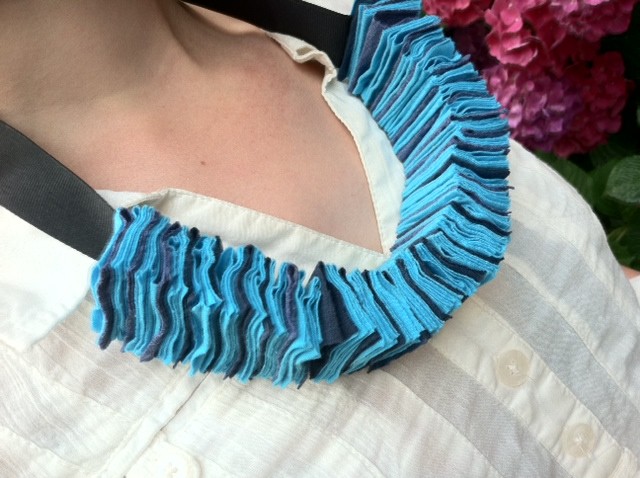
Variations:
-Experiment by making smaller rectangles for a more delicate piece (you can make a necklace this way, or, I made an accompanying bracelet using 1" x 1 1/2" rectangles).
-Use chain in place of the fabric fastener. (I like the idea of an all-white necklace piece with a gold tone chain.)
-Try wearing it as a headpiece! (My sister's boyfriend tied the necklace around his head as a joke, but with the right messy up-do, it could be quite the statement piece.)
-Play with color: Make the red-white-blue version mentioned above, use the color scheme from your favorite sports team to wear to the next game, or craft a rainbow to brighten your day!
Tune in later this week over at Generation T to see the second necklace I made using the scraps left over from this one--super easy, super fast, and also no-sew (no-glue, even!).


Materials:
-T-shirt scraps (sleeves work well!), including one long one to use as the fastener
-Rotary cutter and cutting mat
-Quilting ruler
-Aleene's Fabric Fusion glue
-Ribbon (optional, in place of the long piece of T-shirt scrap to fasten the necklace)

Make it:
1. Cut 1 1/2"-wide strips from the T-shirt scraps.

2. Cut the strips into 2" pieces to make rectangles that are 1 1/2" x 2". (I cut about 124 rectangles in two different colors to make an approximately 9"-long necklace segment.)

3. Lay one of the rectangles flat, wrong side up, and spread a thin line of glue slightly off-center and parallel to the short ends. Fold it in half so that the glue line retains the crease. Let the glue dry and repeat for the remaining rectangles.

4. Squeeze a thin line of glue close to the folded edge of one of the rectangles and press another folded rectangle over it.

5. Repeat step 4 as many times as needed, to attach more rectangles together and create the necklace piece. (Arrange different colors to create a pattern!) Reserve two folded rectangles to use in step 7.

6. Let the necklace piece dry, then touch up any gaps as desired.

7. Spread glue along the end of a long T-shirt strip or ribbon (shown here), and center and press it along one of the spare rectangles from step 5.

8. Then add more glue to the ribbon and press it against one end of the necklace piece, aligning the T-shirt rectangles (the ribbon end should be sandwiched in between T-shirt material). Repeat on the opposite end of the necklace piece. Let dry completely. Then snip the T-shirt strip or ribbon in the middle so you have two ends for tying.

9. Tie the ends in a bow at the back of your neck.

Variations:
-Experiment by making smaller rectangles for a more delicate piece (you can make a necklace this way, or, I made an accompanying bracelet using 1" x 1 1/2" rectangles).
-Use chain in place of the fabric fastener. (I like the idea of an all-white necklace piece with a gold tone chain.)
-Try wearing it as a headpiece! (My sister's boyfriend tied the necklace around his head as a joke, but with the right messy up-do, it could be quite the statement piece.)
-Play with color: Make the red-white-blue version mentioned above, use the color scheme from your favorite sports team to wear to the next game, or craft a rainbow to brighten your day!
Tune in later this week over at Generation T to see the second necklace I made using the scraps left over from this one--super easy, super fast, and also no-sew (no-glue, even!).

Monday, June 21
Starlight Luminaries Mason Jar DIY
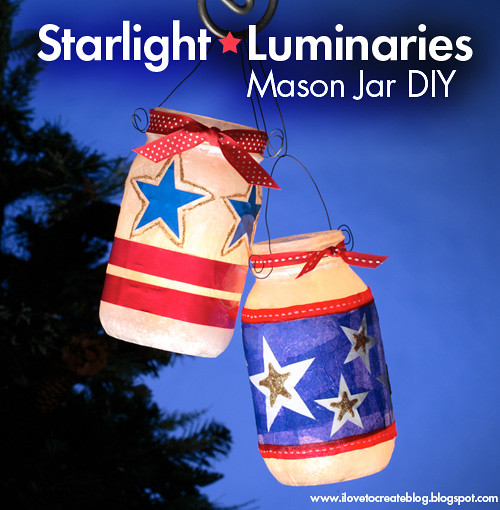
After the fireworks show, light up the night with your creativity! These Starlight Luminaries make the perfect outdoor accent! Dress up old jars with colorful tissue paper and ribbons glued on with Collage Pauge Instant Decoupage™; hang them outdoors for décor that’ll have everyone in the holiday spirit!
Starlight Luminaries
Designed and Decorated by Cheryl Ball
Materials
– Tulip® 3D Fashion Paint™ in 65088 Gold
– Collage Pauge® Instant Decoupage
– Aleene’s® Quick Dry Tacky Glue™
– Foil
– Wire
– Scissors
– Wax paper
– Tissue paper or light cardstock, red, white, & blue
– Glass mason jars
– Plastic
Instructions
1. Protect work surface with plastic bag or paper. Cover immediate area where the jars will be with wax paper.
2. Wash and dry jars.
3. Cut or tear larger pieces of white tissue paper. Cut red and blue tissue paper into strips or stars. Cut enough to wrap around jars.
4. Pour the Matte Collage Pauge Instant Decoupage™ onto foil. Brush onto the jar working on one area at a time. Place white tissue paper onto the jar and brush decoupage onto top of paper. Wet finger in the decoupage and flatten the paper working out any wrinkles or bubbles and make sure the paper is secure all the way around to the back. Cover the whole jar with white tissue in this manner.
5. Choose a strip of red or piece of blue. Apply to the jar in the same method described above but placing so that you achieve the stars or stripes designs. Let dry.
6. Embellish with Tulip® 3D Fashion Paint Gold Glitter.
7. Wrap top of jar with wire to hang.
8. Using the Aleene's® Quick Dry Tacky Glue™, glue on ribbon around jar and at top.
Here's another great design example!
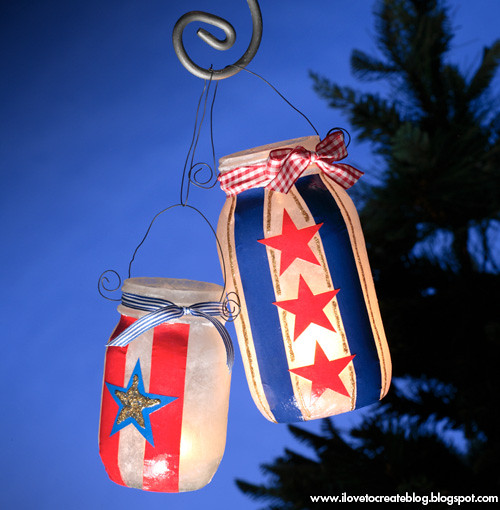
Happy crafting!
Subscribe to:
Posts (Atom)

