Showing posts with label DIY Style. Show all posts

Tuesday, July 21

Abstract Tie Dye Comfy Dress (with pockets!)


As any girl can tell you dresses can be way comfy. Especially loose, flowy dresses. Add in pockets and you're extra special lucky because that my friends is the perfect dress. My perfect dress quickly got stained and so it met up with some Tulip tie dye and I must say that it's the prettiest dress I have in my closet these days!


Tuesday, July 7

Bright & Colorful Tulle Skirt with Colorshot


I have wanted a tulle skirt for quite some time. But I ran into a few issues... either they were too expensive or not the color I was looking for. When Tulip Colorshot sprays came out I fell in love with the blue color and knew I wanted my very first tutu since I was in elementary school to be that very color! In the end my tulle skirt is pretty and colorful and just what I was hoping for!


Tuesday, June 16

Color Shot Lace Shorts Tutorial

Right now I'm really into pastels. My favorite shorts are a pretty light apricot. So preppy. So pretty!

Since I literally have a pair in every color that was available I thought it might be neat to spiffy up a pair by spray painting a lace pattern on with Colorshot. I went with my least favorite color just in case this didn't pan out as hoped, because sometimes it doesn't. Luckily this time it did!

Tuesday, May 19

Random Rainbow White Jeans with Color Shot!


Maybe it's because I was a kid in the 80's but I absolutely love white denim. You'd think I'd love acid wash jeans but I don't. Just no. I ordered a pair of white skinny jeans off of the internet and I wasn't quite as happy with them as I had thought I would be. Rather than return them I thought I'd DIY them and now I've got a pair of random rainbow white jeans that are pretty fab and totally one of a kind!


This project is so simple and so much fun and uses Tulip Color Shot. This stuff is amazing and one of my newest craft obsessions. I'm going to be painting up everything. Just you wait and see! But let's start with these fabulous technicolor trousers.


Tuesday, April 21

Zentangle® Sneakers


If you're crafty I'm sure you've heard of Zentangle®. I spent the longest time, and I do mean LONGEST trying to resist the doodling fad. But one day I decided to borrow a book from the library when I couldn't find anything else I wanted to take home. 


I got after it wit a piece of pink construction paper and my purple glitter pen. It looked like a tween was working it but it was so much fun. That was 1 week ago. And now I'm obsessed with two different notebooks and a good gazillion black markers to doodle my Zentangles® with. It seemed only  natural that I'd get after a pair of sneakers before too long. I held out 7 whole days!

Tuesday, March 17

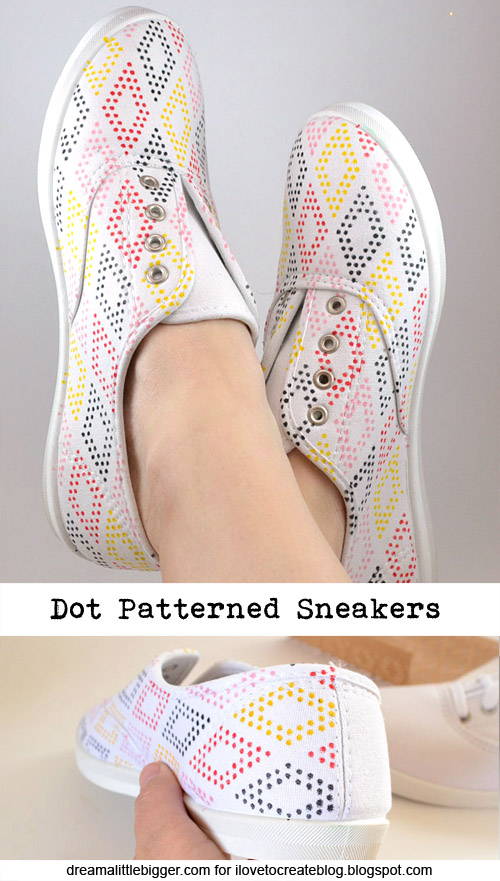
DIY Dot Patterned Sneakers

header-diamond-dot-shoes-dreamalittlebigger 
Some days you've got it and some days you don't These shoes weren't my first or even second attempt to get a very foggy idea I had come up with and decided I needed. Red, yellow, pink and black diamonds. 
My first effort was comical and looked circus ready. My second I ditched the color for all black and then realized that though neat looking, weren't what I was going for. Just like Goldilocks, the third try was just right!

002-diamond-dot-shoes-dreamalittlebigger 
Grab a pair of white sneakers and
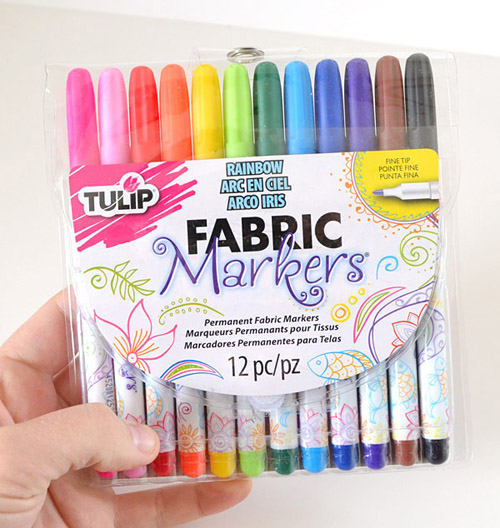
your Tulip Fabric Markers and let's get to it!

Tuesday, January 6

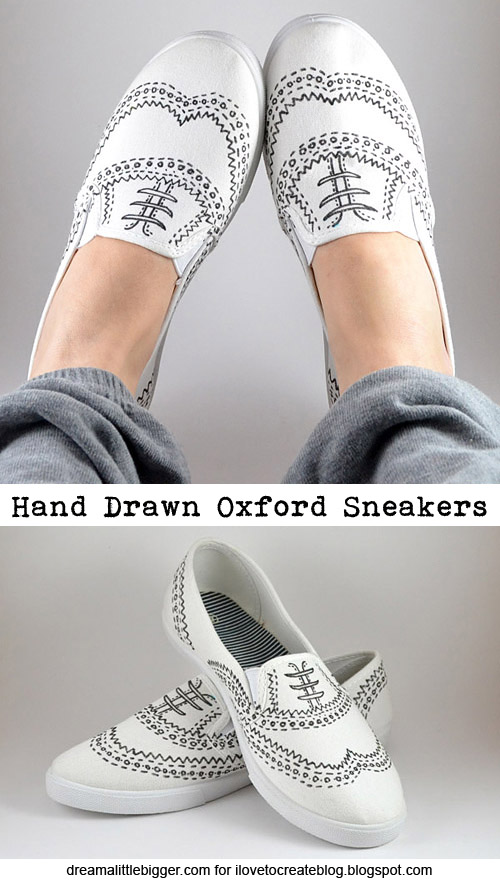
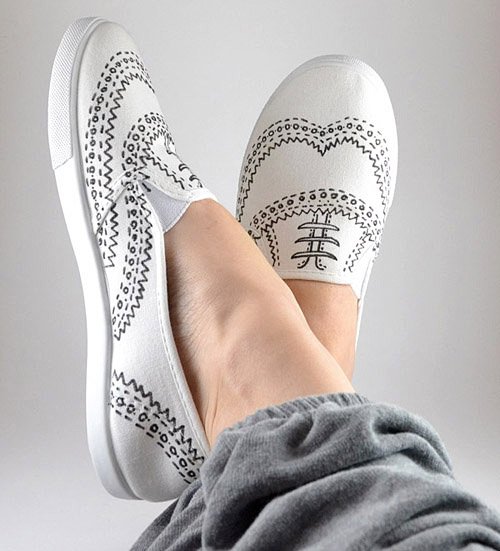
Hand Drawn Oxford Sneakers

header-hand-drawn-oxfords-dreamalittlebigger

You might recall that I have a bit of a "thing" with shoes. I love them and I often window shop for them online. One of my very favorite pair of shoes that weren't DIY are my ASPCA kitty cat Vans. Perhaps I'm just a Vans fan because when I saw these oxford drawn sneakers at We Heart It I was instantly smitten. And when I couldn't find them to buy I went DIY of course!


011-hand-drawn-oxfords-dreamalittlebigger

Monday, January 5

13 Fashionable Fabric Glue DIYs For You


I don't pay attention to high fashion as much as I wish I did. There used to be a time when I kept my eyes peeled to see what killer new looks I could DIY myself. But luckily these fab bloggers do pay attention to the world of fashion and have some great tutorials showing you how to keep your wardrobe in the know on the cheap.

Tuesday, November 18

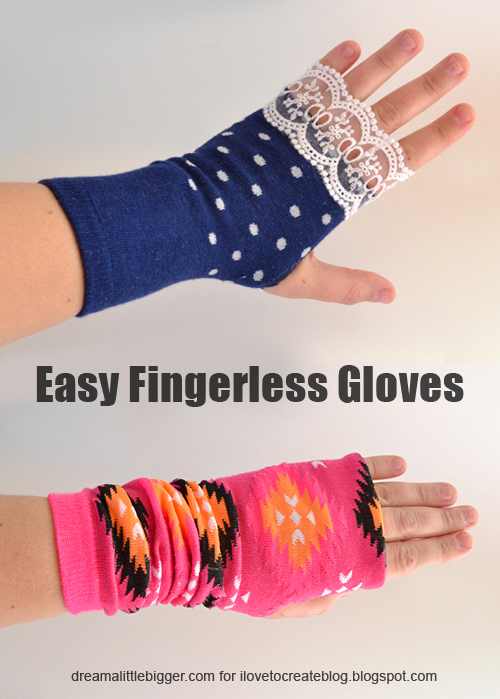
Easy Fingerless Gloves Tutorial

header-fingerless-gloves-from-socks-dreamalittlebigger
My hands get really cold come the winter and for some reason my office is like an ice box if it's lower than 50 degrees outside. Since I still have to work even if my hands feel like ice cubes, I've started wearing fingerless gloves. And when I realized I could make my own, my collection grew like you wouldn't believe!

Tuesday, August 19

Artisan Tie Dyed Hobo Bags

I have loved tie dye for as long as I can remember. When I was a kid my dad pulled over to buy my sister and me a tie dyed shirt out of a VW van. I still wear that tie dye today. As an adult I've not been deterred by tie dye at all. I LOVE it. The bright colors, the unexpected results all add up to one amazing way to pep up one's wardrobe. 

After meeting the guy who used to tour with The Dead (yep, The Grateful Dead) as their official tie dye artist and chatting up all things tie dye I learned to appreciate even more that this isn't just a crafty hobby, but an art form. The Artisan Tie Dye Kits from Tulip are perfect for professional, artistic results!

Friday, June 27

How To No Sew 4th of July bandana pocket

 
Lately I have noticed so many trendy stores selling shirts with contrasting "statement" pockets. I really like this trend!  I think it adds a fun pop of color and visually adds something a little interesting to what could potentially be a plain ol' boring tee shirt.  

Monday, June 23

Asymmetrical Off the Shoulder Galaxy Shirt Tutorial

This week has been chock full on firsts for me. I bought my very first dress form --> her name is Lola; she was a showgirl. I made my very first galaxy tee. And now I'm sharing my very first ever cut up tee tutorial. 

I LOVE cutting up tee shirts. It's amazing how something slouchy and unflattering can become something form fitting and chic. And I know some equate tee shirt makeover with skimpy but that just doesn't have to be the case. Though I tend to wear some off the wall things, I'm pretty conservative in my wardrobe tastes. As I was told very recently, "40 is the new 30 and you're dressing like you're 40, girl." And this shirt is totally made over but even an ultra conservative girl is gonna rock it even with some age appropriate bermuda shorts :)

Tuesday, April 15

Sweet Chambray Sneakers Tutorial


I love sneakers and the cheaper the better, I say. Since I go through shoes hard and fast there is no reason to spend 50 bucks on a pair of name brand sneaks that are going to be hitting pavement so hard that they are worn out in a month or so. And when I saw these cheapies over at Wal-Mart for less than $6, I knew just what to do!


Monday, January 6

Sparkling Sweatshirt DIY

 A few years back I was working on a new logo with my mother who is an amazing graphic designer.  One of the ideas we were exploring was using my brand name letters around a collar like a necklace. I loved the logo, but ended up going with something else.  Still, that idea of letters forming a collar stuck with me.  Flash forward to this week and a sweatshirt I scored at Target for under six bucks on clearance.  It's so soft and comfy and made of recycled plastic bottles, so it's eco friendly to boot!  I loved this sweatshirt hack from Crafty Chica, so I decided to work a little crafty magic using Tulip and Aleene's products, creating a virtual collar and bracelets.  I love how this turned out!

Thursday, November 7

Easy Beaded Moccasins Tutorial


When I was a kid I wore lots and lots of moccasins  and  couldn't be more pleased that they're back in style. But when things are "in" they are also often "expensive". I wanted some too cute beaded moccasins but since the price didn't agree with me, I decided to do what I do... I DIYed a pair on the cheap.

Wednesday, October 9

DIY Screen Printed Good Witch Tote Bag

 Are you a good witch or a bad witch? You'll definitely be a Chic Witch when you screen print and embellish your own faBOOlous DIY Good Witch Tote Bag!  The Tulip Screen-It Machine makes it super easy to custom create and burn your own screens that you can use to print on all sorts of surfaces.  Add a little Tulip Beads in a Bottle glitter accent, some seasonally apropos decorative trims and you'll be absolutely enchanting.

Wednesday, June 26

DIY American Flag-Inspired Shorts


Fourth of July is right around the corner, and if you're like me you want to look fly for the holiday weekend..
.
because let's face it Jeshua...you're single and you need to make an effort... at some point.  
 -_-


The other day I was shopping at an overpriced boutique store - and by shopping, I mean looking at everything saying "I could make that"- and I came across some denim cut-offs with an American (USA) Flag pattern painted on it.

I decided to do my own take on the painted denim. It's subtle enough to be worn all summer long and patriotic enough to be an Independence Day statement piece.

– A pair of denim shorts
– Sand paper
– Painter's tape

DIY Glittered Body Art

Whenever I am at the boardwalk I see booths set up where you can get temporary glitter tattoos or other kinds of body art. As a little kid the thought of having glitter and butterflies all over my arms and face sounded rather delightful. Tulip’s body art is great because instead of paying someone for a one time tattoo you can get multiple stencils and colors that can be used time and time again. It is great for going to the beach, the pool, a party, or a sleepover with your friends. I have wanted to showcase Tulip Body Art in a tutorial for a long time now, so I hope you enjoy it and make some awesome designs of your own! 
What you need:
Tulip Body Art Kit:
Blue Glitter
Silver Glitter
Adhesive
Small brush
Large brush
Dragonfly Stencil
Body Crystals
Remove stencil from backing and adhere to skin.  Rub gently to make sure there are no air pockets.
Brush glue on open areas of stencil.  We left stencil on for the next step, you can opt to remove it according to instructions.
Dip brush into glitter and pounce/pat into stencil. A generous helping is good!  We used blue for the body, head and wing tips and silver for the inside of the wings.  You have to work quickly or the glue will dry. It is similar to eyelash adhesive.
Remove stencil.  Use larger brush to gently brush off any excess glitter.
Use tweezers, pliers or a crayon to pick up crystals.  Dip them into glue and gently adhere to eyes of dragonfly.  Add more if you like!
That's it!  These are so easy and fun!  I'm going to bring them to my next sleepover and share them with my BFF!  I really love them and best of all, I love that they last several days, but not forever.  
We'd love to see what you do with Tulip Body Art!  Visit us on Facebook and share your photos.  And visit my mom at DIY Doyenne for more fashion and style!

Clicky Web Analytics
Pin It button on image hover

Subscribe to our newsletter

* indicates required
I am interested in products and inspiration for...
Close