I'm here at the iLoveToCreate headquarters in the design studio and I came across a huge bin o f tie-dye cast-off shirts. My first thought - gift bags! THe best thing about these is that you don't even need to sew - we're using Aleene's® Fabric Fusion® Peel & Stick Tape™!
Tulip Fashion Glitter sheets open up a world of DIY possibilities. They can be punched and cut into all sorts of wonderful shapes, layered up and ironed on to t-shirts, pillows, throws, jackets, curtains and more. I was inspired again by my favorite vintage Christmas ornaments, this time playing with the iconic mid-century modern shapes. Just cut some out of paper (you can find templates online if hand drawing isn't your thing,) trace and cut the sheets, punch and cut accents, layer it all up and iron it on. UseTulip fabric markers to add a few hand drawn details and you've got a boutique chic one of a kind DIY t-shirt that teens will love!
Happy Saturday everyone! Check out this video by our very own brand specialist Chloe Tatro. Chloe shares how to make these adorable and fun polka dot ornaments using clear glass ornaments and Tulip 3D Fashion Paint a.k.a. Puffy Paint! Watch below to see just how simple it is to make these sweet ornaments!
I've been wanting to try all kinds of nail art but the problem is that I can't grow my nails long! I was looking on Pinterest the other day and saw that a lot of people are buying the press-on nails and decorating them. You can buy a set of 100 nails for under $6 at the grocery store, that is right in my price range!
What I like best about this method is that you can decorate the nails on a table instead of on your fingers, which gives you more control. And you can pop them on and off as you like. Think of them as jewelry that you can make and switch in and out as you wish.
Here is something I didn't think of - I bought the loose nails as opposed to the ones connected to a strip of plastic. No prob, I just used a strip ofAleene's® Fabric Fusion® Peel and Stick Tape™ to hold down the nails as I painted them. Choose the nails by trying them on your finger to get the right size, trim with scissors if needed.
Paint the base coat with nail polish, then clear polish and let dry. Add a tiny dot of Puffy Paint, then use the tweezers to pick up a crystal and drop in the center of the paint. Do this for all the nails and let dry.
When they're dry, simply pop them off, add the nail glue and press on your fingertips. I decorated two sets and mixed and matched them. It's addicting! And you can do a set to give as a gift for Christmas.
Here is Jasen, an iLTC team member. His wife made his Ugly Christmas Sweater and he won the company contest! Yes, that tie lights up and blinks...
In case you haven't noticed, Ugly Christmas Sweaters have invaded the holiday season more than ever. Chances are by now you've been invited to an UCS party or contest, right? We're here to help. If you are lazy, you can be boring and buy a ready-to-go version from UrbanOutfitters, or if you want a dash of elegance (ha!) you can attempt to spin the trend high fashion... like Katy Perry did this week.
However, we here at iLoveToCreate not only appreciate the ugly Christmas sweater (we even held an employee contest last year), but we celebrate this awkward trend because of all the crafty elements! Seriously, check out this Etsy store that features "handcrafted" Ugly Christmas Sweaters, priced at $75 and up! And this is just one outlet, there are many others online if you search.
However, we say that if you are going to rock an UCS, go full-throttle and make your own version! Check out this video by dapper NBC reporter, Ben Aaron. By the way, Ben - we invite you to our design studio to make your next craft project!!
"Last year my family decided to to mix things up and have an ugly
Christmas sweater competition," she says. "I made sweaters for my husband and
myself. Mine was voted cutest and his ugliest. My
advice for making a Christmas sweater is to decide on a theme and push
it to the limit."
Here is Brandi from iLTC, she took a sweater vest and glued a door hanger tothe center and then used Tulip 3D glitter Paint to add accents galore.
TIPS: - Think cheap. Visit the local thrift store and dollar store for your accessories. Even if you can't find a holiday sweater, just go with a basic sweater or sweatshirt. - Big work surface! Clear a table and have good lighting so you can have room to get down and crafty. - A good STRONG GLUE - Aleene's Turbo Tacky will do the trick. - Choose a theme. Your sweater will make more of a statement if there is a kooky story behind it. - A centerpiece design - You can print this out on fabric paper or from a t-shirt. Or you can even start with a basic sweater that already has a design and go from there. And think dimensional - use a stuffed animal or plastic decoration. It's not like you'll be laundering the sweater, go all the way and think BIG and GAUDY! - Sparkle. Glue on some tinsel, glittered ornaments, and even battery oerpated blinking lights. - Comfort. If you want to take your sweater off during the party, you might want to go with a button up garment so you can easily remove it. - Accents: Use Puffy Paint, felt, buttons, garland, paper cutouts, small toys, etc. Heck, even holiday coffee cups, why not?
Have you made an Ugly Christmas Sweater? Please share a link to your picture! We want to see!
1. Tree in a jar. Earlier this month I had a whirlwind trip to Miami and spent an evening window shopping with my friend, Pearmama. We wandered into Anthropologie and I gasped when I saw these fun jar decorations. They're made from Mason jars, mini-jars and salt shakers. They're filled with faux snow and have a little object inside. No water, glycerin, etc. Pretty simple. Priced starting at $18, I knew I wanted to come home and make some.
2. Also spotted - these hanging glass dome ornaments! They look like little fish bowls turned upside down and glued to cardboard. I got all excited and realized...I've actually made and shared several jar crafts! Here are my versions and then I'll show you some others I found online and from my crafty amigas! I think we should all make jar crafts this season!
3. Bottle Picture Frame. This is a Starbucks Frapuccino jar. I removed the label and inserted a family photo with some other objects. I used rub-on letters and accents and then tied a little medal at the front.
4. Candle Jar Shrine. These little shrines, I assembled using glass candles holders (you can also use small juice glasses). I didn't only decorate the inside, but also on top too! Here are the project directions.
5. Message in a Jar. Also this month, I helped organize the 3rd Annual Phoenix Craft Rave. My co-organizer, Cyndi Coon,
hosted a DIY make-and-take project called "Message in a Jar." This was
sooo cute, people loved it. This would be a great project for a girls
night out craft or a wedding shower, etc. Here is a little video I
recorded for you! (Pardon my shaky camera skills).
Her mom makes them every year and fills them with memory objects!
Photo by Taylor Swift.
7. Snowglobe in a Jar. Us crafties have been making these for years, but Taylor Swift gave them a new sense of popularity when she made these for her friends and posted it on her Facebook page last year. Need a tutorial? I have one!
Soooo...are you inspired to use jars n your crafting this season? What are you planning to make? Wouldn't it be fun to incorporate glass etching too? Which is your favorite jar craft? What else can you do with jars? Am I overloading you with questions?
We had a wicked nor'easter blow through the East Coast last week, and
though the snow pile-up lasted less than twenty-four hours, it sure put
me in the mood for winter. So
with the holidays upon us, I decided to make some
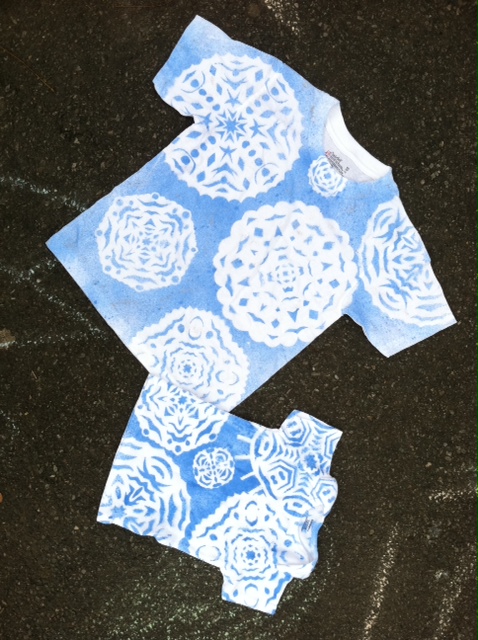
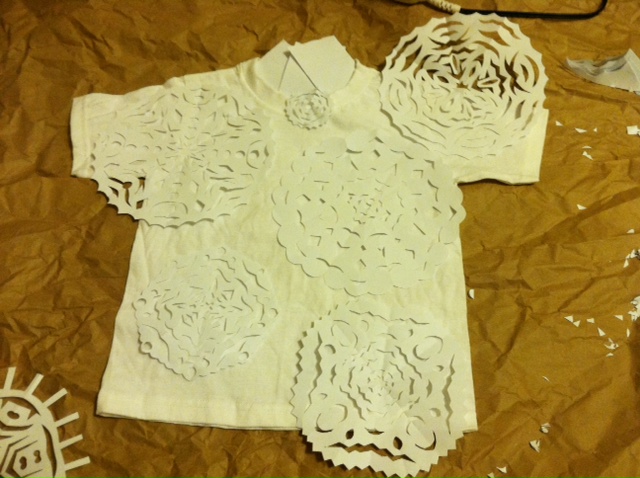
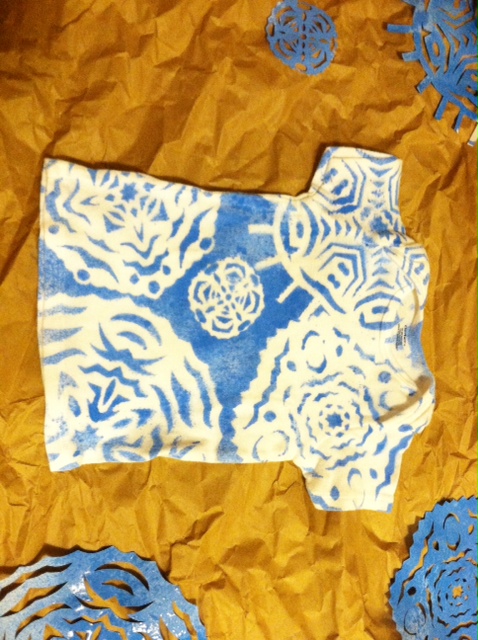
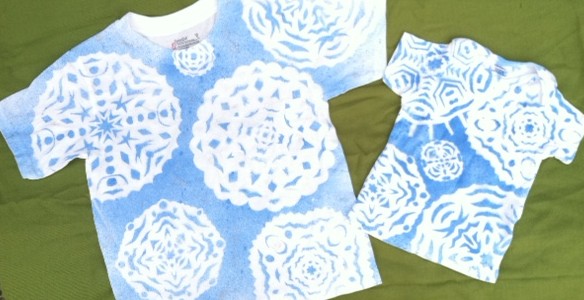
wintery-themed T-shirts for the two young cousins (note: these tees can be made in adult sizes, too)--a
little something to wear inside when it's too cold outside! And a nice
alternative to the ubiquitous holiday sweater, don't you think?
Make it: 1.
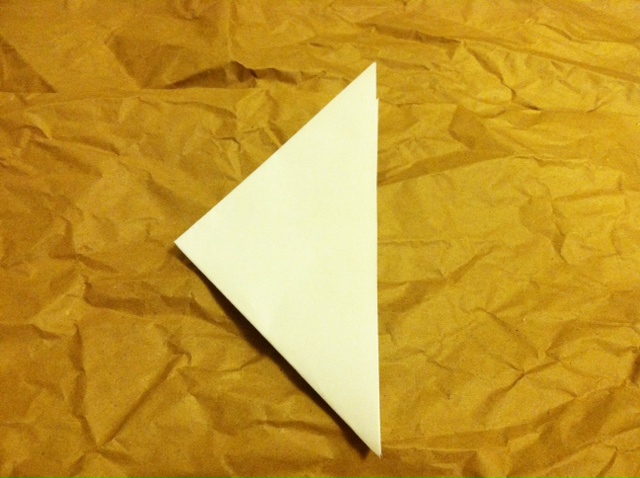
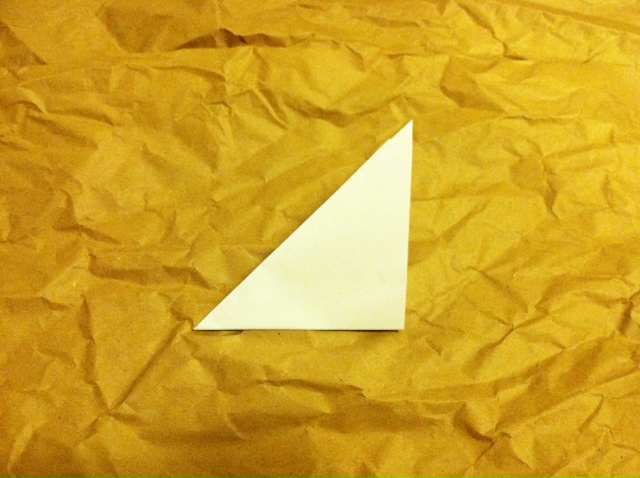
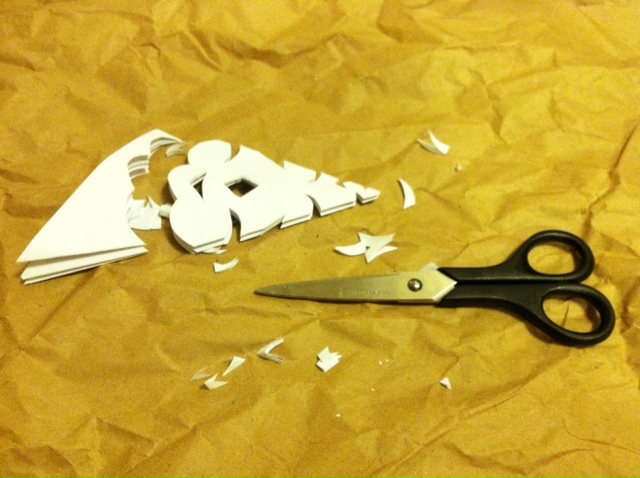
Fold one of the sheets of paper on a diagonal to "square" it. Use scissors to cut off the excess strip of paper. 2. Bring the lower left corner up to fold the triangle in half again. 3. And again! 4. Use your scissors to start cutting notches along the folded
edges: zigzags, circles, crescents, curls, diamonds, and so on! Don't
forget to cut the open edges in an arc, so that the snowflake will be
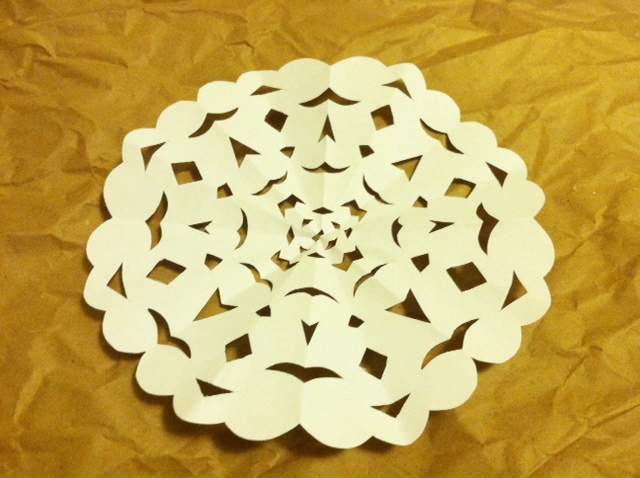
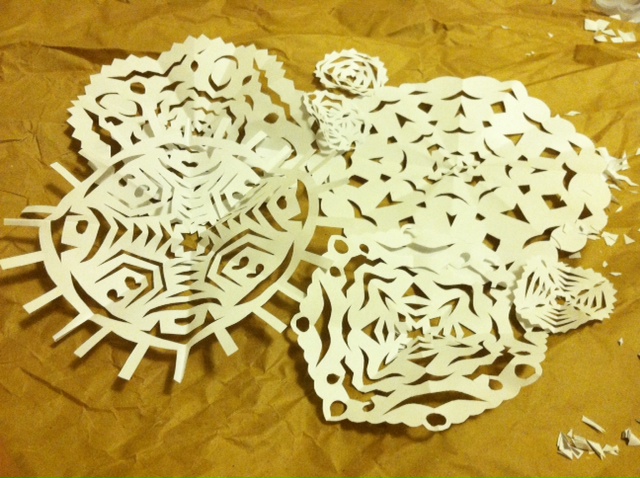
somewhat round in appearance when you unfold. 5. Unfold! 6. Repeat to make many snowflakes (no two will be alike)!
7. Lay the T-shirt flat on your work surface. Arrange the
snowflakes onto the front, and press them with a warm iron to keep them
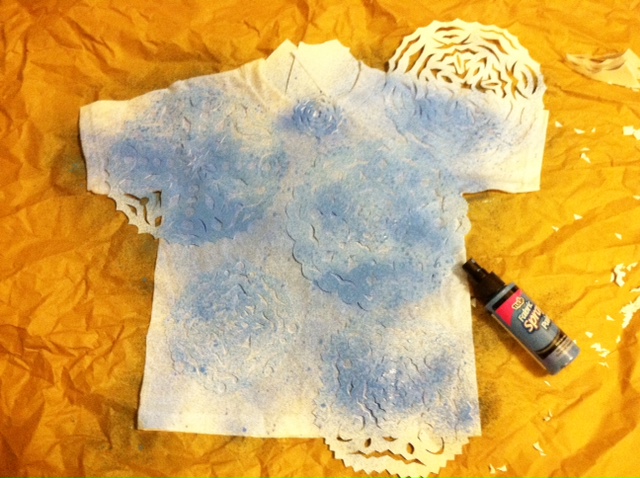
relatively flat. (Note: The weight of the spray paint will actually help
them stay flat, too.)
8. Lightly spray blue paint over the entire T-shirt (I masked the inside back neckband with paper scraps).
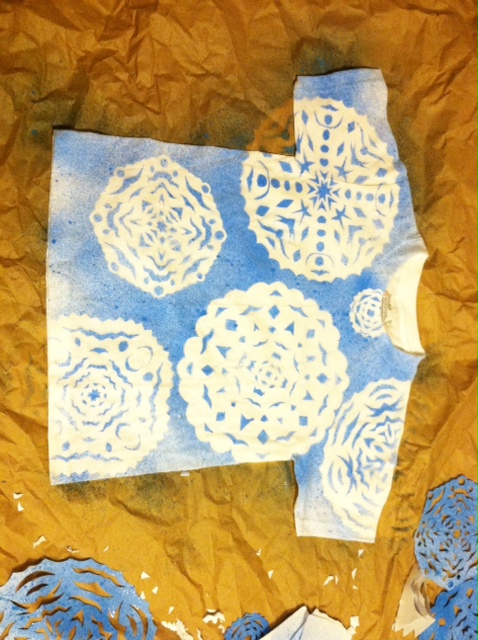
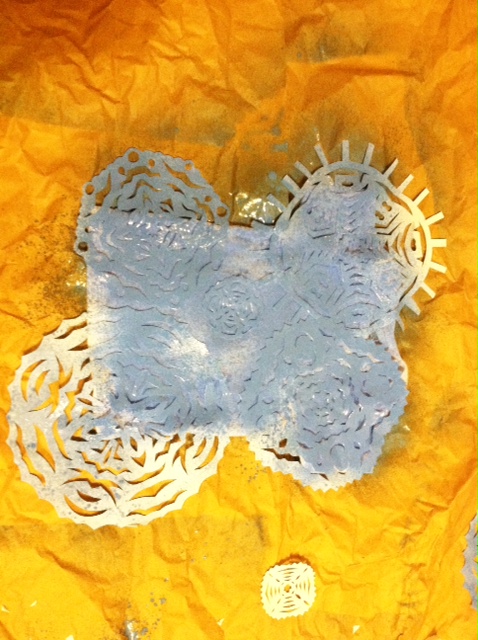
9. Carefully peel off the snowflakes and set them aside. Let the T-shirt dry.
10. Reuse the snowflakes to make T-shirt number two!
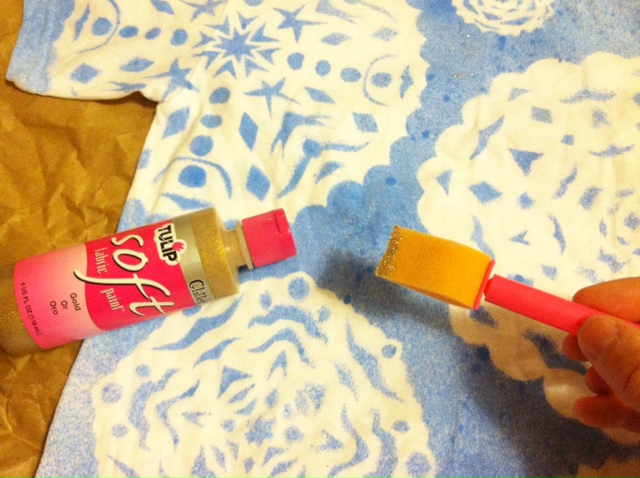
Optional: Use the foam brush and glitter paint to add sparkly highlights to the snowflakes.
Let dry, then try on the shirt (or gift it to its recipient!), and curl up by the fire, knowing these snowflakes will never melt.
This skirt was totally inspired by a Kate Spade skirt that I saw. Of course, I could never come close to making a skirt as wonderful as something in the designer's line, but I think it turned out really nice! If you look close, you'll see how cool the shimmer paint looks, and you just might fall in love like I did. Go to the iLoveToCreate website for the instructions. It's not too late to make it yourself, and wear to that fun little St. Patrick's day party coming up!....


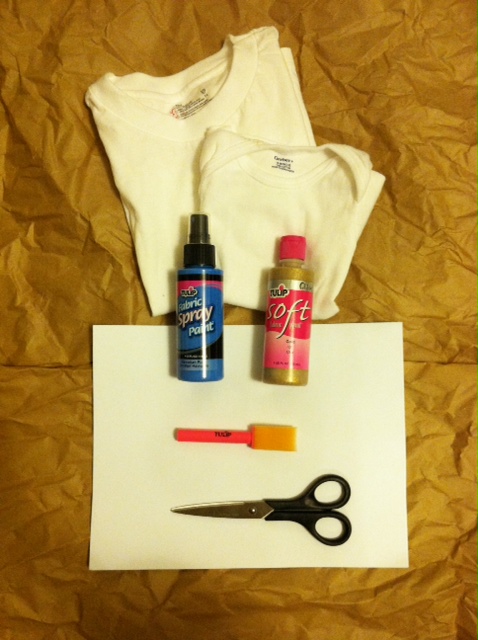 Materials: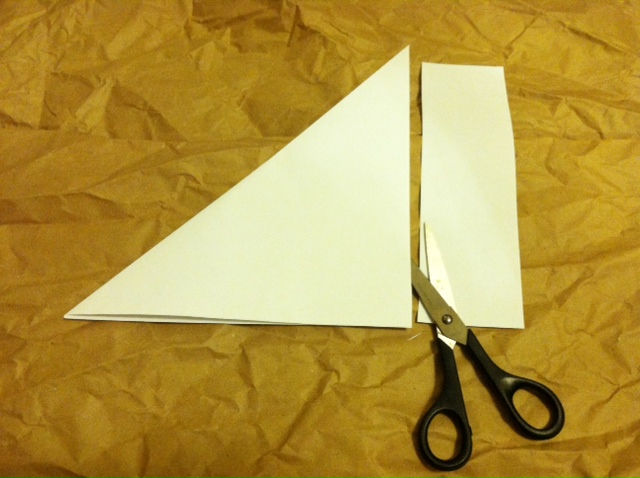



 Some of the best crafty bloggers around were sent some of our brand new Aleene's Dry Adhesives (now available at Michaels stores) to try out on their blogs! We wanted to share with you their super crafty and clever projects they came up with!
 1. Santa Tags and Gift Toppers with Oopsie Daisy
  4. Christmas Hershey Kisses with Craftaholics Anonymous
 7. Corrugated Cardboard Snowman Ornaments from Crafts by Amanda
 13. Easy Christmas Frame Décor from Brown Paper Packages

