Showing posts with label cupcakes. Show all posts

Friday, March 13

Fused Ceramic Trays


I'm still going strong with ceramics! This time around, I played with Duncan EZ Strokes Translucent Underglazes, they are pure pigment and that got me pretty dang excited. I also had fun fusing these pieces together with Duncan French Dimensions to make jewelry or food trays!


Here is my video tutorial!

Friday, November 8

DIY Cupcake Ornaments


Wahoo! I don't know about you but I am super excited about Christmas being right around the corner. Yes, I do celebrate Thanksgiving but not in the normal way. Last night I took down all of my Christmas decorations from the attic and my goodness I was overwhelmed. But once I put my cupcake tree up everything got better.  

Let's go make some Cupcake Christmas Ornaments! 

Thursday, November 29

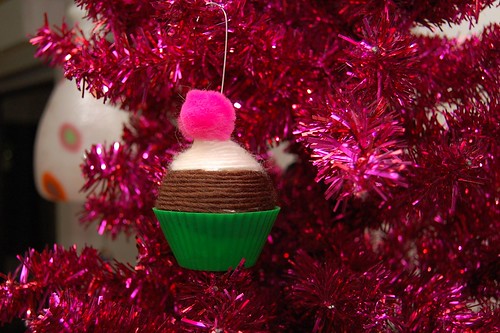
Yarn Wrapped Cupcake Ornament How-To

Christmas time is here! Finally I can start decorating the house and making crafty Christmas ornaments. Ok, the decorations have been up for a few weeks - but now I can openly talk about it. Today for I Love to Create I want to share a fun ornament I whipped up in about 5 minutes.

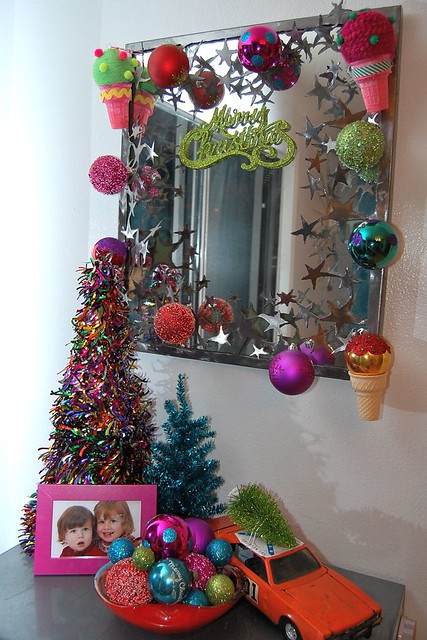
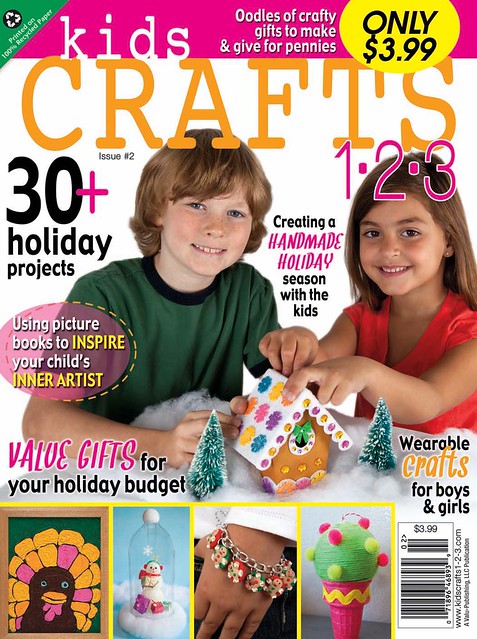
By now you have hopefully been to Walmart and gotten your hot little hands on a copy of Kids Crafts 1-2-3 the new magazine I am the editor for. I also happen to do a few of the crafts from time to time. You can see my handiwork on the cover with an ice cream cone Christmas ornament. The ornament is a yarn wrapped version of an ice cream cone ornament I did last year. I decided to roll with the sweet theme and go for a cupcake version!

SUPPLIES

Aleene's Tacky Glue

ornaments

Silicone cupcake liner

Scissors

Yarn

pom pom

The first thing you want to do is find ornaments that fit in your cupcake liners. Once you do that wrap your ornament in yarn. I went for a chocolate cupcake with vanilla icing look.

When your ornament is completely wrapped in yarn glue into your silicone cupcake liner. Feel free to add gem stone sprinkles or a pom pom cherry on top.

All that is left to do is hang from the tree. Now I need to figure out how to make a doughnut version of this ornament.

Tuesday, June 26

4th of July Platter - and a Sprinkles Cupcake Giftcard Giveaway!

4th of July cupcakes courtesy of Sprinkles.
The 4th of July is only a week away, but it's not too late to make some snazzy platters to hold your goodies. Here are two ideas of plates to create at your local paint-on-pottery shop! Special thanks to Sprinkles for donating the cupcakes for the photo - check the bottom of this post to enter in a giveaway!

You'll need to select some Duncan bisque, I went with an oblong platter and a large square one. And then you'll need Duncan Concepts Underglazes in red, white and blue. Brushes and Pure Brilliance Glaze are needed too. You can find all the product details here. 

 Base coat your platters as desired. I went with all white for one of them, and red and blue for the other. The contrast is nice once they are fired, they'll compliment each other!

 I used thin tape down the center of the platter and then used a Tulip Sponge Pouncer to create dots. For the outside, I used the tip of the paintbrush and made a hecka lot of polka dots!

 For the second platter, I used a Tulip Flexible Stencil and applied white paint with the pouncer. When you're finished, coat with two layers of Pure Brilliance and then fire at Cone 6.

GIVEAWAY: Leave a comment sharing what you'll be crafting up for the 4th of July and we'll draw one name on Friday to win a $20 gift card to Sprinkles Cupcakes

Friday, January 13

Fuzzy Slipper Makeover!


How many of you received a pair of fuzzy slippers this season? My son got me these and as soon as I saw them I knew exactly what I was going to do with them! I used my Crafty Chica Cupcake Applique ($1 here!) and Tulip Beads in a Bottle to bring them to life!!


Visit us on Facebook!
Craft on!

Thursday, December 15

Celebrate National Cupcake Day With Us! (Two Giveaways!)

Win this cupcake mug and platter set by leaving a comment below!

Happy National Cupcake Day!
To celebrate all things fluffy and frosted, we've collected all our favorite cupcake-themed projects and inspiration for you!

 In addition, we have TWO giveaways! The first is this ceramic mug and platter set that I painted. They each say "El Pastelito" (The Little Cake).

Win a dozen sprinkles cupcakes! Leave a comment below!
The other giveaway is a giftcard from Sprinkles Cupcakes for a dozen of their famous cupcakes.

To enter to win, simple leave a comment below sharing your favorite cupcake flavor, favorite cupcake craft, or personal cupcake memory! We'll randomly draw two names, one for each prize.
Deadline to enter is 11:59 pm PT, TODAY!

Alrighty, here is our cupcake round up! Enjoy!

10 Ways to Eat a Mini-Cupcake (giveaway chance, here too!)
Sweet Cupcake Apron
Yummy Cupcake Ornaments
Takes the Cake Gift Card Holder
Strawberry Cupcake
Sweet for the Sweets
Cupcake Apron
Cupcake Wrappers
Cutesy Cupcake Shirt
El Pastelito Greeting Card
Crafty Cupcake Dress-Up
Icing on the Cupcake Pillow
Cherry on Top Cupcake Apron
Wackilicious Candy Cupcakes
Sweet Savings
Sweet Things
Cupcake Tin Photo Frame
Tie Dye Cupcakes
Cupcake Scrubber Shrine
Crafty Chica's Cupcake Fight Story


Visit us on Facebook! Craft on!

Thursday, February 3

Crafty Cupcake Dress Up

Materials List

  • Tulip® Fashion Glitter™

    23554 Red Fine Jewel
  • Aleene's® Paper Glaze

  • Tulip® Multi-Surface Stencils™

    Hearts
  • Aleene's® Original Tacky Glue Sticks

  • Miscellaneous

    •   Tape
    •   Pencil
    •   Decorative edge scissors
    •   (2) Bamboo skewers
    •   Scissors
    •   Scrapbook paper – damask printed, chocolate brown, linen 

    Instructions

    1. For the cupcake sleeve, cut a band of damask printed scrapbook paper 2¼” high and 17” long. Glue two pieces together if needed, using Glue Stick. Fan-fold the paper into ¼” folds. Glue the ends together.
    2. For the cupcake poke, cut a rectangle of damask printed scrapbook paper 2¾” high and 3¼” wide to create the base piece.
    3. Cut a rectangle of chocolate brown scrapbook paper 2½” high and 3” wide, using decorative edge scissors. Glue to the center of the base piece.
    4. Peel the backing from Heart Stencil. Press the sticky stencil on the table and pull up several times to decrease the stickiness.
    5. Press the stencil on the linen colored scrapbook paper and trace the large heart with a pencil. Pull away stencil and cut out the heart. Glue the heart to the center of the base piece.
    6. Press the stencil on the linen colored heart with the heart swish in the corner. Apply Paper Glaze in the stencil and lift the stencil straight up to reveal the glue image.
    7. Pour Glitter over the glue. After a few minutes, tap the excess glitter onto a sheet of paper. Let dry.
    8. Apply Paper Glaze to the edges of the cupcake poke. Pour more glitter onto the sheet of paper. Dip the glazed edges into glitter, tap off the excess and pour back into the glitter bottle. Let dry.
    9. Attach a bamboo skewer to the back with tape.
    10. Place your fancy cupcake into the sleeve, and insert your cupcake poke into the top to complete your Cupcake Dress-up!

Visit us on Facebook!
Craft on! Click here for today's daily giveaway!

Friday, January 21

Icing on the Cupcake Pillow

 
Designed by Kathy Cano-Murillo
Whether in visual or edible form, cupcakes bring sweet smiles all around. Here’s an easy way to add a sweet touch to a girl’s bedroom. This project makes for a great activity for mothers, daughters, sisters and friends.

Materials List

  • Tulip® One-Step Fashion Dye™

    Fuchsia
  • Tulip® Glam-It-Up!™ Iron-On Fashion Designs™

    26635 Large Cupcake Pack
  • Miscellaneous

    •   Plastic wrap
    •   T-shirt – 100% cotton – Large
    •   12x12” pillow form
    •   Ruler
    •   Needle and thread
    •   Spray bottle
    •   Plastic tablecloth 

    Instructions

    1. Wash and dry T-shirt to remove sizing. Spread out shirt on plastic table cover and dampen with spray water bottle.
    2. Mix dye in bottle according to package directions and then pour into empty spray bottle. Spray bottom of the shirt until saturated.
    3. Fill bottle half way with water to dilute dye and spray middle of the shirt.
    4. Fill bottle to the top with water to further dilute and spray top part of shirt.
    5. Wrap shirt in plastic wrap, let set for 6-8 hours. Wash and dry.
    6. Set shirt flat on counter. Measure a 13x13” square in center of T-shirt and cut out through both layers of fabric.
    7. Turn the pieces inside out and sew up three sides.
    8. Turn right side out and iron flat. Adhere Tulip® Iron-On Fashion Designs according to package directions and where desired on pillow.
    9. Stuff with pillow form and sew an invisible seam to close the pillow.

Visit us on Facebook!
Craft on! Click here for today's daily giveaway!

Thursday, December 30

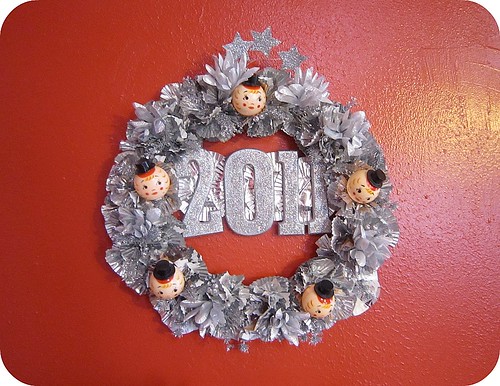
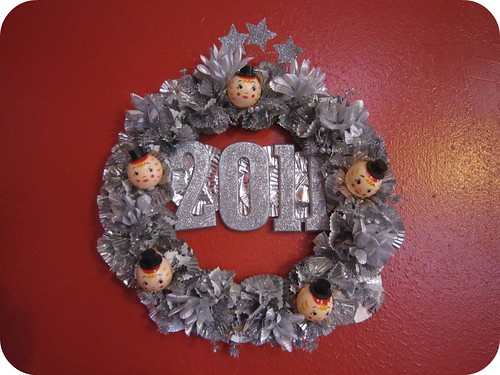
Cupcake Lined New Years Wreath


I have been on a bit of wreath making kit as of late and don't think for one minute I am going to let New Years Eve slip by without it's own wreath.  Time to bust out the cupcake wrappers, glitter and Homecoming Mum supplies - just trust me.


SUPPLIES
Foil Cupcake Liners
Faux Flowers
Hot Glue Gun
Plastic Baby New Years Dolls
Wooden Numbers
Scissors
Cardboard Cake Board
Craft Knife


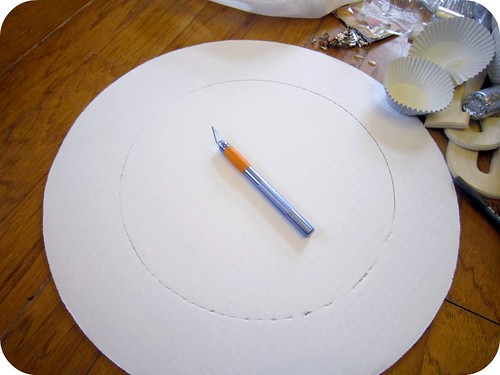
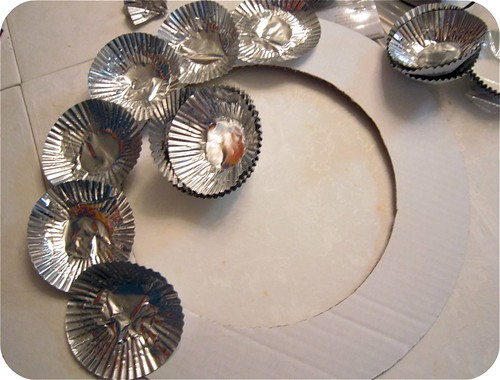
Recently I had a wreath making party with my friends Vickie and Noelle.  We had trouble locating blank wreath bases like we wanted so that clever Vickie scored us some cake boards to cut into wreath shapes instead.  I decided to steal this idea for my New Years wreath.  Cake Boards come in various sizes, choose which size you like best.  I went with a 16" diameter.  Use a bowl or small or mug to trace the inner circle of the wreath and a craft knife to cut out the circle.


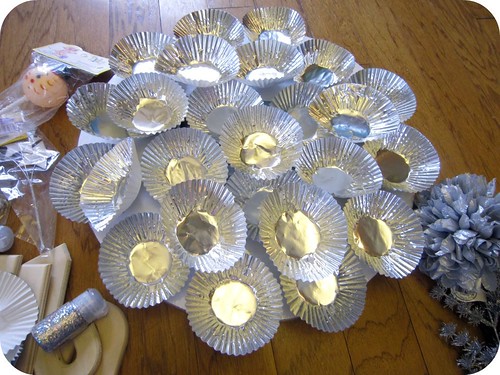
Foil cupcake liners are the sparkly secret weapon of this wreath.  Foil cupcake liners are white on the inside so you will need to turn several inside out.


Using a combination of hot glue gun and Liquid Fusion Glue my mother and I attached the cupcake liners to our new cake board base.  At first we just covered the cardboard in flat liners and then went back and added more folded and tweaked cupcake liners.


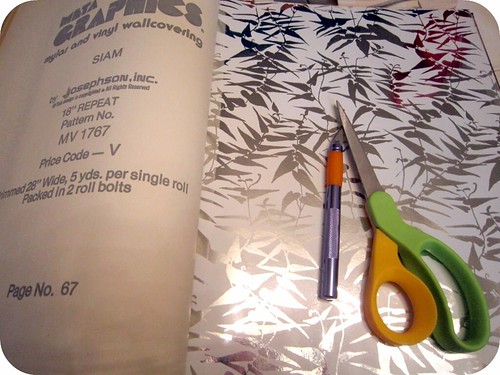
Along with cupcake liners we embellished the wreath with mirrored wall paper flowers, vintage doll rattles with top hats like Baby New Year, various Home Coming mum tid bits and whatever sparkly silver goodness we could find.


Once the wreath was totally filled in with silver ruffles a strip of cardboard left over from the cake board was added across the center of the wreath.


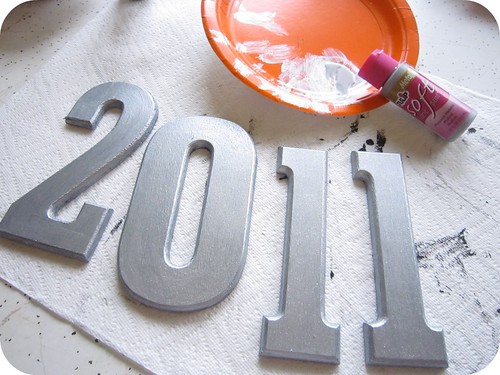
Tulip Fabric Paint says it is for fabric, but between you and me it works on wood too!  We painted the numbers 2011 silver and allowed to dry.


Once the paint was dry we coated the numbers with a thin coat of Liquid Fusion Glue and sprinkled with Tulip Fashion Glitter in Silver.


All that was left to do was add the silver glittery numbers to the center of the wreath.  Next year I will just pop off the 1 and a 2!


Check out more of my I Love to Create Projects.


Craft on! Click here for today's daily giveaway!

Thursday, May 20

Recycled Cardboard Cupcake Coozies


Tomorrow is my monthly mommy meet-up. Every month we get together, let the kiddlets frolic and eat snacks. Last month I brought a batch of cake pops and this month I thought I would go with plain old cupcakes. The cupcakes might be plain, but the custom cupcake wrappers are not.


I have made cupcake toppers a bazillion times and decided today for I Love to Create I would spice things up. It all started with my new issue of Green Craft Magazine and a project called From Trash to Treasure: Embellishments From Boxes by Lisa Guerin. Tune in Monday for a full magazine review (it's more like a book than a magazine) and a chance to win your own copy!


SUPPLIES
Collage Pauge Instant Decoupage Medium
Scissors
Pictures
Circle Paper Punch
Boxes (I used cereal, cake mix and coke)
Sizzix Big Shot
Sizzix ScoreBoards XL Die - Cupcake Holder, Ruffle


REDUCE, REUSE and RECYCLE
Cardboard piles up around my house. Sure I recycle it like a good girl, but for my custom cupcake wrappers I thought I would revamp them. Cut your boxes open and measure to fit for your Big Shot Machine.


ADORN
Decorate your boxes with scraps of paper or scrap booking paper like I did. I used a Circle punch to cut out pink circles and a smaller punch to cut out circles of photographs of all the kids in my mommy group. Using Collage Pauge I adorned my boxes. I found it was best to decoupage on the side of the box without print. Plus I kind of like seeing the print inside my cupcake wrappers.


DRY
Let your boxes dry completely. Trust me on this, it will get ruined running it through your machine damp I know from experience. Being the impatient gal I am I put my boards in the oven at 175 for 30 minutes to speed the drying time.


BIG SHOT
I lined my boxes up with the cutting tool on the Big Shot to be sure my pictures would show on the cupcake wrapper. The Big Shot is my new fave craft tool all you do is crank the handle and the pieces roll right through with a perfect die cut waiting for you at the end. The cupcake wrapper is one of many options they have (I already invested in flowers).


CINCH IT UP
The Big Shot instructions call for using 3 small brads. 1) I did not have any brads 2) These cupcakes were going to be around little kids who love to swallow things like brads. All that being the said I decided to use a needle and hot pink embroidery thread to stitch the wrapper together. The bottom of the wrapper just has fold tabs.


CUPCAKES
I made up my cupcake recipe. I wanted something pink to match my wrappers, so I invented my own Pink Lemonade Cupcakes. I bought Lemon Cake Mix and subbed in Pink Lemonade concentrate for the water amount the box called for. I added red food coloring until a pink color was achieved.


I also used a can of store bought vanilla icing and mixed in the remainder of my pink lemonade concentrate. This made it a little runny so I added powdered sugar until it was thick again. I also added red food coloring to make the icing pink.


I baked the cupcakes in some fun polka dotted cupcake liners from Bake it Pretty. All that was left to do was sprinkle with pink sugar crystals.


The cupcakes are tart, but delish and most importantly look fab. I can't wait to show all the mommy's in my group tomorrow.


Just because you don't have a Big Shot, does not mean you can't join in the fun. Draw your own design onto a cardboard box and create a custom wrapper of your very own.
Clicky Web Analytics
Pin It button on image hover

Subscribe to our newsletter

* indicates required
I am interested in products and inspiration for...
Close