Showing posts with label kid projects. Show all posts

Monday, November 17

Glittered PomPom Pinecone Ornaments


Looking for an easy-yet-impressive, fun, fast, kid-friendly craft you can make in bulk? One that is perfect for a party or classroom? One that looks good on a Christmas tree or just grouped together as a wintertime centerpiece? 

Look no further, my friend. Glittered pompom pinecones are the answer!

Want to make some at home? 
Yeah, you do!

Monday, May 19

Two-Tone Tie-Dye Clothespins


Clothespins aren't just for hanging up laundry –they are a clever and inexpensive workhorse for all around the house! Everything from displaying children’s artwork, to wrapping presents, to sealing off an open bag of chips. Why would anybody buy a $2 chip clip when you can buy 36 clothespins for a dollar? A clever organizing staple in any classroom, a bundle of these candy colored clothespins make for a fun and inexpensive teacher’s gift any time of year!
These clothespins are colorful and kid-friendly craft you can make by the dozen in a single afternoon. Want to learn how? Keep reading...


Friday, November 8

DIY Cupcake Ornaments


Wahoo! I don't know about you but I am super excited about Christmas being right around the corner. Yes, I do celebrate Thanksgiving but not in the normal way. Last night I took down all of my Christmas decorations from the attic and my goodness I was overwhelmed. But once I put my cupcake tree up everything got better.  

Let's go make some Cupcake Christmas Ornaments! 

Thursday, November 18

Tallulah's Turkey Top


Today for I Love to Create we have my spin on the obligatory hand print turkey Thanksgiving craft. Tallulah needed the perfect Thanksgiving outfit, so I decided to make it myself.


SUPPLIES
Pen
Tulip Fabric Marker (Fine Writers)
Cardigan
White Fabric
Steam a Seam
Fabric Fusion Glue
Iron
Scissors
Embroidery Floss
Felt
Embroidery Hoop


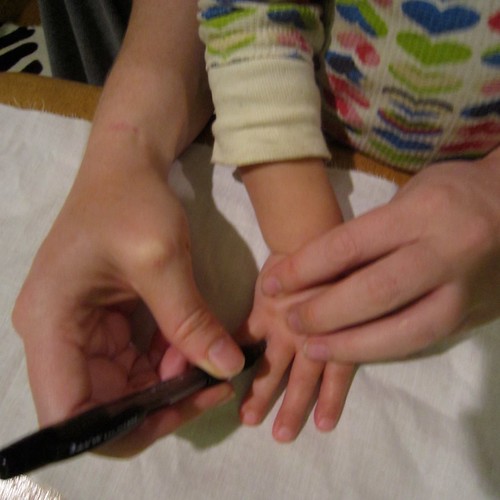
The hardest part of this project will be getting your toddler to hold still long enough to trace their hand onto a piece of white fabric. I find candy bribes help.


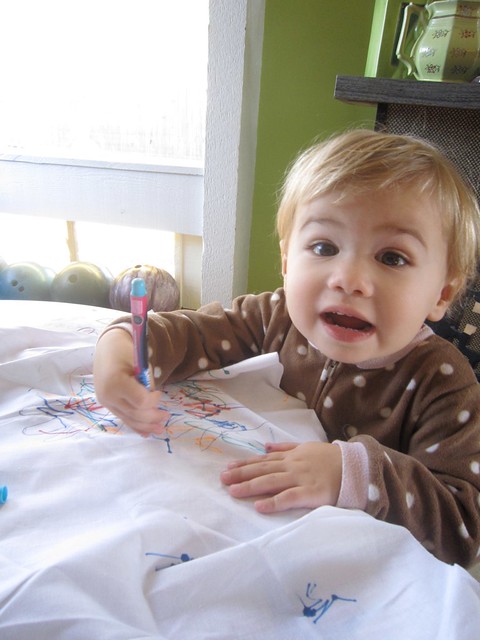
The easiest part of this project is letting your kiddlet go nuts with a pack of colorful Tulip Fabric Markers. Tallulah had never played with markers so this was quite the treat for her. I let her scribble all over the area where we had traced her hands.


Once Tallulah grew bored of coloring on the fabric I used a hot iron to adhere some steam a seam to the back of the fabric. This was primarily to stiffen the fabric and keep the edges from fraying.


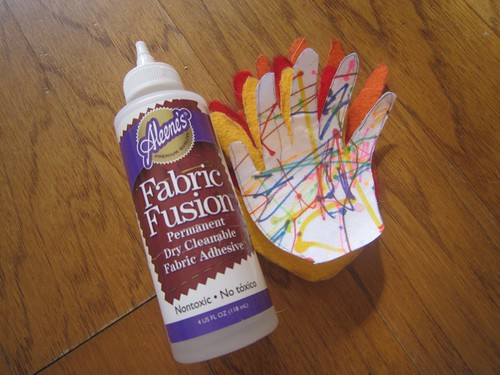
I cut out Tallulah's colorful hands and used them as a template to cut out a red, orange and yellow felt hand. I used Fabric Fusion Glue to attach all the pieces together.


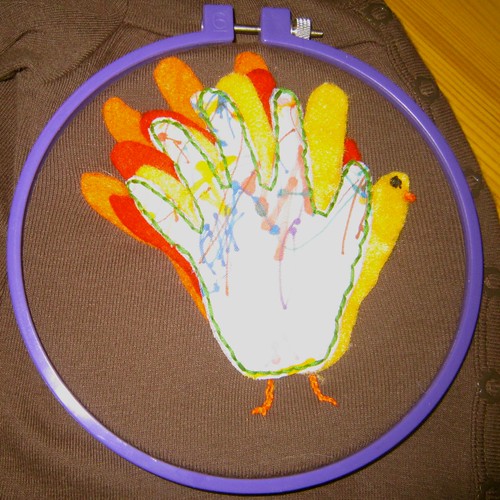
Using Fabric Fusion Glue I attached the turkey to a brown cardigan. After the glue dried I embroidered the edges for extra embellishment. I also added a beak and a French knot for an eye.


All that was left to do was slip Tallulah a lollipop so she would stand still and pose for this picture (I'm telling you it's so wrong, but those candy bribes work). I can rest easy now that Tallulah's turkey day outfit has been sorted out. Now I need to figure out what I'm wearing.

I'd love to know what some of your favorite Thanksgiving crafts are? Do you have something you and the fam make year after year? Seen something on a blog recently you want to try. This is my first time to dabble in Thanksgiving crafts so I'm curious what other options are out there.

Craft on!Click here for today's daily giveaway!

Thursday, September 30

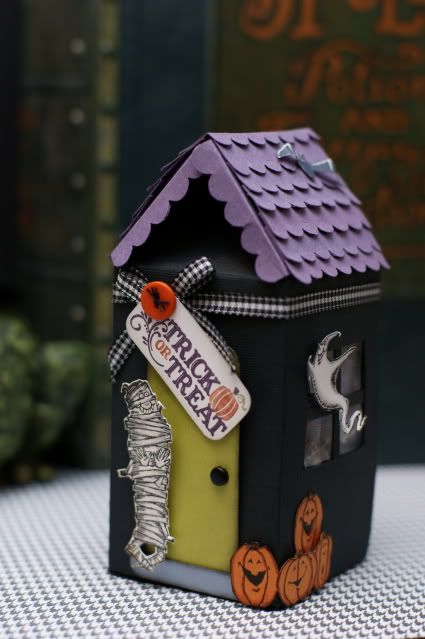
Haunted Milk Carton House


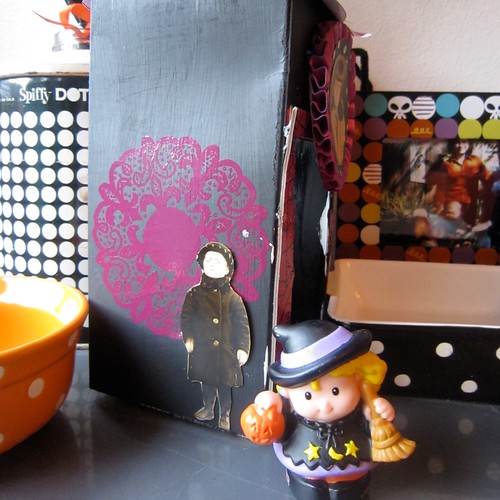
This summer I scored a large bag of Little People for my daughter at the thrift store. Included were animals, knights and Little People dressed in their Halloween costumes. Tallulah has plenty of fun playing with her Little People as is, but I thought why not kick it up a notch and start getting her in the Halloween spirit. We missed the recycling last week so I had cardboard milk cartons starting to pile up and it dawned on me what cute Haunted Houses they would make!


SUPPLIES
Cardboard Milk Carton
Scissors
Paint Brush
Crafty Chica Little Chica Paint Pack
Paint Brush
Sandpaper
Craft Knife
Aleene's Acid Free Tacky Glue
Hambly Overlay
Vintage Photographs
Scrap Booking Paper
Halloween Themed Chip Board
Trim


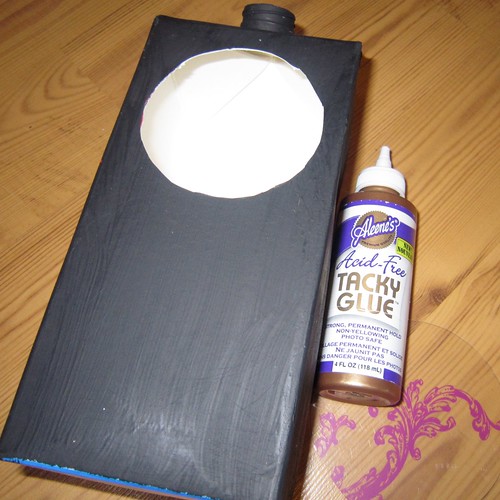
The first thing I needed to do was use sandpaper to get the waxy topcoat off of my milk carton so I could paint it black.


Every haunted house needs a door and a window so your Little People can go inside and play. I used a craft knife to cut out the shapes from my milk carton.


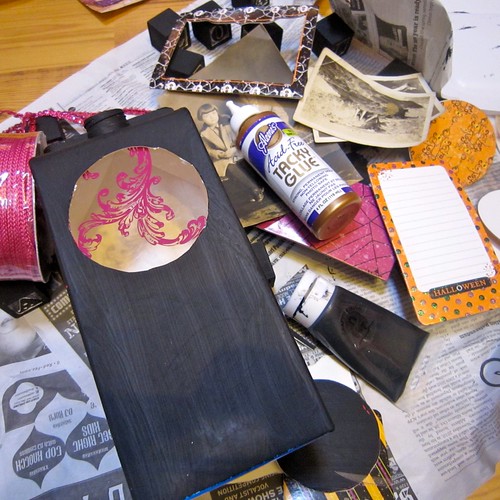
I decided to use Aleene's Tacky Glue to attach a piece of clear Hambly overlay inside my window. From here hot pink and black became my theme.


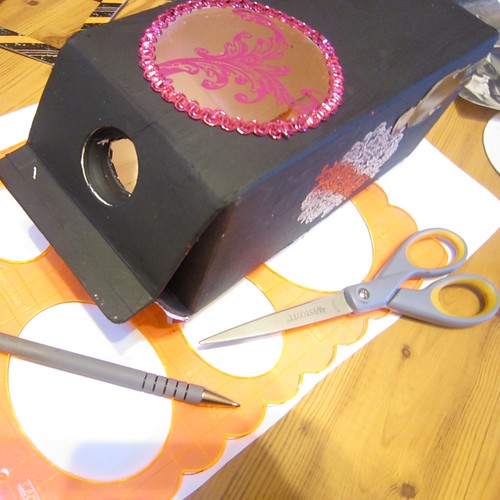
I decked out my window in sparkly pink trim for a little extra some-somethin'.


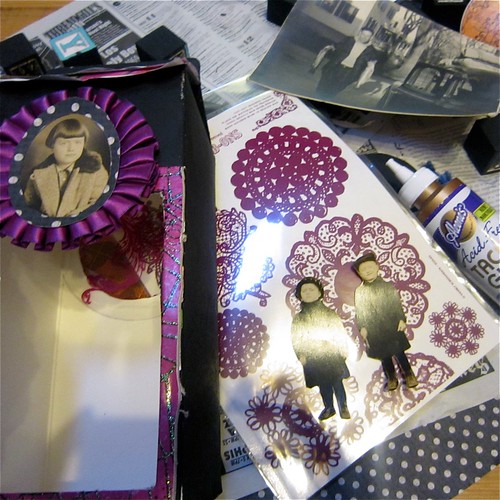
To keep up with the hot pink theme I used some Hambly rub-on's that look like doilies/spider webs on the sides of my haunted house. I used Aleene's Acid Free Tacky Glue to adhere some vintage photographs of children that were kinda creepy.


I used a scalloped edge template and scissors to cut out paper shingles for the roof of my haunted house. I used Aleene's Tacky Glue to attach alternating strips of paper.


I added a few last minute frills like chipboard around the door and a rosette with another creepy kid over the door.

Seems like a lot of work, but actually a milk carton was transformed into a creepy casa in a couple of hours and most of that was paint and glue drying time.


All that is left to do is bust out the Little People and the haunted house is ready for action!

Have some extra milk cartons lying around? Check out these other crafty up-cycled options!

Halloween Cartons by Stampin Addicts


Halloween House by Little Lovely


Haunted Milk Carton by The Little Room

Craft on!Click here for today's daily giveaway!

Thursday, August 12

Baby Pools and Bikinis


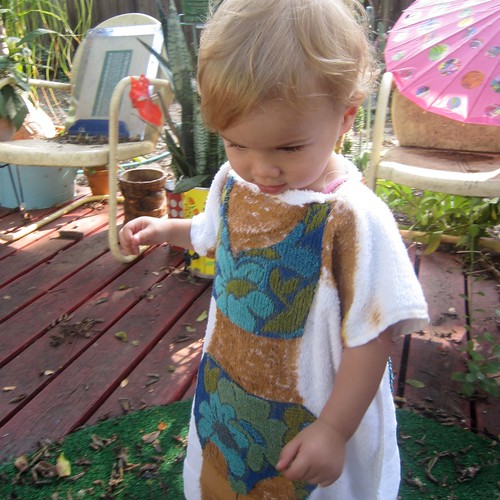
If you have been following my series on swimming in Austin it would be perfectly clear to you why Tallulah needed a fancy new swim suit cover up. Actually today's I Love to Create project was inspired by a cover up I spotted on a recent trip to the pool. You have probably seen said cover ups. Typically the cover ups depict skimpy little bikinis, but since mine is for a 1 year old I decided to go with a retro swimsuit and a little more coverage.


SUPPLIES
White Towel
Scissors
Fabric Fusion Glue
Sewing Machine
Thread
Tulip Soft Fabric Paint in Golden Tan
Paint Brush
Patterned Towel
Crafty Chica Tango Permanent Fabric Markers


The first thing is to make the actual cover up. Luckily my mother Fredda Perkins was in town this week so I sat her down at the sewing machine with my white towel. The towel is folded in half with a neck hole cut. My mom actually made a boat neck collar. Next she stitched down the sides of the towel making it more of a little dress leaving arm holes at the top. The key is to get a towel in the right size. I used a smallish towel for Tallulah.


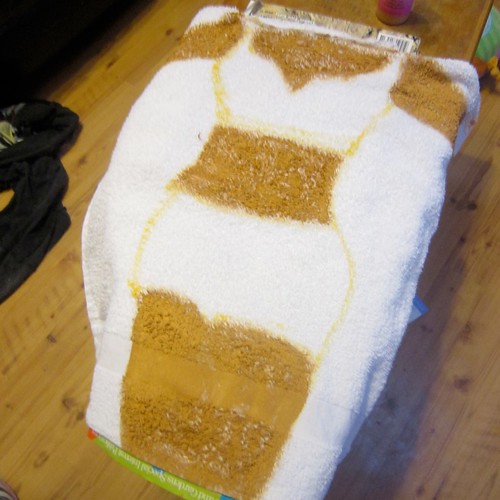
Now that my cover up was sewn it was time to draw on the image of the body and bikini. This cover up was a family affair because my sister Hope Perkins drew the body and swimsuit onto the towel.


I used Tulip Soft Fabric Paint in Golden Tan and painted the body.


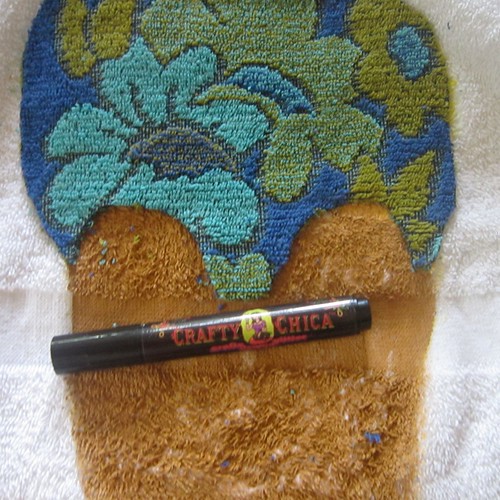
Once my paint dried completely it was time to add the swim suit. Using funky vintage towels I cut out the shape of a retro bikini.


I attached my terry cloth two piece to my cover up using Liquid Fusion Glue.


A quick once over with a Crafty Chica Fabric Marker to define the legs and my cover up was complete!


All that is left to do is hit the pool, which keep in mind here in Texas we can do well into October. I might need to make an adult sized version for me since it is the only way I will ever be in a bikini again.


Don't forget to do the back!

Thursday, May 20

Recycled Cardboard Cupcake Coozies


Tomorrow is my monthly mommy meet-up. Every month we get together, let the kiddlets frolic and eat snacks. Last month I brought a batch of cake pops and this month I thought I would go with plain old cupcakes. The cupcakes might be plain, but the custom cupcake wrappers are not.


I have made cupcake toppers a bazillion times and decided today for I Love to Create I would spice things up. It all started with my new issue of Green Craft Magazine and a project called From Trash to Treasure: Embellishments From Boxes by Lisa Guerin. Tune in Monday for a full magazine review (it's more like a book than a magazine) and a chance to win your own copy!


SUPPLIES
Collage Pauge Instant Decoupage Medium
Scissors
Pictures
Circle Paper Punch
Boxes (I used cereal, cake mix and coke)
Sizzix Big Shot
Sizzix ScoreBoards XL Die - Cupcake Holder, Ruffle


REDUCE, REUSE and RECYCLE
Cardboard piles up around my house. Sure I recycle it like a good girl, but for my custom cupcake wrappers I thought I would revamp them. Cut your boxes open and measure to fit for your Big Shot Machine.


ADORN
Decorate your boxes with scraps of paper or scrap booking paper like I did. I used a Circle punch to cut out pink circles and a smaller punch to cut out circles of photographs of all the kids in my mommy group. Using Collage Pauge I adorned my boxes. I found it was best to decoupage on the side of the box without print. Plus I kind of like seeing the print inside my cupcake wrappers.


DRY
Let your boxes dry completely. Trust me on this, it will get ruined running it through your machine damp I know from experience. Being the impatient gal I am I put my boards in the oven at 175 for 30 minutes to speed the drying time.


BIG SHOT
I lined my boxes up with the cutting tool on the Big Shot to be sure my pictures would show on the cupcake wrapper. The Big Shot is my new fave craft tool all you do is crank the handle and the pieces roll right through with a perfect die cut waiting for you at the end. The cupcake wrapper is one of many options they have (I already invested in flowers).


CINCH IT UP
The Big Shot instructions call for using 3 small brads. 1) I did not have any brads 2) These cupcakes were going to be around little kids who love to swallow things like brads. All that being the said I decided to use a needle and hot pink embroidery thread to stitch the wrapper together. The bottom of the wrapper just has fold tabs.


CUPCAKES
I made up my cupcake recipe. I wanted something pink to match my wrappers, so I invented my own Pink Lemonade Cupcakes. I bought Lemon Cake Mix and subbed in Pink Lemonade concentrate for the water amount the box called for. I added red food coloring until a pink color was achieved.


I also used a can of store bought vanilla icing and mixed in the remainder of my pink lemonade concentrate. This made it a little runny so I added powdered sugar until it was thick again. I also added red food coloring to make the icing pink.


I baked the cupcakes in some fun polka dotted cupcake liners from Bake it Pretty. All that was left to do was sprinkle with pink sugar crystals.


The cupcakes are tart, but delish and most importantly look fab. I can't wait to show all the mommy's in my group tomorrow.


Just because you don't have a Big Shot, does not mean you can't join in the fun. Draw your own design onto a cardboard box and create a custom wrapper of your very own.
Clicky Web Analytics
Pin It button on image hover

Subscribe to our newsletter

* indicates required
I am interested in products and inspiration for...
Close