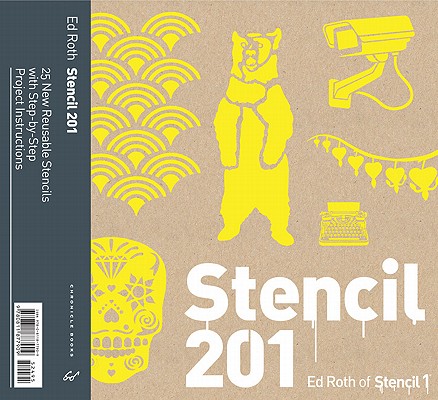
I was giddy with excitement when Ed Roth's latest book
Stencil 201 showed up in my PO Box.
Stencil 101 was a huge hit at my
baby shower. I made
matching skirts for me and Tallulah using a stencil from
Stencil 101 Decor. I have done
glass etching with some of his stencils. I even busted out a
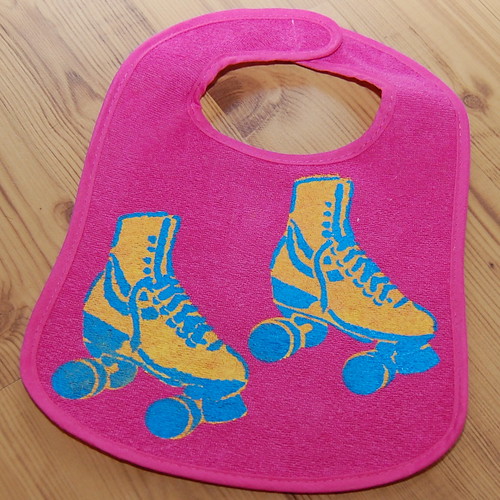
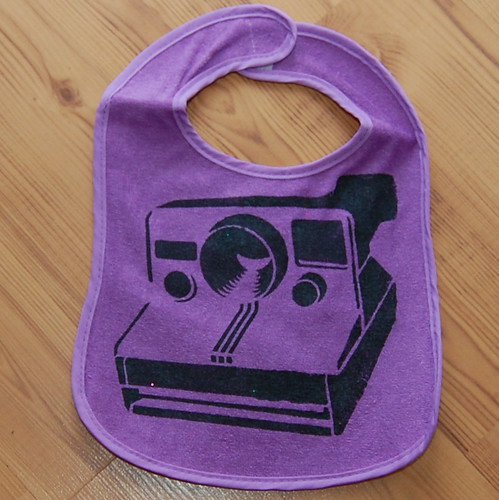
blouse or two. What was I going to make with all the awesome-o patterns in Stencil 201? Since I am on a handmade stocking stuffer kick hip bibs seemed perfect!
With each book
Ed Roth and his stencils get better and better. The stencils in 201 are plastic so you can wash and reuse them over and over again. The patterns do not disappointment with sugar skulls, bears and patterns. I used mine on bibs with some Tulip Fabric Paint, but think of all the holiday possibilities. You could stencil stockings, tree skirts or even make felt ornaments.
I was lucky enough to get a chance to chat with the stud of stencils himself Mr. Ed Roth.
 What is the most creative way you have seen someone use your stencils?
Well, if you asked me that last year it would have been when Bust Magazine featured a pic of their toilet tank painted with my baby deer stencil but now, in Stencil 201, my barber buddy Eliath Pineda uses one of my stencils to cut a pattern into the side of a clients hair. I'd say that get's the most original award!
I adore all your books, each one gets better and better and the first one was so dang good I didn’t think it was possible. How did you get hooked up with Chronicle books?
It's funny. years ago I set out to make a stencil book. Publishers scratched their heads when they saw my prototype book I made of 50 stencils. Having a background in web design, i built my own site and sold the stencils individually instead. Years later, I sat down at a dinner party with a friend of a friend who works at Chronicle. When asked what i do, i told him and he said "oh we should make a book!". And there it went!
 When you first got started did you ever envision your stencils being used the way they are now to create fabric, wallpaper, jewelry and more?
Not really. I just loved painting t-shirts and walls and I sort of designed in that theme. I think I am lucky to always learn from my customers and people like you in the field that take the stencil use further. Look at guest artists Jenny Hart and Vickie Howell with embroidery and felting, these techniques combined with a nice stencil image create a new product I would not think to initially make. Love those gals!
I’m curious, I’ve navigated my way through the craft world for years. From vending at small punk rock craft shows to make and take booths for corporations at CHA. I know you are on the same trajectory. How has the craft industry been for a man? Do you think you get treated any different since it is such a female dominated industry?
I didn't notice. I don't think about that, I just do my thing. I love all the ladies I meet, the business gals, the crafting dames, everyone's been cool. I've worked with you, Jenny Hart, Vickie Howell, Erica Domesek, Kathy Cano-Murillo, and what's her name, oh yea Martha Stewart(bow). I think I've been welcomed!
 Your new book Stencil 201 has a few “guest stars” how did you pick your contributors and did you let them choose how they would use your stencils or did you come to them with a pitch?
The choice of artists was so random. Christian Sumner, A Baker in Brooklyn, is a friend of mine and he is driven and just so talented I had to feature him in the cookie stencil how-to. Susan Rivas, I met when she offered me a slice of pizza and we got to chatting. She does amazing "collagistrations" so I had to see what she would do with the stencils. I was a guest in Vickie's book Craft Corps and we chatted creative stuff since so I wanted her in my book. Jenny is the queen of embroidery in my book and a Chronicle author so that was a no-brainer. Erica Domesek asked me some time ago to provide stencils for her Sharpie booth at NY Fashion Week and we became buddies, she's unstoppable. I featured Swoon since I adore her street art and met her at her opening, she is involved in so many good causes I had to get her in there. Elaine Elwick Barr is a craft genius and great friend of mine who has been one of those creatives who has taken my stencils to another level, shrinky dink jewelry, come on! Just love all these people!
What is the best selling stencil on your website? Are deers all the rage or do boom boxes dominate?
Hmm, ya know, birds rule. Nature in general has done well. But of course my graffiti inspired imagery does well too. But birds. yea. birds.
 How do you trend forecast what stencils to make? Like I am just discovering foxes have been the new owl for awhile.
I guess like you, something out there resonates. I look at everything around me in NY, I live in a trendy area. Sometimes these trends are on high fashion clothing, sometimes they are used in decor. I think I watch trends and feel waves passing and think what's next after all this? It's a feeling. But also, in business, I have to see what does well and sometimes play off of that. Skulls> Birds> Octopus> Mustaches > who knows haha
I love the fun chocolate collaboration set you did with Alison Nelson. Are there any more little hidden Ed Roth gems out there we should be looking for? Any big collaborations coming down the turnpike?
I have decided it is my year to do many collaborations. I am very interested in co-branded products, developing some cool licensing deals where you see my artwork on home products. I have shown people for years how to stencil on a bunch of surfaces, now i will offer those things made as well. Also, I am also hoping to offer more Stencil1 art product with the right manufacturer so my users have more tools to create more. I am not so interested in sitting in a licensing booth, I am trying to break that formula. I am a small business and things like that can be costly so I try to take unique approaches to business. What i am saying is I am cheap, haha. Better word, resourceful.
 Geez your stencils are popping up all over the places, movies, TV, magazines even Martha is on team Stencil1. What has been your biggest piece of press to date? The one that effected sales and clicks on the website the most? Like was there a huge demand for the twig stencil after the Country Living feature?
Aw thanks, Well, Being on Martha was a good boost. BEing in ReadyMade years ago was a big boost too(RIP Readymade!). It's so funny, whatever stencil gets featured in press,well, that's the one stencil that you will see ordered! I offer over 100 designs on stencil1.com
but people only bought the skull stencil after the queen of craft MArtha made a shirt with my skull stencil!
What does the future have planned for Mr. Ed Roth?
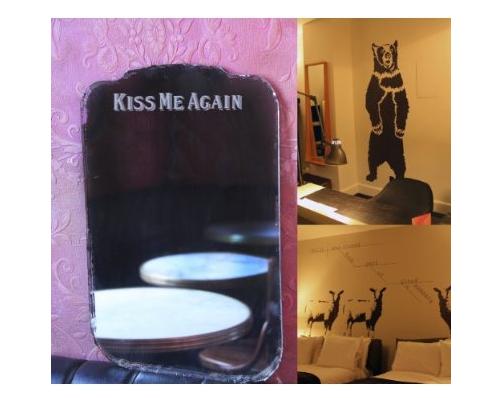
Oh boy. Lots to do here. Licensing my art, developing new art supplies and home goods, I am very interested in doing more video and have written a few tv treatments, more installation work for hotel rooms, I want to have an art exhibit, and I really enjoyed the book tour for Stencil 201 and that inspired me to do more events where people simply get to make art!
Visit us on Facebook!
Craft on!