Showing posts with label fashion glitter. Show all posts

Monday, August 10

"Horsing Around" with Glitter and Tacky Glue


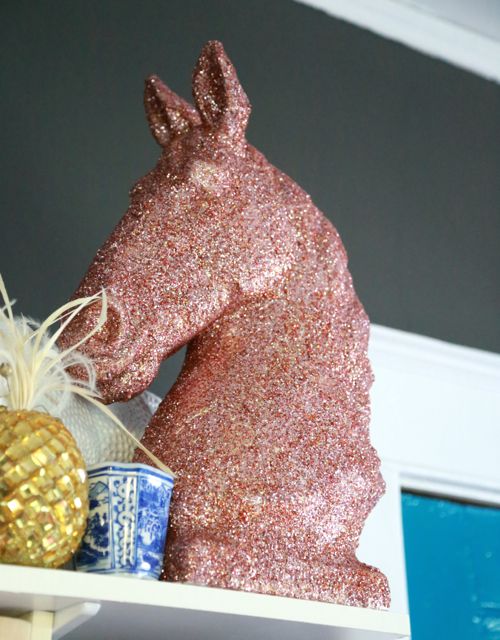
I have a hard time leaving the thrift store without spotting at least one buried treasure. And while there is something to be said for clothing and housewares, I just love a good knick-knack! Animal figurines in particular. And because a little kitsch is never enough, I like to double down with a good coat of glitter. The great news is, if you follow the secret recipe, you can cover any surface in glitter and it will never shed. That's right folks: IT WILL NEVER SHED. 


Want to find out more? Let’s go!

Sunday, December 7

Glittered Skinny Belts

header-glitter-belts 
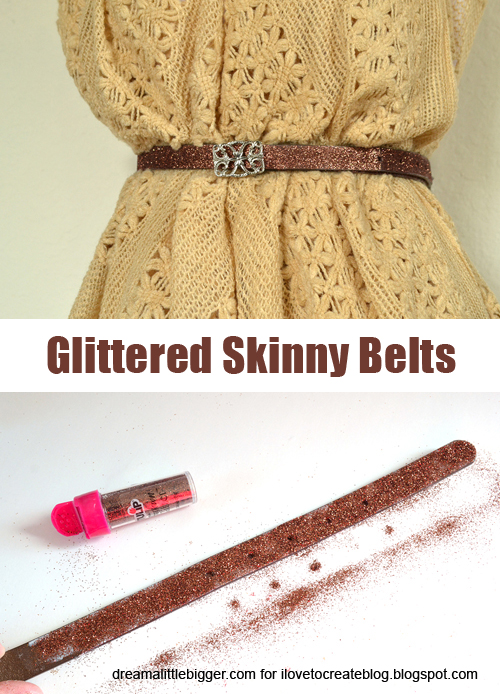
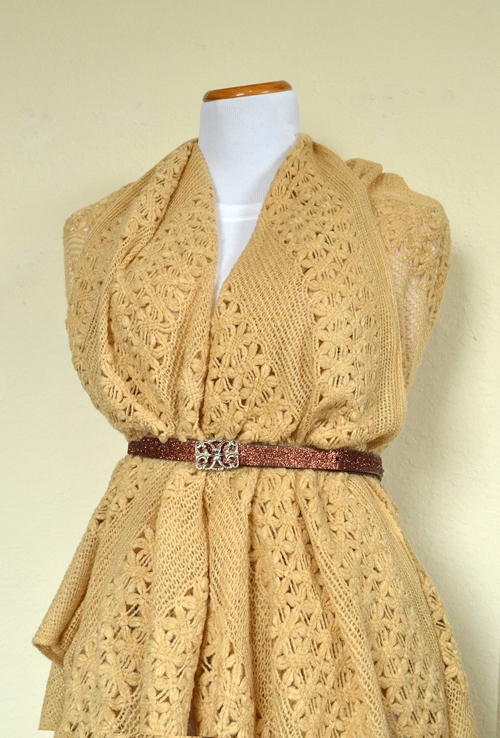
Sometimes I want to add a quick and low budget bit of pop to an outfit. Loving my over-sized throw-like cardigan, I thought it would be nice to cinch it with a skinny belt for a more fitted look. And then it seemed only right to toss in a bit of glitter as well!
For this project you will need:
Skinny belts

002-glitter-belts 
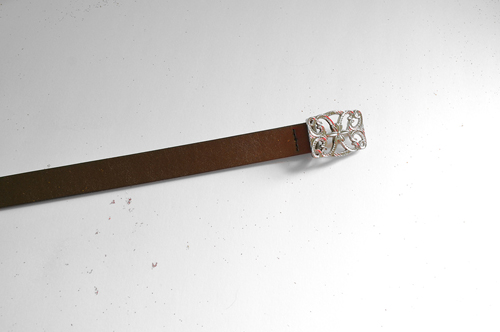
I love this skinny belt. It's plain and brown, which isn't bad in and of itself but it has a fabulous buckle!

010-glitter-belts 
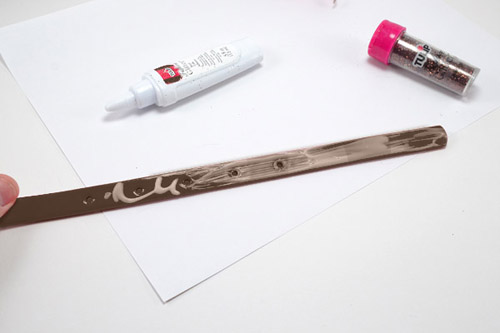
To update simply apply your glitter bond...

001-glitter-belts 
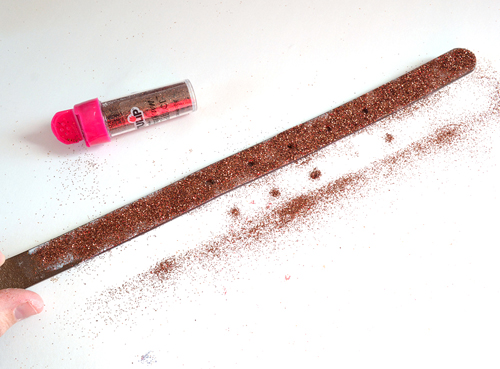
Sprinkle glitter liberally over a piece of paper to easily collect and return the stray glitter back into your tube.

006-glitter-belts 
Allow to dry and rock it out!

003-glitter-belts
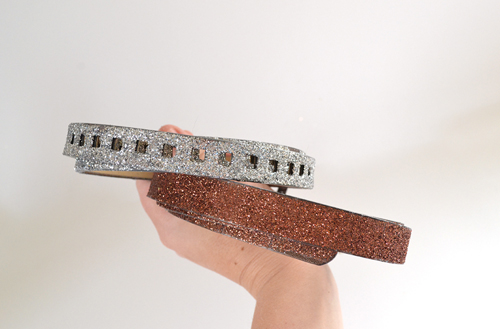
I decided to go brown glitter on my brown belt to keep things kind of sedate, but on my belt with square cut outs thought SILVER was the way to go for an edgier look!

All in all, this project took about 5 minutes. The hardest part was waiting for my belts to dry!

For more fun projects, I hope you'll visit me at Dream a Little Bigger!

Tuesday, November 11

Glitter Plaid Shirt.


 I really loved the look of causal plaid with Gold Glitter,
I saw this sequin plaid shirt on Pinterest and I could not wait to recreate my own version.
 Below is my inspiration.
  VIA
Now let me show you how easy it is to re-create using Tulip Glitter and Glue


Sunday, October 19

Sugar Skull Tee-DIY


 Crafty Chica, Kathy Cano-Murillo has a new line of Day of the Dead crafting amazingness! 
If you have not seen it you have to go and check it out HERE.
When I saw this iron on Skull applique I had to make a Shirt. Not only does Kathy designs her own craft  line, she runs a Blog a Youtube channel and is a full time Mother and Wife. She is an inspiration to everyone around her.  FYI, it's available at select Michaels stores and will also be able to order online through iLoveToCreate.com and Amazon.com.

Wednesday, August 6

How To Make A Glittered Cuff


Hoodie HOO! Summer is still here but with school right around the corner I am going a little nuts! Those long summer days will get shorter and shorter and we might notice we will have less time to work on crafts. Today I will be showing you a craft that you can accomplish in a small amount of time! I loved making this cuff because it can be split up into parts allowing your kids to help out along the way. I let my son do the dots which made him feel involved and that is always good! I hope you enjoy it and remember the possibilities of designs are endless when decorating your personal cuff. The best part of today's tutorial is this amazing new product from Tulip! 
Let's get started making our Glittered Cuff!
-

Tuesday, May 13

I Love To Create: Back Braided Tee.


I have seen so many braided back shirts this Spring 
I thought it would make a great DIY.
Adding your own little saying on the front of your shirt is just another way
 to make the shirt personal just for you.
You could wear it as a beach cover up or wear it with a tank and jeans. 
Check out how I made this braided back, Stencil Tee.

Thursday, December 26

Leopart Print Glitter Heels

Here's a cool sparkly pair of kicks to enjoy for New Year's that I literally whipped up in under 30 minutes!  They are such a cool way to make a statement with that little black dress at your party and what girl doesn't love a little bling to ring in the new year?

Friday, November 29

Wood Collage Jewelry


This first week of December is always crazy - lots of festivals, online orders and gifts to make for friends. Instead of spending a lot of money on new supplies, I combed through my stash to find what I had a lot of. I came across a plastic bin full of little wood pieces. I immediately thought of painting, glueing and glittering them into necklaces and bracelets. I love how they turned out! Here's is my tutorial so you can do it too, they make great little gifts to pass out to friends and family!

Tuesday, November 12

You're a Star, Sweatshirt DIY

 I have seen Star shirts and sweatshirts everywhere and
 I just love them so I decided to make one for  myself of course
I had to add a little bit of sparkle to it.

Tuesday, March 26

Easy Glitter Dot Easter Eggs
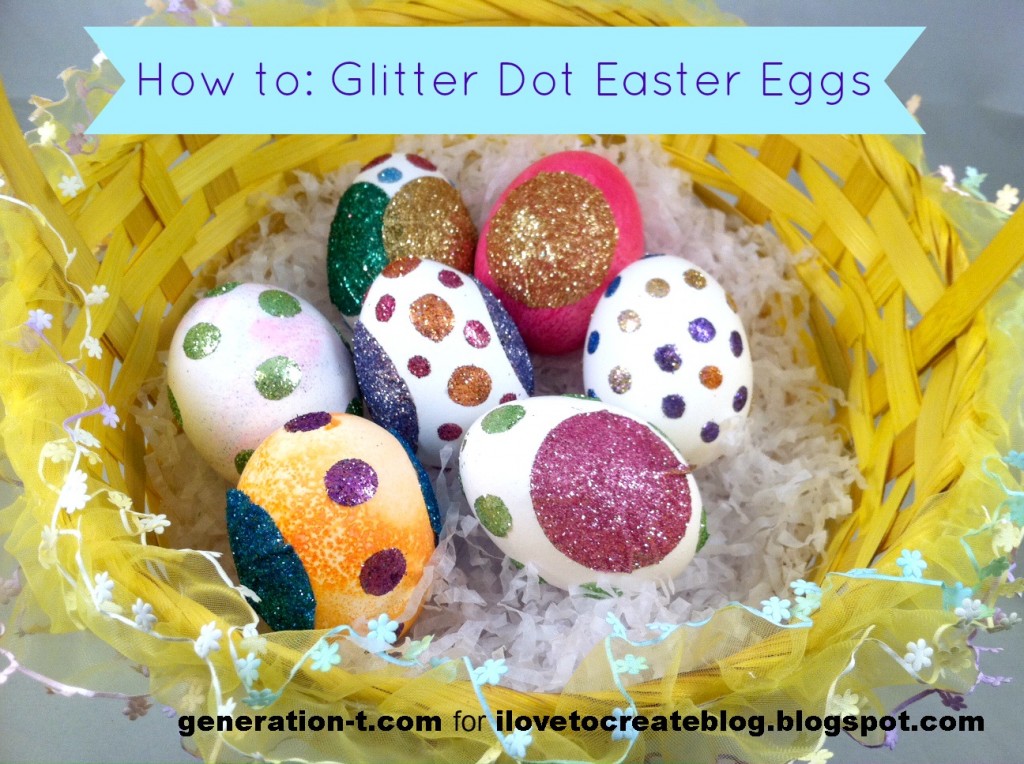

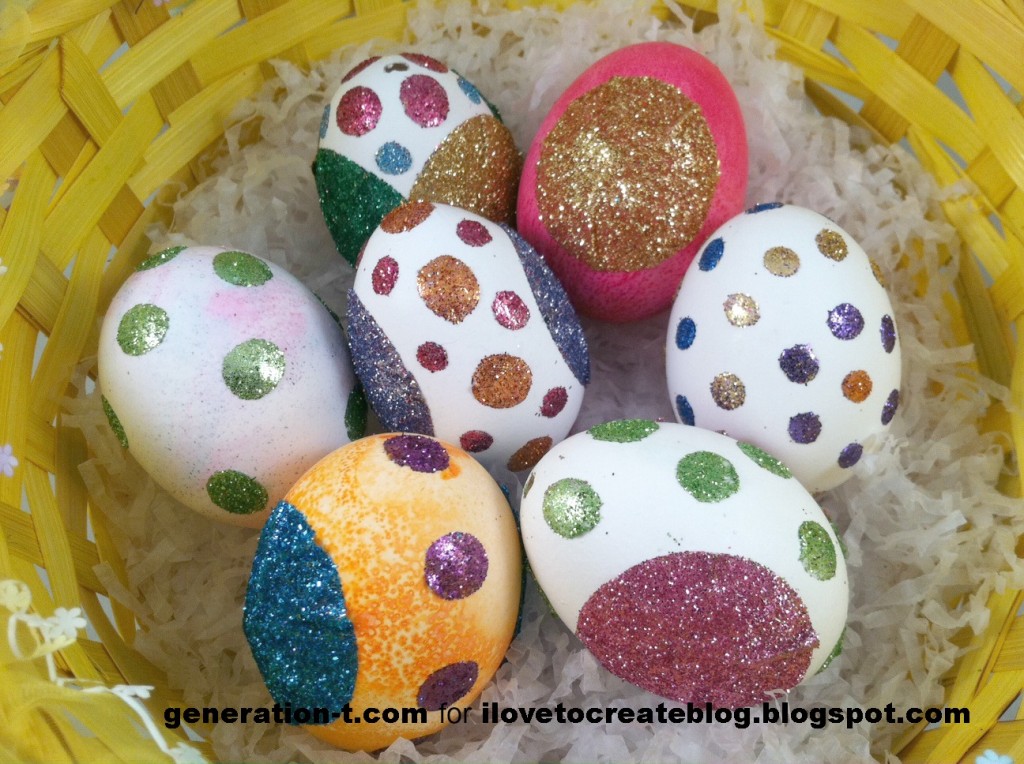
I'm pretty traditional when it comes to decorating eggs at Easter time (dollar store egg dying kit, anyone?), but to be honest, it was getting kind of dull year after year. My solution: Bring on the polka dots! Bring on the disco sparkle! The best part? No waiting around for dye to set or glue to dry. This is egg decorating with immediate (and rather shimmery) results.


What you need:
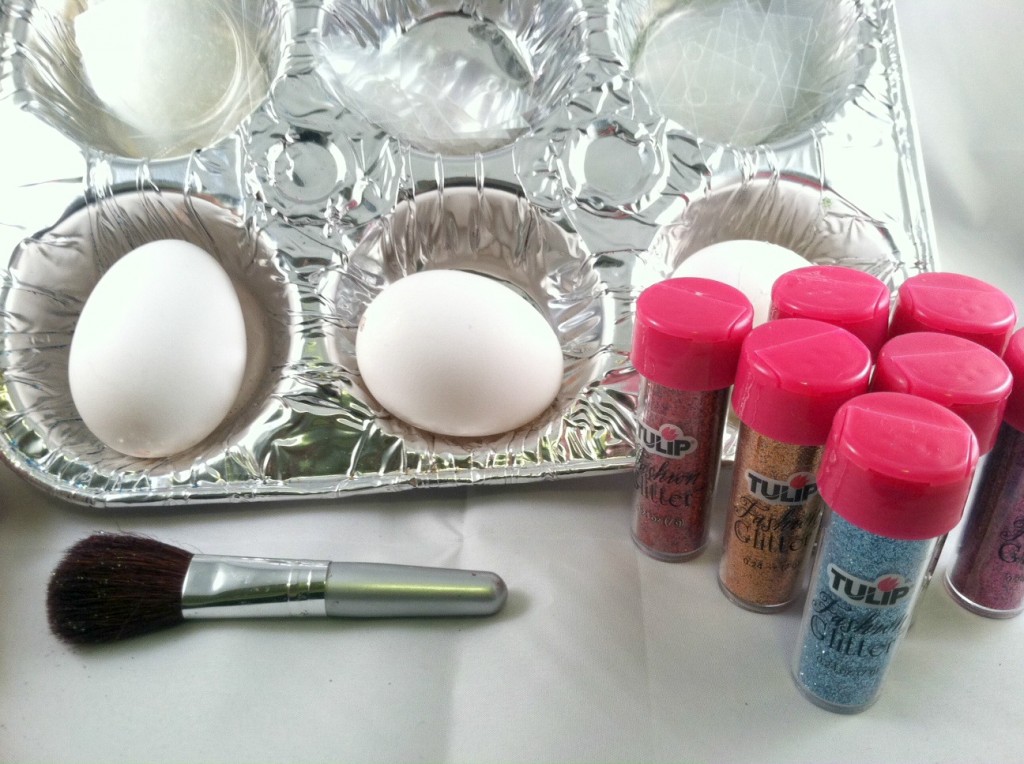
-clean, dry blown eggs (hard-boiled will work fine, too; I personally just don't like to mix food and glitter!)
-Aleene's Tacky Dots
-Aleene's Tacky Dots Singles (small and medium)
-Aleene's Fashion Glitter
-aluminum muffin tin or tray
-makeup brush
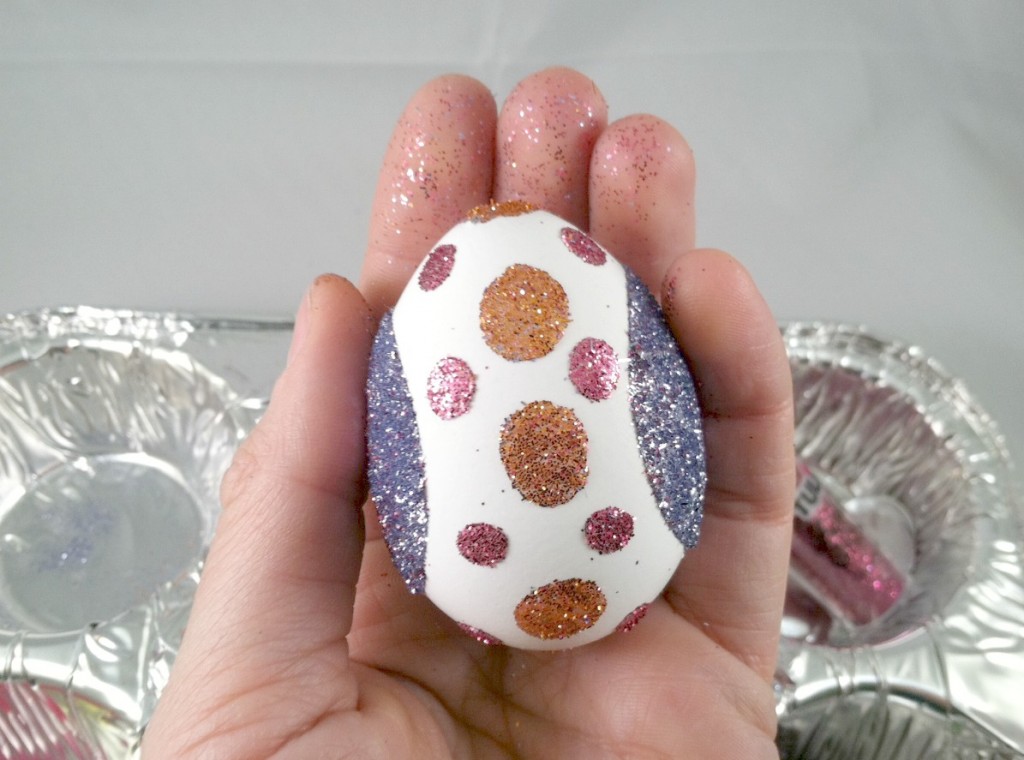
Click through to watch the video tutorial I did for About.com, or follow the instructions below!
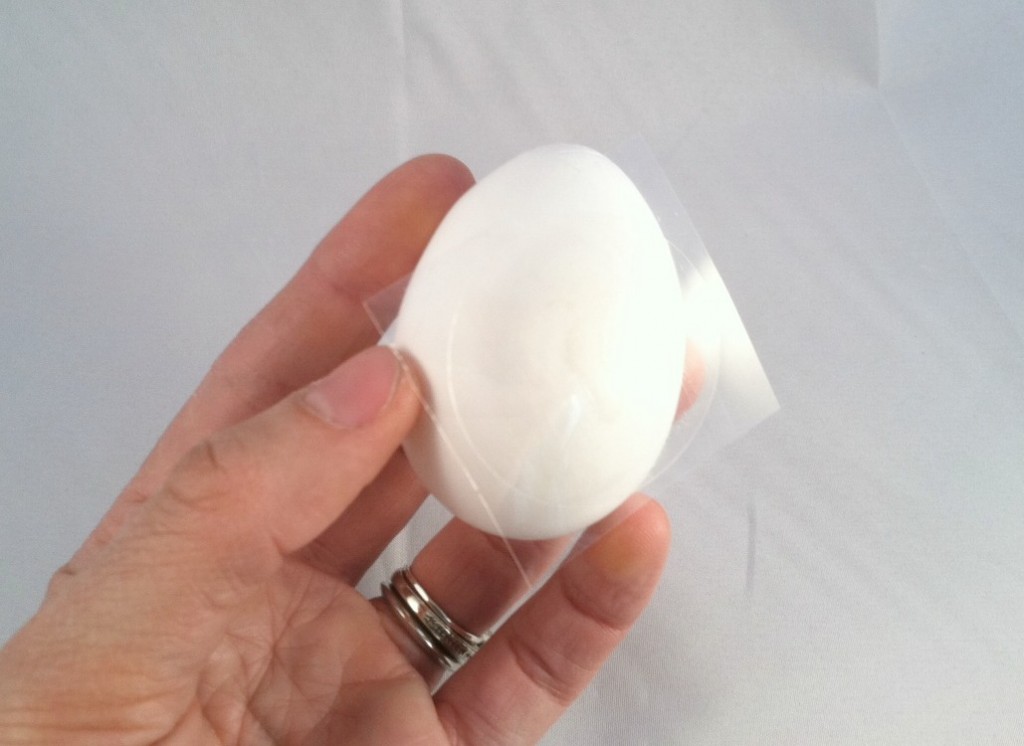
Center one of the Tacky Dots on the side of the egg, and gently press it down.
Peel off the backing and gently press down any wrinkles. Then repeat on the other side with another Tacky Dot.
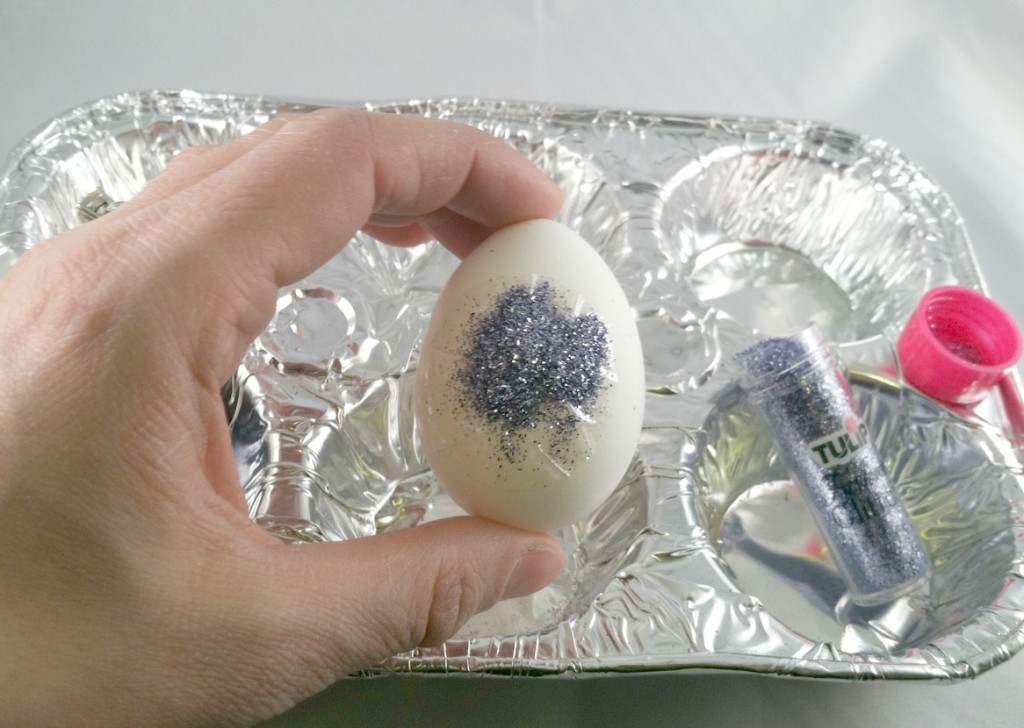
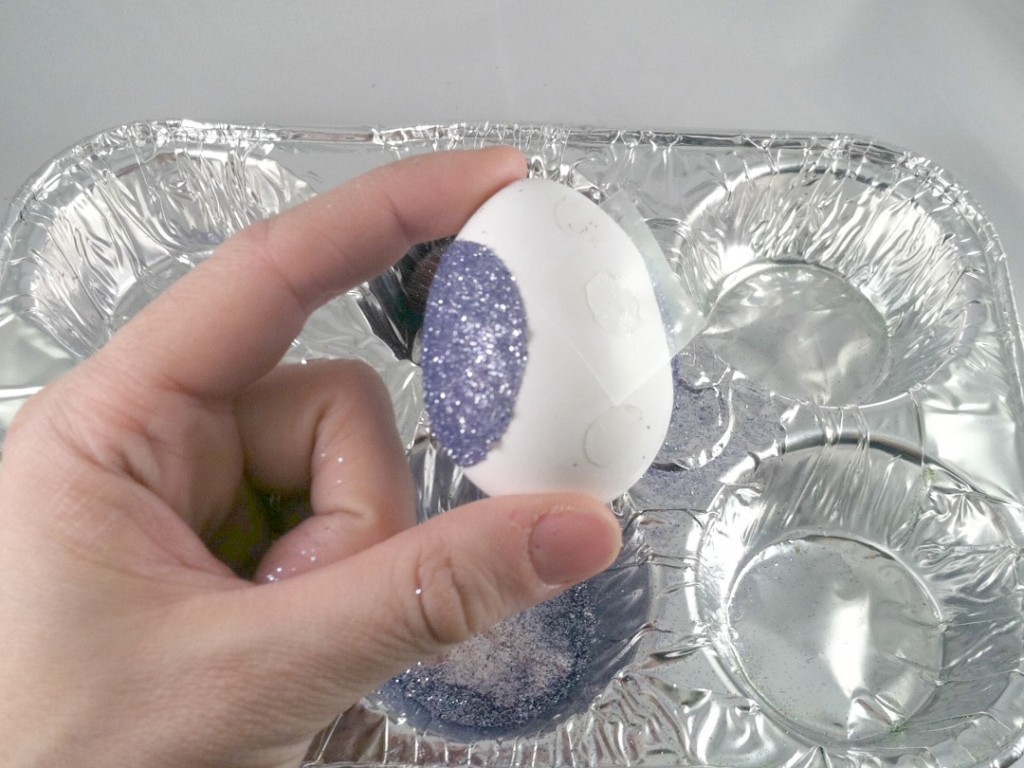
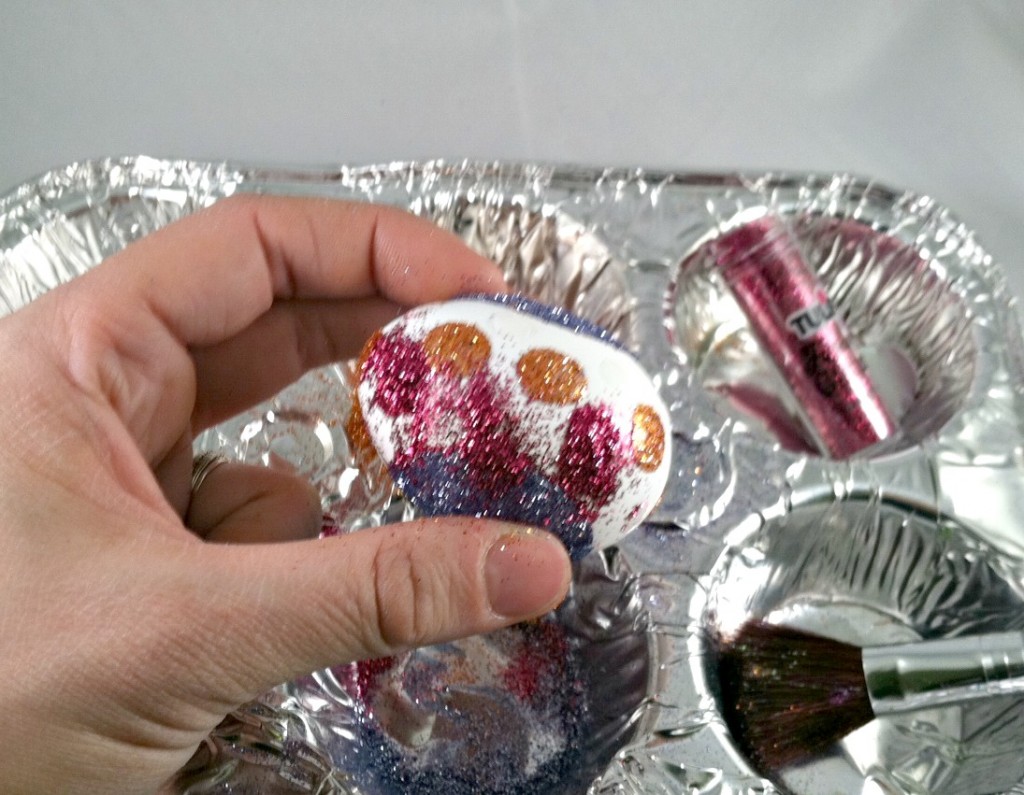
Hold the egg gently over the muffin tray and liberally sprinkle glitter over the tacky dot. Brush off the excess with the makeup brush and rotate the egg to repeat on the other side.
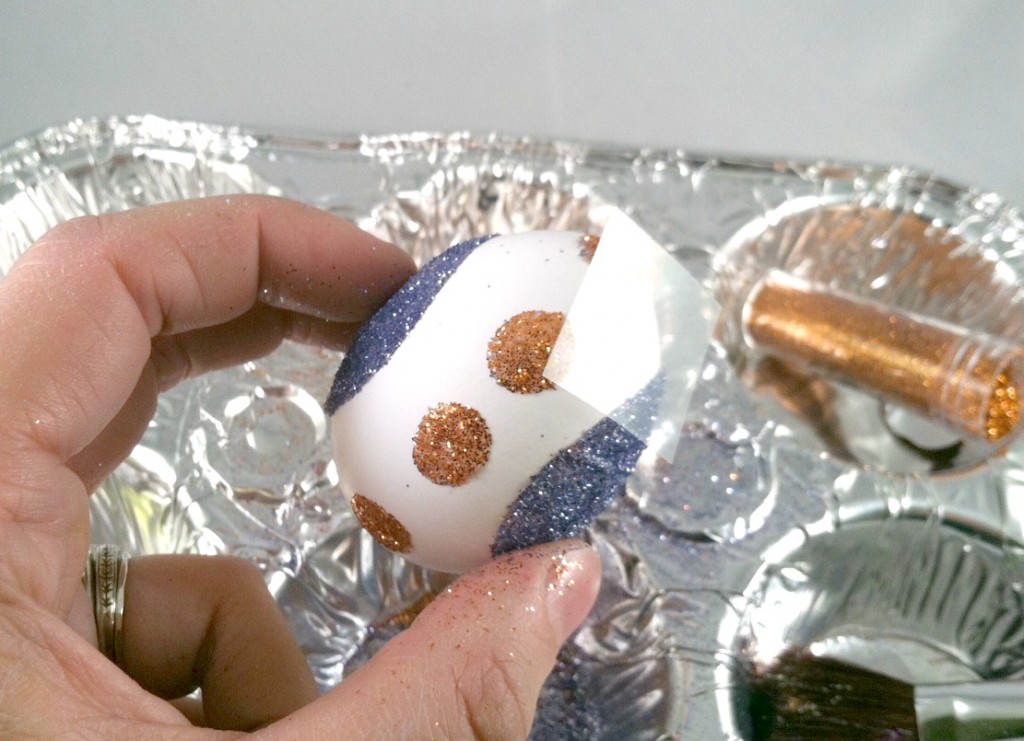
Try adding medium Tacky Dot Singles around the egg, between the large dots, and repeat the process: Shake on the glitter (new color!); brush off the excess.
Next, I try sticking the small Tacky Dot Singles in the white area around the large dots and repeat the process a third time (again, with a new color).
Shake the glitter on, then dust off the excess.
 
Finished!
Try different combinations of glitter color and dot sizes to repeat and fill your basket.
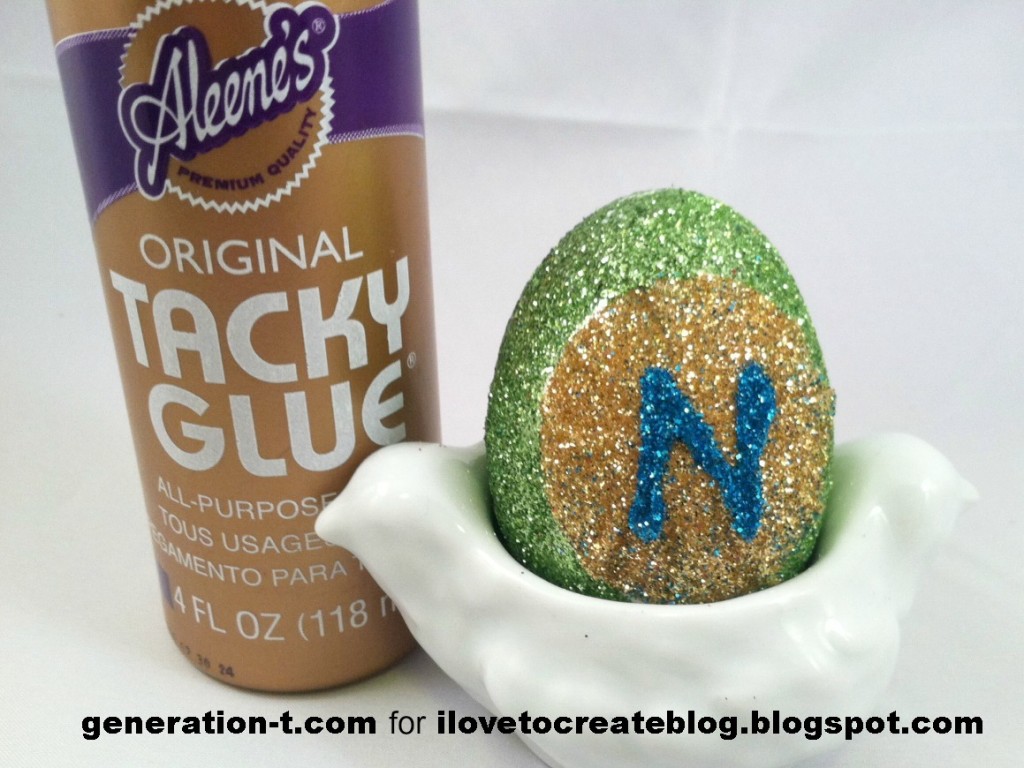
Variation: To personalize your egg, use Tacky Glue to write an initial over the glitter layer on the large Tacky Dot, then sprinkle it with contrasting color glitter. Let it dry completely before brushing off any excess sparkle.

Thursday, July 26

Glittered Roller Skate Bookends

Everyone needs a pair of glittered roller skates in their life. They make great bookends, door stops, paper weights, meat tenderizers - they are virtually indispensable around the house. Now that you know you need a pair, let me tell you how to make them.

SUPPLIES

Rollerskates

Aleene's Tacky Glue

Yarn

Tulip Fashion Glitter

Scissors

Paint brush

Cardboard

Tulip Spray Fabric Dye
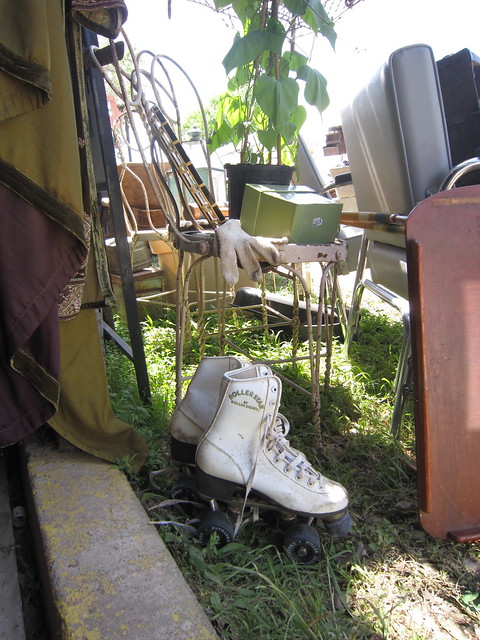
If you are lucky you will find a pair of vintage roller skates at the thrift store or a garage sale where it is a short walk to your car. I found mine at a hot outdoor flea market, nowhere near my car. However, I knew from the minute I laid eyes on them I wanted to glitter them and make a pair of bookends so it was worth it.
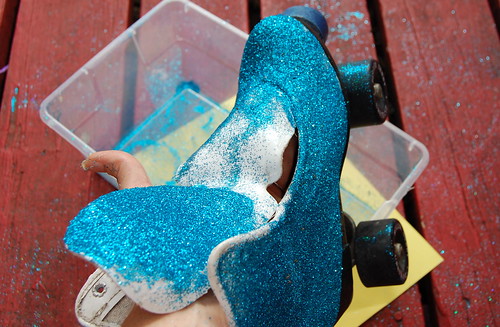
Covering your skates in glitter is really easy. Coat your skates in Tacky Glue and douse the wet glue with tons of glitter. I went with teal.
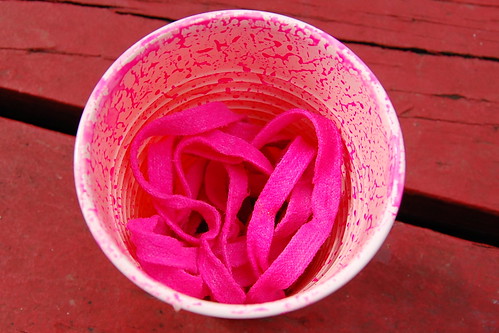
While your glue is drying dye your laces. I went with a neon pink. I put my laces in a plastic cup and sprayed until saturated.
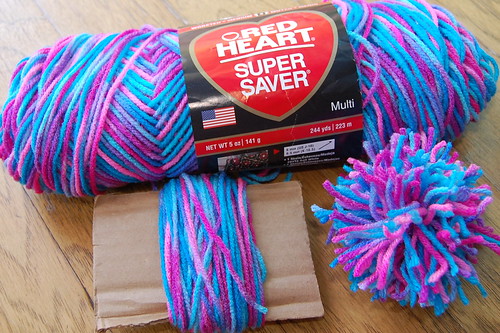
So now your glue and your dye is drying, let's make some yarn pom poms. Remember when you wore pom poms on your skates? Made doing the Hokey Pokey that much more fashionable. Wrap yarn in whatever color you want around a piece of cardboard 100 times. Slide the yarn bundle off one end. Cinch the bundle by tying a piece of yarn tightly around the center. Now with scissors go in and cut all the loops. You may need to trim your pom pom.

Once everything is dry re-lace your skate. My holes had some glue over them so I used a knitting needle to poke them through. You might also realize you need to go back in and do a bit of glue and glitter touch up once you dust off excess glitter and any bald spots are revealed. I also blew my skates with a hairdryer to get a little more glitter off. Using a piece of yarn or glue attach your pom pom to your skate.
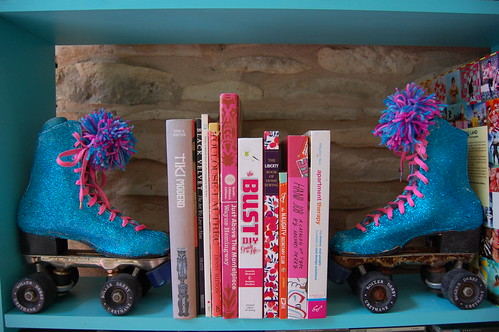
I'm kinda in love with my new skates. I suppose if they were my size I could actually still wear them to the rink. However, I prefer not to fall down in public so I will just keep them on my bookshelf.

Monday, February 6

Eye Candy from the 2012 Craft and Hobby Association Show


This was our showstopper mannequin created by our talented in-house team...Pattie Wilkinson, Suzie Shinseki, and Allee Marderosian.  Her dress panels were created with Tulip One-Step Dyes.  Her necklace was created using Aleene's adhesives and Tulip Fashion Glitter.  Her top was encrusted with our new Tulip Deluxe Crystals.

We had so much eye candy going on at the CHA show and took so many wonderful pics! We wanted to share with you just some of the pretty creations on display!
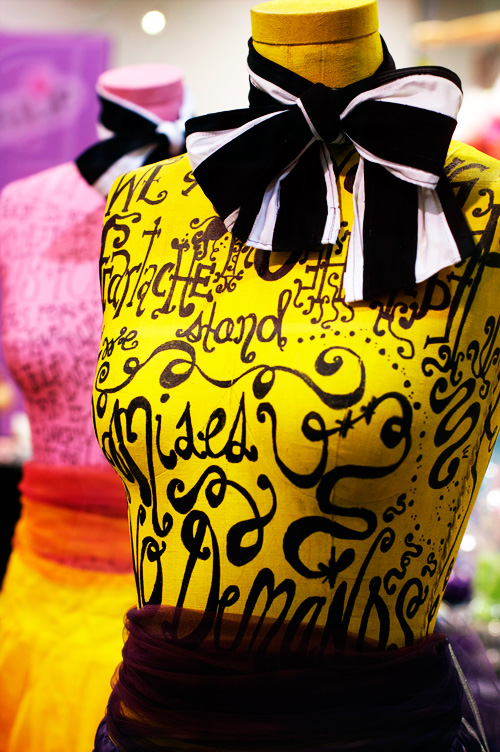

Betsey Johnson designer Charlene Pack created these super cool doodled mannequins.  She doodled all over them with our Tulip Fabric Markers and 3D Fashion Paint.  She even dyed all the fabrics using our dyes!


Pattiewack created these cool heels using our new Tulip Deluxe Crystals and Heat Setter.  A few people have commented that they look like googly eyes!

Clicky Web Analytics
Pin It button on image hover

Subscribe to our newsletter

* indicates required
I am interested in products and inspiration for...
Close