Father’s Day is coming up,
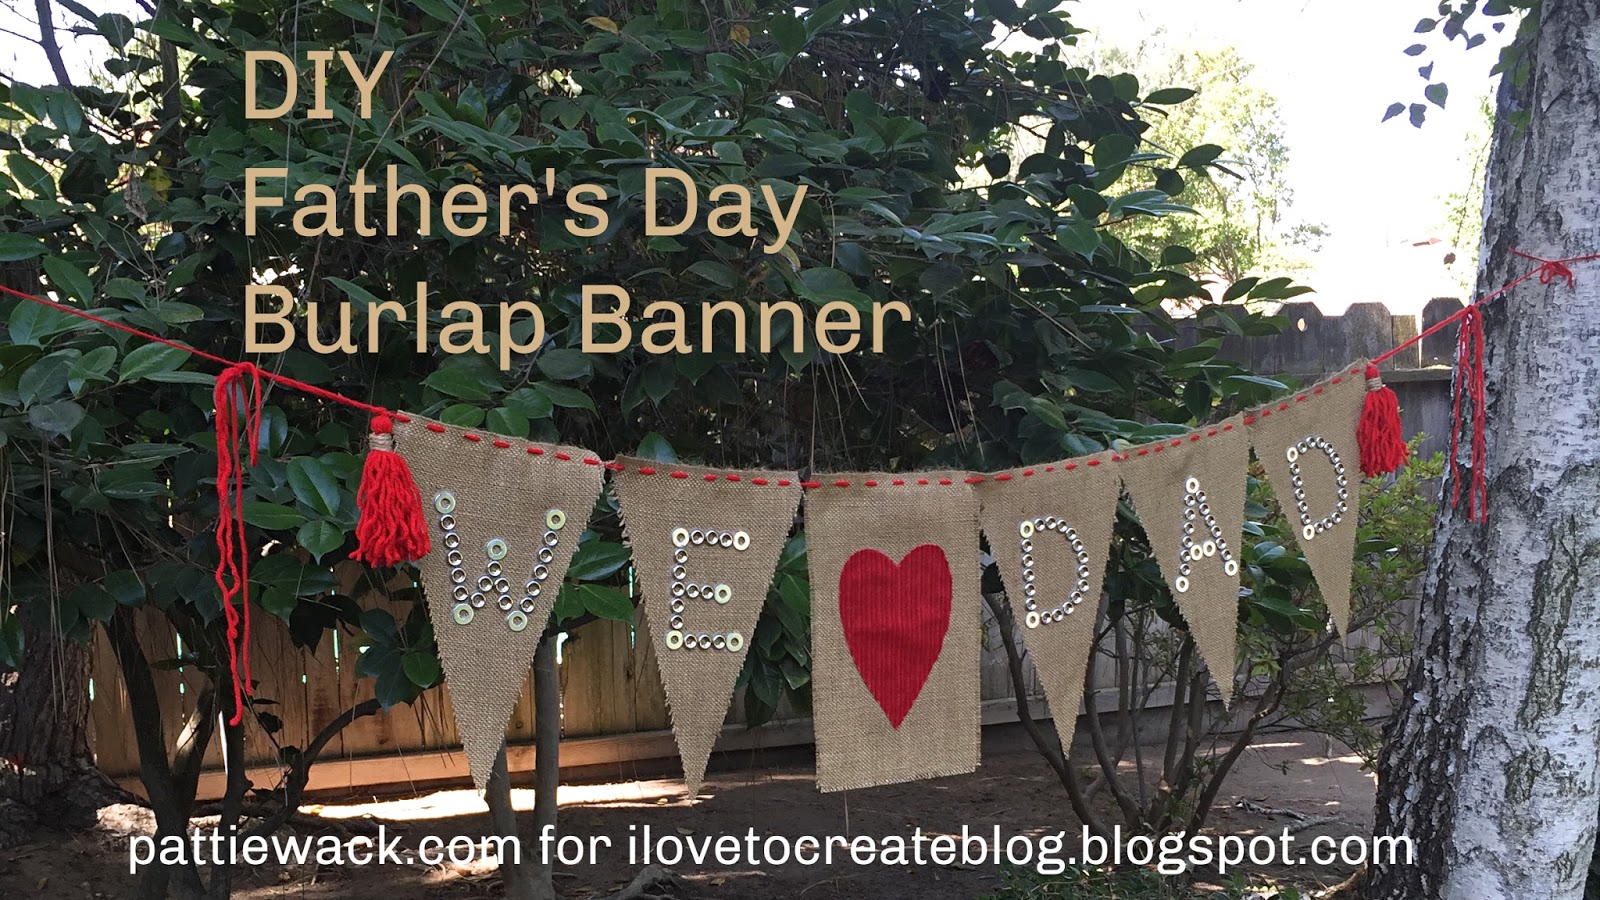
and I thought it would be fun to send my Dad a burlap banner made with washers, burlap fabric and
Aleene’s® Easy Squeeze Turbo Tacky Glue. Even
if your Dad has everything he needs, he can always use a reminder that he’s
loved, right? And I wanted a handmade
gift that I could put in a priority envelope, and then ship it from California to Oklahoma. So
this is perfect!
Showing posts with label Aleene's Turbo Tacky Glue. Show all posts
Sunday, June 7
Monday, November 17
Glittered PomPom Pinecone Ornaments
Looking for an easy-yet-impressive, fun, fast, kid-friendly craft you can make in bulk? One that is perfect for a party or classroom? One that looks good on a Christmas tree or just grouped together as a wintertime centerpiece?
Look no further, my friend. Glittered pompom pinecones are the answer!
Want to make some at home?
Yeah, you do!
Tuesday, October 28
7 Ways To Decorate A Light Switch
I originally set out to decorate 5 light switch plates, but ended up getting to 7 -- I just couldn't stop! For most of them, I used the new "Always Ready" Aleene's Tacky glues (they arrive in the checkout aisle -- no the glue section -- of JoAnn stores starting in November!). It's smart new inverted packaging that has the glue all ready to go -- in other words, no need to shake the bottle anymore to get the gluey stuff into the tip. They are great -- my only challenge was to remember to store them back in their base, tip down!
A light switch plate is a pretty sweet blank canvas -- small in dimension and fairly low-stakes (in case the creative process doesn't go as planned). But when it does work, what fun! Which switch plate theme or technique would you take and run with?
Thursday, December 5
Glittered Glam Christmas Trees
I think I love Christmas for one very distinct reason... It is totally acceptable to have everything in your home covered with glitter. In fact, it's highly encouraged! So I decided to bling out a pair of paper mache cones I had in my craft stash!
Friday, February 1
4 Fun New Yarn Ideas - Cool2Craft TV with Heidi & Tiffany
Learn new techniques, chat with us while watching the show and ask questions about all your favorite Aleene's products!Airing Monday February 4, 2013 9 am Pacific/10 am Mountain/11 am Central/Noon Eastern.
How do you join us? Go to Cool2Craft.com and you'll see the link to the Livestream player and chat box where you can join right in. See you in the chatroom on Monday or drop by anytime this week to watch these cool video tutorials!
Visit us on Facebook! Watch our video tutorial archives on YouTube! Get creative! Get inspired! Be cool!
Friday, November 30
Wool Felt Christmas Tree Wall Art, Christmas Mosaic Brick and more! Cool2Craft TV
The Cool2Craft girls are sharing Christmas inspired projects. Tiffany is creating Wool Felt Christmas Tree Wall Art with Aleene's Turbo Tacky Glue and EcoHeidi is crafting a Christmas Tree Mosaic Brick with Aleene's Tacky Glue. Plus we'll be sharing abelieve book, holiday cupcake toppers, a reversible gift bag and a mini felt tree ornament.
Learn new techniques, chat with us while watching the show and ask questions about all your favorite Aleene's products! Drop by our chat room during Monday's show and mention that you saw this post on the iLovetoCreate blog for your chance to win Aleene's Tacky Glue!
Airing Monday December 3, 2012 9am Pacific/11 am Central/Noon Eastern. Go to Cool2Craft.com and you'll see the link to the Livestream player and chat box where you can join right in. See you Monday!
Visit us on Facebook! Get creative! Get inspired! Be cool!
Monday, July 16
iLoveToCreate Tori Spelling Inspired Pin This Necklace
iLoveToCreate Tori
Spelling Inspired ‘Pin This’ Necklace
Margot Potter
“These are your
grandmother’s crafts...ya gotta problem with that?”
My design process is a very intuitive one. I see things, they spark ideas and off I go
to figure out how to turn the ideas into reality. Not everything works out the way it is in my
mind, but that’s part of the fun of design.
These vintage wooden clothespins were part of an Estate Sale haul from
several years back. I knew there was a
design in these, but what, I didn’t know.
Watching Craft Wars, I’ve been utterly charmed by Tori Spelling’s large scale
whimsical necklaces. This week I was
going to make a Pop Craft Challenge inspired Dog Toy box, but honestly I was
running out of time and feeling stressed until I stumbled on these clothespins,
pictured Tori’s jewelry and it all came together. My vintage craft magazines are filled with
found object jewelry like this and I find it all such fun. I am seriously smitten with this design. I
can not wait to wear it to the big Craft and Hobby Association show I’m
attending this week. You could do
something similar using clip style clothespins or golf tees would make a
smaller scale but equally delightful design.
Materials
11 ½”x4” vintage wooden clothespins
8 10mm crystal SWAROVSKI ELEMENTS rounds
2 sterling or silver plated dapped French ear wires
2 sterling or silver plated EZ Crimp ends
2 silver tone or black size 2 crimp tubes or beads
.018 49 Strand Beadalon wire
2 metal loop topped craft screws
10.5” segment gun metal textured cable chain
Gun metal lobster clasp
Crafty Chica Paints: red, black, white
Tulip sponge brush
Aleene’s Spray Acrylic Sealer matte finish
Aleene’s Turbo Tacky Glue
Tools
2 pairs chain nose pliers
Mighty crimp tool
Flush cutters
Electric drill with 1/16” bit
Marker
Mark and drill holes in clothespins. There is a hole in the center top of each
(these are drilled side to side so the pin leg opening will hang forward on the
wire.) The second side to side drill
hole is at the sides just above the top of the pin leg opening. Repeat for 9 of your clothespins.
Make a small hole in the center top of two clothespins;
these will be threaded with the loop top screws to create the earrings.
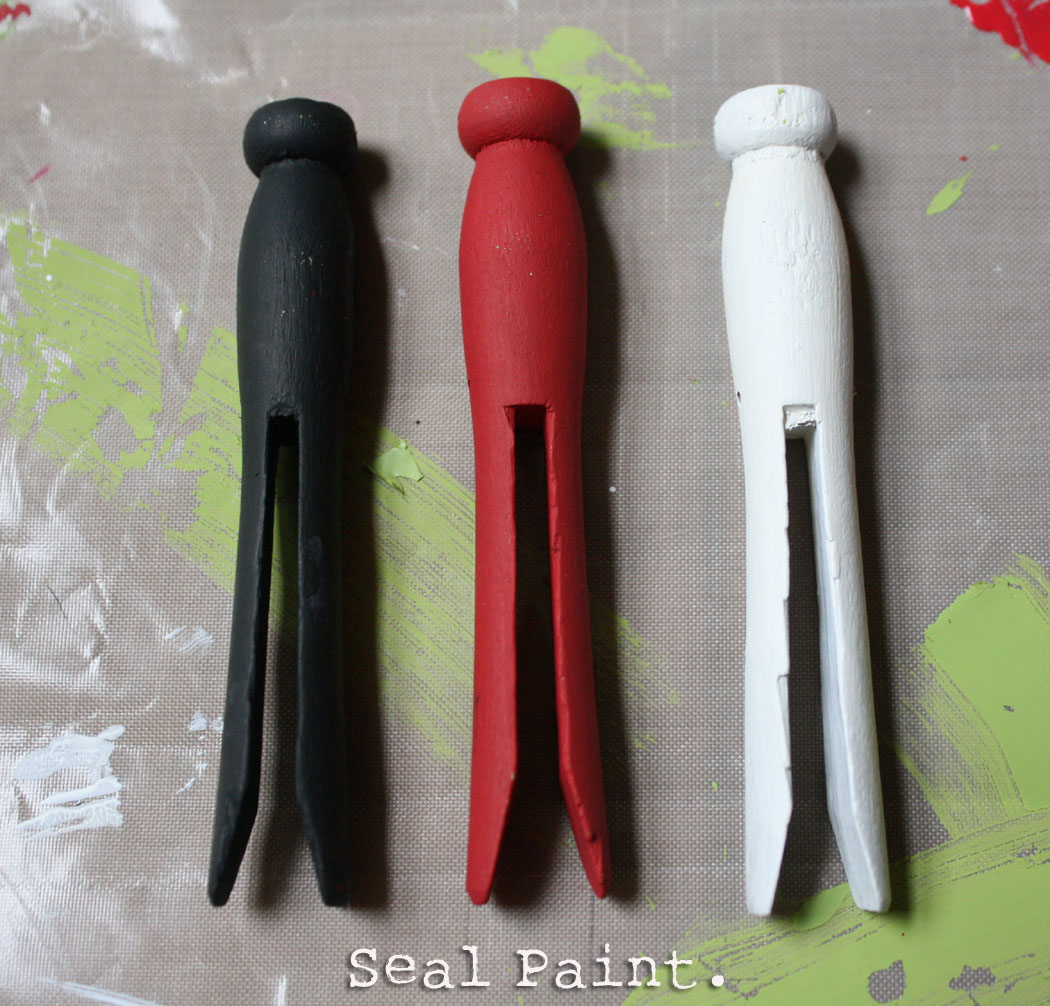
Paint all clothespins.
There top drilled pins are red. Make
three more red, three black and three white.
This will take several coats drying in between. You can also sand in between coats. Use a foam brush to paint and a small detail
brush to reach inside of the pin legs.
Paint all sides.
Cut a 10” segment of beading wire. Thread an EZ Crimp end on one side, secure
with Mighty Crimp tool. We have a video
that shows you how to do this here.
Thread 9 clothespins on the wire alternating colors. Thread wire into a second EZ Crimp end. Use chain nose pliers to grasp and pull wire
through end pulling the clothespins taught, but not too stiff. Use Mighty Crimp tool to secure wire, use
flush cutters to cut off excess wire tail.
Thread a second wire into the lower hole opening on the outermost
clothespin. Thread on one of your crimp
tubes, use chain nose pliers to compress tightly.
Slide a bead on the wire, thread into the next pin and
repeat this process until you reach the final bead. Thread the wire into the 9th
clothespin, add a crimp tube, tighten wire to remove any slack and compress
tube with chain nose pliers to secure.
Cut off excess wire with flush cutters.
Attach a jump ring to one of the EZ Crimp ends. Repeat on the other side, adding the
chain. Finish by attaching a jump ring
to the open end of your chain and add the clasp before securing closed.
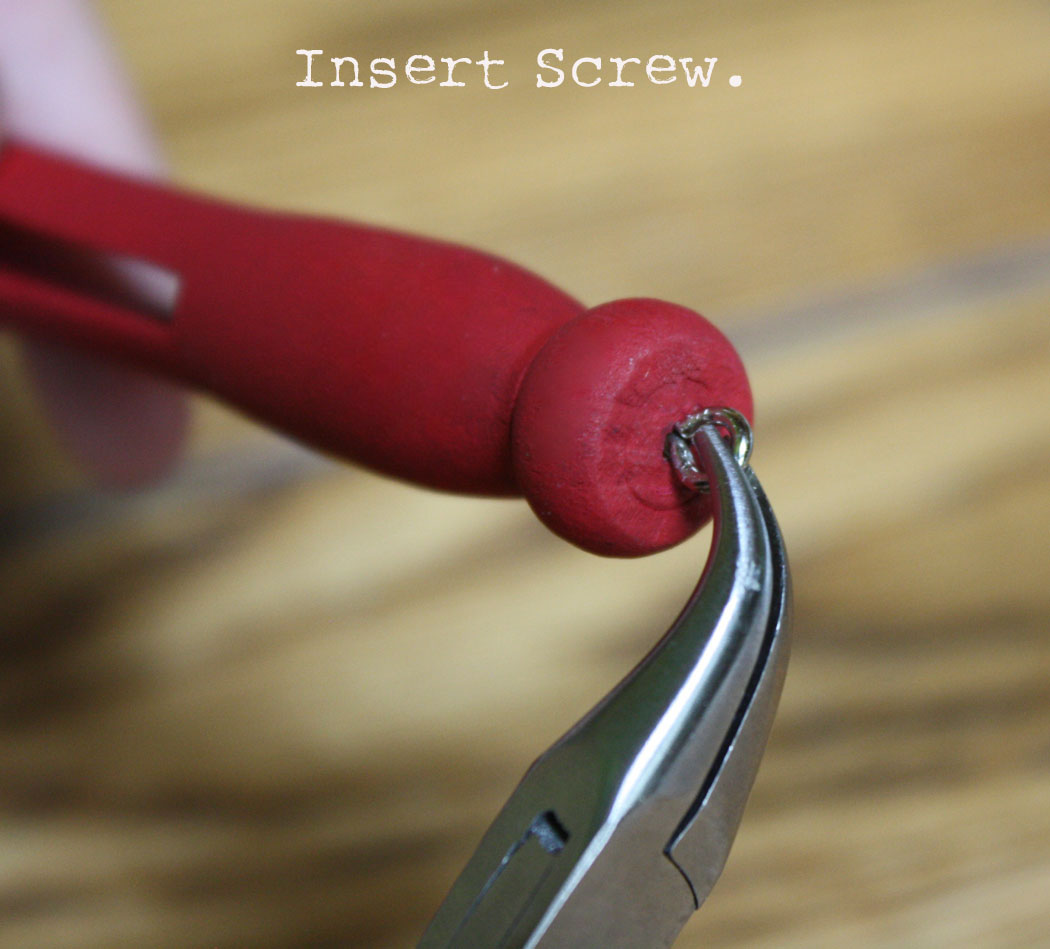
To make earrings, thread a loop top screw into the
pre-drilled opening. Dab a little bit of Tacky Glue on the screw before inserting. Use chain nose
pliers to push and turn loop into opening until it is completely embedded. Use chain nose pliers to attach ear wires
loop tops by opening the loop on the earrings, sliding them into the loop and
securing closed.
Friday, July 13
Beautiful Butterflies - Cool2Craft TV
It's super cool! Cool2Craft TV July 16, 2012: Beautiful Butterflies! The Cool2Craft design team is sharing a fun collection of paint inspired craft ideas this week! EcoHeidi Borchers is sharing the vintage Aleene favorite technique to create her Look of Metal with Kitchen Foil Butterfly featuring Aleene's Tacky Glue and Tiffany Windsor is crafting a Butterfly Garden Tablescape featuring Aleene's Turbo Tacky Glue, plus much more!
Learn new techniques, chat with us while watching the show and ask questions about all your favorite Aleene's products! It’s easy to watch the Cool2Craft TV Channel right from your computer. Airing Monday July 16, 2012 9am Pacific/10am Mountain/11 am Central/ Noon Eastern. Go to http://cool2craft.com and you'll see the Livestream player and chat box. See you Monday! Can't make the live show? No problem, you can drop by anytime 24/7 to watch the show!
Visit us on Facebook!Craft on!
Wednesday, July 11
Craft Wars Inspired (Junk Drawer) Ocean Dreams Birdhouse
Avalon Potter for iLoveToCreate
"Teen crafted, Mom approved."
My mom is going to be on an upcoming episode of TLCs new show Craft Wars and she's making projects every week with other contestants from the show inspired by the theme of the week before. Last week's Pop Craft challenge was to make a junk drawer themed birdhouse. We had two of these old birdhouses sitting in our yard, so we decided to both decorate one. I used her paint scraping technique in colors that fit my style and added some things from our 'junk drawer', some sea shells from our last trip to the beach, old buttons and a seahorse metal charm. Layers of mixed acrylic paint colors from Crafty Chica, Scribbles and Tulip are all sealed under Aleene's Spray Sealer so this can go outside. I can't wait for a bird to move in!
Materials
Old wooden birdhouse
Seashells
Old buttons in colors to match
Seahorse or ocean themed metal accent
Number tape (7 gypsies)
Blue, black, copper, white and brown paints (Crafty Chica, Tulip and Scribbles brands)
Aleene's Turbo Tacky Glue
Aleene's Spray Acrylic Sealer (matte)
Tools
Scissors
Butter knife or palette knife
If you are using an old birdhouse, clean off any debris and lightly sand. If a new birdhouse, sand lightly.
Avalon Potter for iLoveToCreate
"Teen crafted, Mom approved."
My mom is going to be on an upcoming episode of TLCs new show Craft Wars and she's making projects every week with other contestants from the show inspired by the theme of the week before. Last week's Pop Craft challenge was to make a junk drawer themed birdhouse. We had two of these old birdhouses sitting in our yard, so we decided to both decorate one. I used her paint scraping technique in colors that fit my style and added some things from our 'junk drawer', some sea shells from our last trip to the beach, old buttons and a seahorse metal charm. Layers of mixed acrylic paint colors from Crafty Chica, Scribbles and Tulip are all sealed under Aleene's Spray Sealer so this can go outside. I can't wait for a bird to move in!
Materials
Old wooden birdhouse
Seashells
Old buttons in colors to match
Seahorse or ocean themed metal accent
Number tape (7 gypsies)
Blue, black, copper, white and brown paints (Crafty Chica, Tulip and Scribbles brands)
Aleene's Turbo Tacky Glue
Aleene's Spray Acrylic Sealer (matte)
Tools
Scissors
Butter knife or palette knife
If you are using an old birdhouse, clean off any debris and lightly sand. If a new birdhouse, sand lightly.
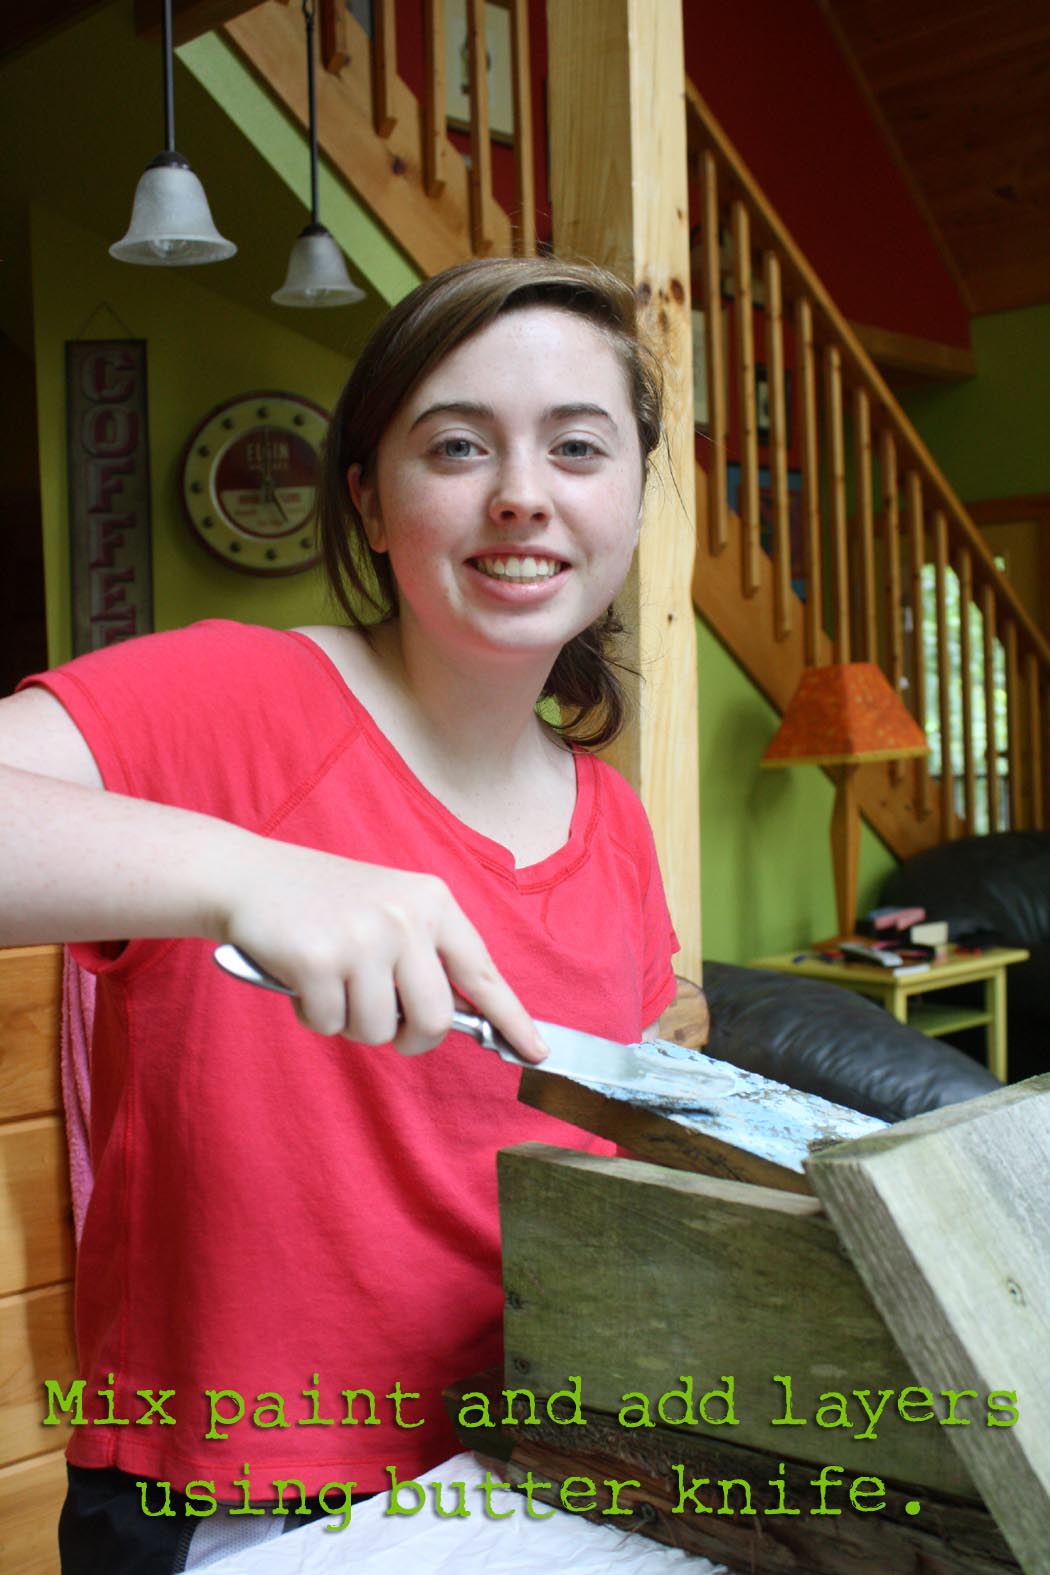
Mix up paints to make several shades of blue, grey and tan. Use a butter knife to scrape paint on house door, roof and sides in layers, starting with the darker colors and continuing until you're happy with how it looks. try not to smash the colors together, layer them on top of each other instead.
Use Tacky Glue to glue shells around your door frame.
Glue buttons around opening using more Tacky Glue.
Glue Seahorse to Door with more Tacky Glue. Yay, Tacky Glue!
Run tape along edge of roof on front and sides. Cut to fit.
Spray with sealer, apply several coats allow them to dry in between each layer.
Monday, April 16
iLoveToCreate Retrofabulous Crafts: Hana Ami Flower Scatter Pins
Visit us on Facebook!
Craft on!
Hana Ami Flower Scatter Pins by Margot Potter
iLoveToCreate Retrofabulous Crafts
Hana Ami Flower Scatter Pins
Margot Potter
Some crafty days are smooth sailing and then...there are days like today. I was going to whip up some quick and easy yarn fabric flowers on my new Hani Ami loom and...well...virtually everything that could go wrong, went wrong. Ergh. I persevered, because I'm both impatient and stubborn, and eventually I got there. These yarn flowers were all the rage back in the day, there are countless ads in my vintage magazines for looms to make these. This was a new loom, I just wasn't used to the platform and the process and the instructions were confusing, as most instructions seem to be. I ended up making up my own way of finishing the flowers, removing them from the platform and sewing through the centers of the flower petals and around them until I made my way around each flower. It isn't the darning method recommended, but it's the one that worked for me!
Once I finally got three double layer petal flowers finished, Aleene's Tacky Glue made fast work of the rest. I added a button center with an acrylic 'gem' to each flower and a safety pin back to each one and...phew! I did it! You can too!
These are fabulous on hats, jackets, t-shirts, flip flops...you will never run out of places to pin or glue them...and you can attach them together to make a funky scarf or sew them into pillows or garments. Hooray!
Materials
Yarn
Buttons
Acrylic gemstones
Safety pins
Aleene's Turbo Tacky Glue
Tools
Clover Flower Making Loom (with darning needle)
Scissors
Attach yarn and begin winding following manufacturer's instructions. Take your time and keep yarn tight as you wind.
I went around each peg twice for fluffier flowers.

Use needle to sew through and around petals, going into the center of each pair and around into the center of the pair at the opposite side, working your way around flower until you reach the final pair of petals.
Finish flower, tie of ends at back and snip tails.
Attach buttons and crystals with glue.
Attach safety pins, add a dab of glue and allow to dry overnight.
The blogger was compensated for this post.
Craft on!
Hana Ami Flower Scatter Pins by Margot PotteriLoveToCreate Retrofabulous Crafts
Hana Ami Flower Scatter Pins
Margot Potter
Some crafty days are smooth sailing and then...there are days like today. I was going to whip up some quick and easy yarn fabric flowers on my new Hani Ami loom and...well...virtually everything that could go wrong, went wrong. Ergh. I persevered, because I'm both impatient and stubborn, and eventually I got there. These yarn flowers were all the rage back in the day, there are countless ads in my vintage magazines for looms to make these. This was a new loom, I just wasn't used to the platform and the process and the instructions were confusing, as most instructions seem to be. I ended up making up my own way of finishing the flowers, removing them from the platform and sewing through the centers of the flower petals and around them until I made my way around each flower. It isn't the darning method recommended, but it's the one that worked for me!
Once I finally got three double layer petal flowers finished, Aleene's Tacky Glue made fast work of the rest. I added a button center with an acrylic 'gem' to each flower and a safety pin back to each one and...phew! I did it! You can too!
These are fabulous on hats, jackets, t-shirts, flip flops...you will never run out of places to pin or glue them...and you can attach them together to make a funky scarf or sew them into pillows or garments. Hooray!
Materials
Yarn
Buttons
Acrylic gemstones
Safety pins
Aleene's Turbo Tacky Glue
Tools
Clover Flower Making Loom (with darning needle)
Scissors
Attach yarn and begin winding following manufacturer's instructions. Take your time and keep yarn tight as you wind.
I went around each peg twice for fluffier flowers.
Use needle to sew through and around petals, going into the center of each pair and around into the center of the pair at the opposite side, working your way around flower until you reach the final pair of petals.
Finish flower, tie of ends at back and snip tails.
Attach buttons and crystals with glue.
Attach safety pins, add a dab of glue and allow to dry overnight.
The blogger was compensated for this post.
Saturday, January 14
Learn new Crafting Techniques! Cool2Craft TV Monday January 16, 2012: Prints & Patterns
It’s easy to watch the Cool2Craft TV Channel right from your computer. Airing Monday January 16, 2012 9am Pacific/10am Mountain/ 11 am Central/ Noon Eastern. Go to http://cool2craft.com and find the Livestream player and chat box. See you Monday!
Visit us on Facebook!
Craft on!
Subscribe to:
Posts (Atom)