Kid art is one of my favorite things, but I have too many boxes full of kid drawings! I wanted a great way to appreciate and display my son's 3rd grade class' adorable art, so I decided to help them make a fabric collage quilt. It turned out so cute! Let me show you how to make it, step by step...
Showing posts with label Fabric Fusion. Show all posts
Saturday, March 14
Saturday, January 31
No-Sew Owl Applique T-shirt
I love the look of fabric applique, but I just don't have time to painstakingly sew an applique to a t-shirt. Aleene's Fabric Fusion to the rescue! I used it to glue an adorable owl print applique on some t-shirts for my son, and it was so quick and easy I just had to share with you!
Labels:
applique,
baby shirt,
DIY appliques,
Fabric Fusion,
owl,
t-shirt,
tie dye
Tuesday, April 8
Tie Dye Dream Pillow
April is supposedly the rainy and cloudy month, but it has been pretty nice so far in my neck of the woods and I am no going to complain. The cloud on the pillow I have created and am sharing with you today is not worth complaining over either. Actually it is quite cute and super soft!
Thursday, August 11
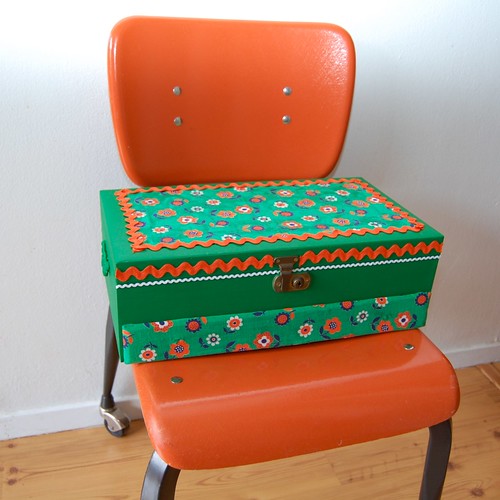
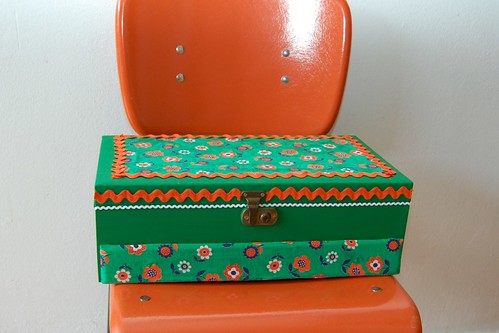
Recycled Reto-Style Jewelry Box


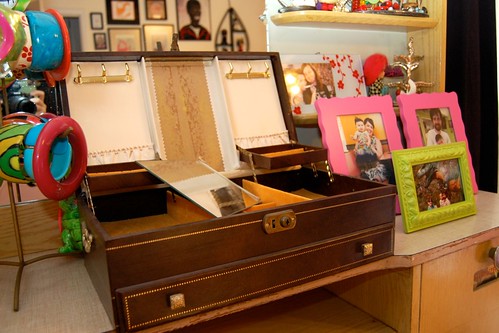
This is not my first time at the jewelry box re-vamping rodeo. Once upon a time I even sold them on my website. Lately, I have spotted several cute recycled jewelry boxes on Pintrest and Etsy that have my creative juices flowing. Flowing so much in fact I decided to revisit my stash of vintage jewelry boxes and see if I couldn't come up with something new and improved. My jewelry collection is always overflowing and I can never have too much cute storage for it.

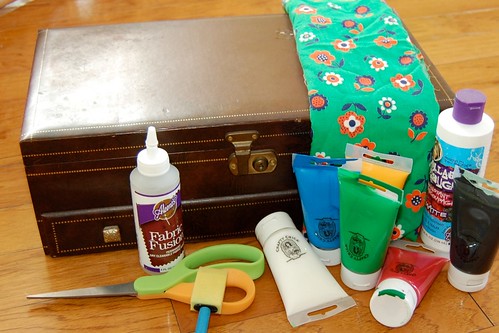
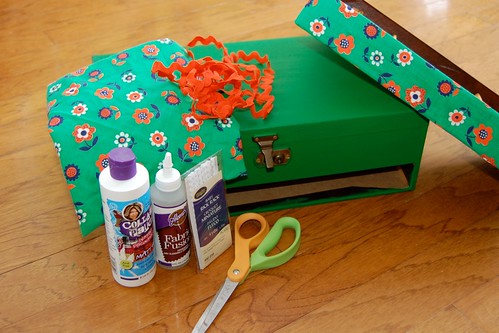
SUPPLIES
Jewelry Box
Crafty Chica Paint
Scissors
Paint Brush
Aleene's Tacky Glue
Fabric
Collage Pauge
Rick Rack
Pliers


At least every other trip to the thrift store I spot an old jewelry box begging for a face lift. I happen to have a small stockpile in my studio of a few that have called my name through the years. I opted for a large dark brown dude from the 1960's to re-do.

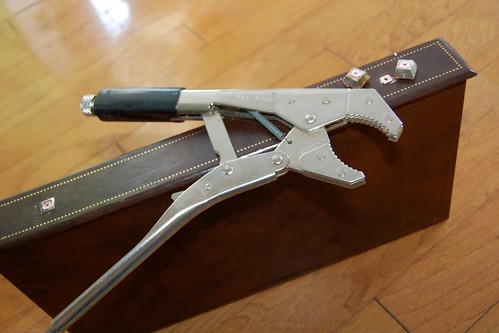
The only priming I did was to remove the drawer pulls. I needed a pair of pliers for this.

The first thing I did was using Crafty Chica Paint and a sponge brush applied several coats of green paint. Allow your paint to dry completely between coats.

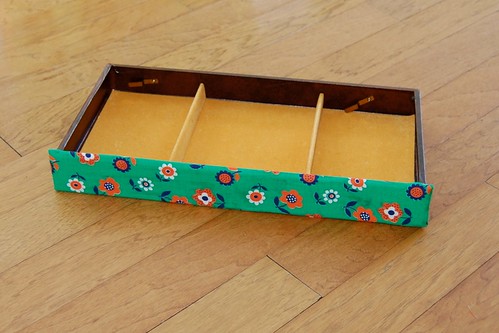
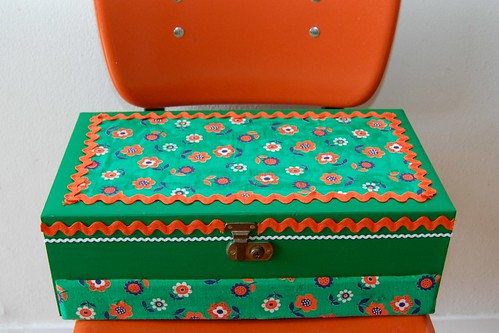
Once my paint was dry I used Collage Pauge to apply my fabric. I re-covered the drawer in my vintage fabric and added a large rectangle of fabric on the lid.

Paula Deen thinks everything is better with butter and I happen to think everything is better with rick rack. I applied the rick rick with a combo of Fabric Fusion and Quick Dry Tacky Glue depending on what surface the rick rack was touching.

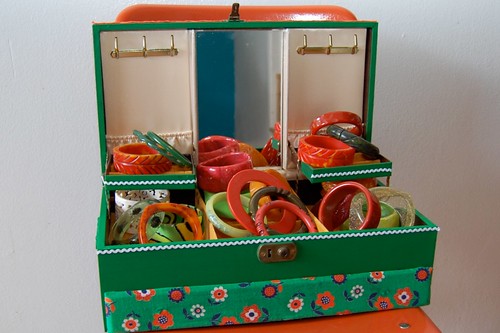
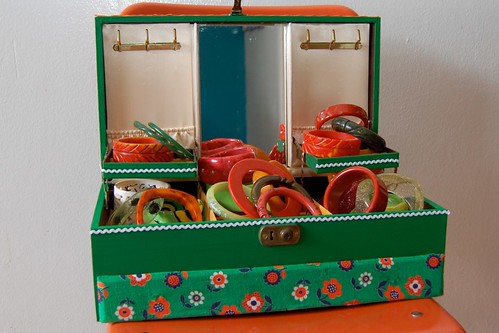
My new and improved jewelry box houses my Bakelite collection perfectly. I like the idea of being able to color coordinate my jewelry with my jewelry box. Ya, I've been accused of being too matchy matchy in my day - so what.

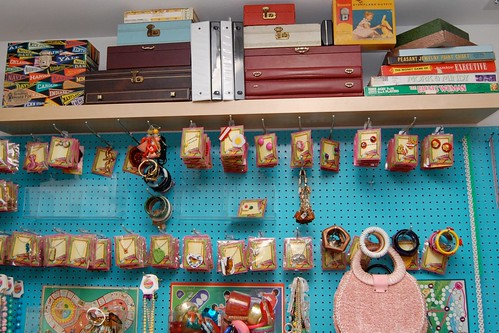
Check out more I Love to Create posts here. Be sure to check out my series on jewelry displays and boxes - Journey Through a Jewelry Box Flickr Faves, How Ya Hanging - Jewelry Displays of Crafty Ladies, Jewelry Displays in Books and Making Your own Jewelry Display.

Visit us on Facebook!
Craft on! Click here for today's daily giveaway!
Wednesday, January 12
iLoveToCreate Teen Crafts: Volleyball Spirit Socks

Volleyball Spirit Socks
Avalon Potter for ILovetoCreate Teen Crafts
"Teen crafted, mom approved."
For my project this week I decided to create some knee high volleyball socks! I have recently been preparing for a volleyball tournament and when you play volleyball your uniform usually includes knee high socks. Instead of buying a pair of fancy socks, I decided to decorate them myself! It is fun and easy and is even better once you try them on. You can adapt this project to any sport or if you're not sporty, just for fun!
Materials
White knee socks
1” grey grosgrain ribbon
Pink Felt
Aleene’s Fabric Fusion fabric glue
Tulip dimensional fabric paint-slick black
Tracing pen
1” circumference circle template
Tube or rectangular form large enough to secure socks and hold their form

1. Place sock on form.
2. Take your pen and mark where you will put your volleyballs and bow on socks.

3. Take your circle cutout and trace it eight times with your pen on the felt.

4. Cut out the circles and use the fabric paint to make a volleyball design on each felt cutout.
5. Let those dry and start on your two bows.
6. Find out how big you want the bow loops to be and cut a piece of ribbon to the desired length. Glue down the two ends in the middle.

7. Add a little bit of glue in the center of the bow where the ends meet. Cut a small piece of ribbon just long enough to go around the bow, fold in the ends.
8. After all of the volleyballs and bows have dried place the first four volleyballs and bow out on your sock.
9. Use Aleene’s fabric glue to glue the volleyballs and bow on the sock. Cover the whole backside of the volleyball in glue and only the center of the bow. You can tack the bow and volleyballs down with thread if you like.
10. Use the dimensional fabric paint to create dashes moving diagonally between the volleyballs on the front of the sock.
11. Let it dry on the tube. Repeat for second sock.
12. Enjoy!

Saturday, August 21
BACK TO SCHOOL: Teacher Gift

Teacher Gift
Designed by Cheryl Ball
Cozy up to creativity with a gift your child’s teacher will use every day! Create this simple craft with colorful felt and Aleene’s® Fabric Fusion™ to turn any disposable coffee cup into one that’s head of the class!
CLICK HERE FOR PRINTABLE DIRECTIONS
See even more back to school projects HERE!
Friday, May 14
Kamikaze Art Apron

Last month I spearheaded a craft cruise and one of our projects was to embellish an apron. Let's just say I embraced the concept. Armed with one bottle of Aleene's® Fabric Fusion®, I covered this canvas cutie up with fabric, Crafty Chica® Iron-On Appliques™ , Crafty Chica® Chunky Glitters, buttons and more. I even used stencils and paint!I think the spirit of this apron is that if I do happen to get it messy, no one will ever know because it has so much going on already.
This is an apron from Michaels Stores. It was a wee bit thin for me, so I cut it up the center and sewed in a panel of canvas fabric to make it wider. I then used Fabric Fusion to add trim around the edges.
Try it! Have fun!
Thursday, April 22
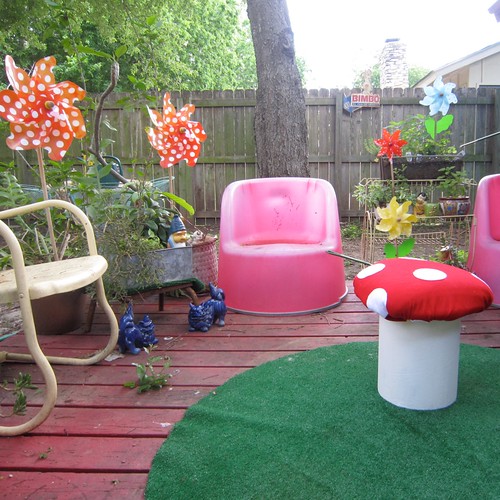
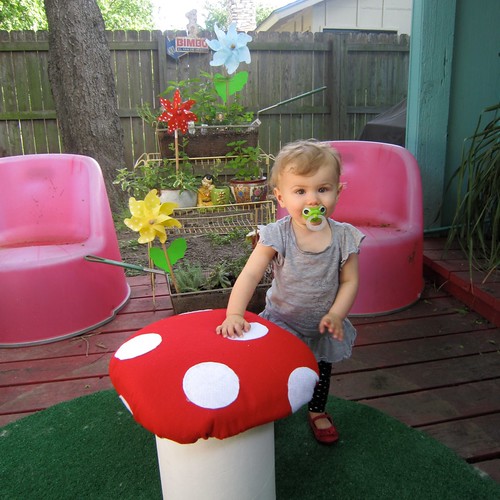
Toadstool Garden Stool


With spring in the air everyone needs a toadstool in their garden or on their patio. You could buy one from your local garden center or you could easily make one like I did.

SUPPLIES
White Felt
Foam
White Crafty Chica Paint
Red Felt
Concrete Pier Form
Batting
Liquid Fusion Glue
Staple Gun
Scissors
Fabric Fusion Glue
Paint Brush
Pen
Wooden Disc (several inches larger in diameter than your stool base)

DUMPSTER DIVE
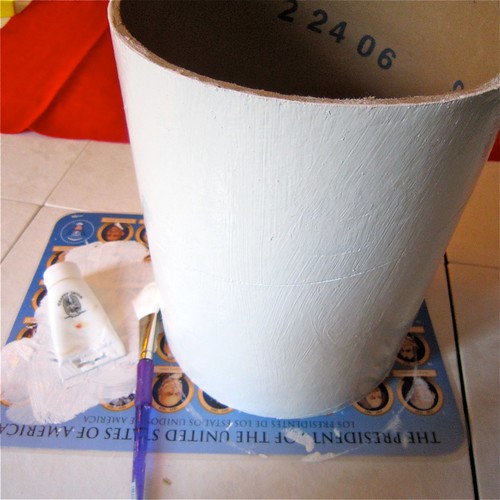
Actually I didn't do any dumpster diving. What I did do was cruise my neighborhood during bulk trash week. On a nearby street I found several large cardboard tubes which I was later informed are concrete pier forms. They were also filled with lots of wooden dowels that I snagged.

PAINT IT WHITE
I covered the cardboard in 2 coats of white Crafty Chica paint.

POLKA DOTS
Using a mug as my template I traced 12 circles onto white felt. I then cut the circles out and used Liquid Fusion Glue to attach them to a piece of red felt.

STOOL CUSHION
I traced my wooden disc onto foam and cut it out with scissors. If your foam is super thick you may need to use an electric knife.

I glued my foam to the wood using Liquid Fusion Glue. I also padded my stool with some extra batting.

READY, AIM, FIRE
Once the glue dried on my foam I sat it face down on the non-polka dotted side of my red felt. Using my staple gun and scissors I pulled, tucked, stapled and trimmed the felt. I tried to make sure the felt did not pucker and was nice and taunt on the top of the cushion.

CAP OFF YOUR TOADSTOOL
I used a heaping helping of Liquid Fusion glue to attach my stool top to it's base.

Though my stool is not water proof on a sunny day it looks pretty dang cute sitting on my back porch just waiting for someone to pop a squat.

When someone is not sitting on my new polka dotted mushroom stool Tallulah enjoys playing with it. Next I need to make a giant paper mache garden gnome.
Tuesday, March 9
I Heart ZIPPER SHOES!!

I love shoes so much, that I'm always checking out ways to wack them out with something, and these strappy heels caught my attention at Forever21 on one of my many dashes to the mall.

But they didn't start out like this. Oh no. At the iLoveToCreate Studios the Designers start with an idea like everyone else in the creative world, BUT then we must create a SKETCH to show the approval committee what we plan to DO with our idea before we can make it.

So, here's my sketch of the shoes I had in my head. As you can see, the technique for gluing is written there, along with my initials, and what the embellishments will be. At the time I was thinking zippers, crystals, and using GLUE to hold them all together. If you look real close, you see that "yes" it was approved.

And here's the shoes BEFORE the zippers, glue, and rosettes started being added.

In the process, I used clothespins and masking tape to hold them together while the glue set.

Oh, and did you know that zippers fray when you cut them? That's why you see the candle lit on my work table. I held the cut zipper over the flame to stop them from fraying. Works like a charm. I use Aleene's Fast Grab Tacky Glue, and I also used Fabric Fusion to hold the rosettes together. They are 3 sizes of wavy circles cut from an old pleather jacket, with a brad in the center of the small circle. I stacked and glued them together and then glued them to the shoes. The next morning I took off the tape and clothespins and woot-woot!

Check it out..... Our copy writer Chloe just HAD to try them on. They are size 9, and she is a size 6....so they are pretty big, but still pretty stellar.

Cute toes, Chloe!
Make it fun, make it crafty, and make it WACKY!
Till next time...
PattieWack
Subscribe to:
Posts (Atom)


.jpg)