Showing posts with label picture frames. Show all posts

Tuesday, January 20

Silly Frames for Silly Photos

header-blinged-out-frames-dreamalittlebigger 

If there is one thing my family is good at it is refusing to take a serious picture. We have no pictures where we're all politely smiling with our hair and makeup done and Sunday clothes. We have pictures where we act a fool or just have fun. So I decided to bling up some silly frames for some of these silly pictures with Clear Gel Tacky Glue!

Sunday, November 10

Thankful Thanksgiving Shadowbox

 
I love me a seasonal picture frame. Have I said that before? Anyway I also love me scrapbooking. Man I sound old. Anyway, all that being said Thanksgiving picture frames are far and few between so I grabbed a stack of scrapbooking paper and took matters into my own hands.

Thursday, August 22

Up-Cycling A Puzzle Into a Picture Frame


I'm slightly obsessed with gallery walls. I've been in the new house 1 month today ad already have 4.5. Today I made a new personalized addition to one of those gallery walls using a vintage puzzles, Tacky Dots and Instagram photos.

Thursday, June 27

Simple Shadow Box Show and Tell


So my husband Chris is not really a hero in the eyes of most, but to our family he is. Anyone who gets up at 5:30am with the kids and let's me sleep until 8:30 is a hero in my book. He's also a medal winner. Not for courage, but for canoeing. Sure, he came in 3rd place - but he still got a fun medal. I thought I would show him what a hero he is to us by whipping up this easy shadowbox.

Supplies

Aleene's Tacky Dots

Shadow Box Style Picture Frame

Scissors

Decorative Paper

Objects to Frame (medal and photo)

First I cut my scrap book paper to fit inside my frame.

Next I used Aleene's Tacky Glue Dots to adhere my Instagram picture to the paper.

One of the things I love about these Tacky Dots is that they are strong enough to hold something as heavy as a made in China 3rd place canoeing medal.

All that was left was to put the back on this frame and sit it on a shelf. I can't wait to make a photo wall in Chris's new home office when we move. This simple shadow box will be the perfect addition.

Tuesday, May 21

How to make a Tie Dye Doily Collage


Tie Dye Doily Collage
Jaderbomb for iLoveToCreate


I am always looking for a fun way to add Tie-Dye to my home decor. The colors are so vibrant when everything is complete. How fun will it be to see something everyday that adds pure happiness in your life. Since it's almost Summer I thought I would show you how to bring Tie-Dye into your outdoor decor. 
Let's get started because I am super pumped for you to make these! 
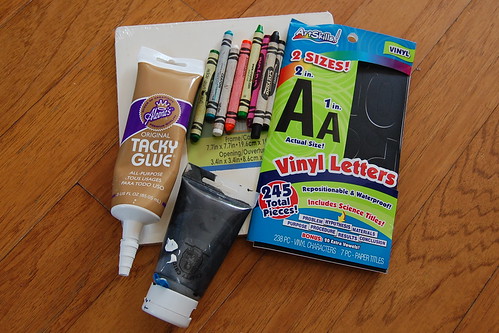
You will need:
*Tulip One-Step Tie-Dye Kit :  (Red, Yellow & Blue)
*Vintage Doilies or new ones

*Craft Brushes 
*Picture Frames
*Fishing string to hang them on fence
*Lot's of LOVE

The first thing you will do is fill up your bottles with water.  What I love the most is the powdered dye is already in the bottle when you get it. There is a bold line at the top of the bottle that states how much water to put in the bottle so you don't have to measure anything. 
When you get your pack of tie dye there will be a pamphlet in it showing you different techniques you can use. I like to use this for inspiration and possibly create new techniques from the ones shown on the paper. I always keep this for future reference.
(Trust me it comes in handy, plus it's pretty to look at)

Once you have your design complete in your head put the rubberbands that came with your package on your doily. Have fun and put as many as you want.
I start off by getting an old platter that I am ok with getting dirty and stained. I have an old cookie drying rack that I bought just for this purpose. I like it because it is raised and allows all of the dye to fall into the tray. If you are doing large items you might have to settle for a piece of visquin.
Don't forget to throw on the clear gloves that come with your tie-dye. This will prevent your fingers from getting stained.
I started by applying yellow first on one end. 
Don't forget you can create "other" colors by putting these colors together!
*Red+Blue= Purple
*Red+Yellow= Orange
*Blue+Yellow=Green
*Yellow+Green=Lime Green
These are just some of the colors you can create by mixing.
Then right after the yellow I applied blue since I know the two colors will make a nice shade of green where they touch. You can always squirt more blue directly over the yellow to get more green. 
Grab another doily and repeat the same steps. Make sure you change the pattern of your rubber bands to get different designs. This will look great once you hang them all up together. 
I decided to do an Ombre doily because I think it looks beautiful when complete. To start you will apply a single color to one side. Make sure you squirt out a good amount so you can spread it with your brush. Don't brush completely over the doily if you want to add another complimentary color on the other side. 
I like the color yellow and green create so I added yellow on my opposite end. It's really gorgeous because you get shades of lime green.
Time to dry. I always hang mine from a pot with a clothes pin. I enjoy when the colors bleed into each other. If you don't want the colors to fall downward lay your doily on a flat surface to dry. Let dry for 7-8 hours or overnight. I left my doily's outside all night. When you wake up take off the rubberbands and wash your doily. I recommend washing them by themselves.
(Make sure to keep your rubberbands, they will come in handy for bigger projects)
I love how delicate they look, yet so much fun!
I hope you enjoyed this tutorial! Just imagine how great these will look in your back yard (of course in a protected spot). If you don't have a backyard to put them in, you can always display them in your bathroom, kitchen, carport, living room, kids room or bedroom. 
Big hugs from Jaderbomb to you! See you in the next post.
P.S. I promise when you start playing with Tie-Dye you won't be able to stop, hehe! 
*Find more of my DIY decor at JADERBOMB.COM*
Oh and check out my other posts for iLoveToCreate below!

Thursday, February 21

Easter Basket Picture Frame Tutorial


I just can't stop the seasonal frame making insanity. With every holiday comes new pictures to display. Easter is no exception. I hit the craft stores, department stores even the thrift stores - but alas there were no cute Easter frames to be found. Luckily I had a plain wooden frame begging for a makeover lingering in my studio.

SUPPLIES
Aleene's Tacky Glue
Paint Brush
Glitter
Easter Grass
Small Eggs
Small Bunny
Blue Craft Paint

The first thing my crafty partner in crime and I did was make a glue/paint/water potion. I wanted my Tacky Glue thin enough that I could paint it on the frame.

While my glue was still wet I sprinkled blue glitter on top.

For the bottom half of the frame I glued on green Easter grass. Feel free to decorate your grass however you see fit. I opted for plastic eggs, glitter covered bunnies and felt flowers.

All that was left to do was choose the perfect picture of my family to put inside. This is us last year headed into church. I love the way the glitter shimmers by the light of my Easter wreath.

Thursday, October 18

Melted Crayon Halloween Picture Frame

I have a thing for seasonal picture frames. It is kind of an addiction. When Target puts their seasonal picture frames out I am the first in line. I decided to add to my collection this year by making one of my very own.

SUPPLIES

Blank Picture Frame

Black Crafty Chica Paint

Halloween Colored Crayons

Vinyl Letter Stickers

Aleene's Tacky Glue

Hairdryer

Craft Knife

Pardon my lack of step out pictures, I had an anxious toddler as my co-crafter on this project. The first thing I did was spell out the word boo on my blank frame with vinyl letters.

Next I painted the frame black. Tallulah did a base coat with her kid paint and then I followed up with some Crafty Chica Paint. I set my frame in the sun to dry.

Using a craft knife I slit the paper on the Crayons. Tallulah was in charge of unwrapping and breaking. I chose Halloween colors. Yes, in my world teal is a Halloween color.

When my frame was dry I used Aleene's Tacky Glue to attach my broken crayons along the top of the frame.

When my glue was dry I headed outside with my hairdryer to melt the crayons. In a perfect world the wax would have made it down over the words Boo, but alas they did not.

The heat from the hairdryer helped my stickers to peel up at the ages. Tallulah helped me peel up the letters to reveal the words BOO! All that was left to do was add a fun photo of the fam at the pumpkin patch last year and display.

Thursday, April 12

Neons and Nature Picture Frame


I have a real thing for neons and neutrals lately. You might recall my post entitled All-a-flutter For Fluorescents. There was also the neon cake pop display I made for my sister's bachlorette party. Then the real obsession with painted sticks started here with Going All Banksy on the Forest. Month's later my love for this color combination is still going strong. So much so that today for I Love to Create I decided to bring the neon to the neutrals yet again.


SUPPLIES
Picture Frame
Scribbles Paints
Paint Brushes
Masking Tape


You might recognize this wooden frame as a prop from the Little Lumberjacks and Jills party I recently threw for my kids. The frame was perfect for the woodland theme of the party, but did not fit in with the rest of my kitschy decor when the buffalo plaid came down. I didn't want to just donate the frame or give it away, instead I decided to give it the Naughty Secretary Club treatment. The first thing I did was using masking tape I taped off sections.


Using neon Scribbles paint I adorned my frame. Consider yourself warned that this takes several coats. I eventually added white paint to make the neon more opaque. A white base coat on the stripes might have been my best bet in retrospect.


Once the paint had dried completely I removed the masking tape to reveal the finished product. Ahhh, much better. My very own neons and neutrals painted frame. I love the two extremes of neons and nature together. Then again I would.
Visit us on Facebook!
Craft on!
Clicky Web Analytics
Pin It button on image hover

Subscribe to our newsletter

* indicates required
I am interested in products and inspiration for...
Close