Showing posts with label DIY Thanksgiving. Show all posts

Thursday, November 13

Laminated Leaves Fall Table Runner

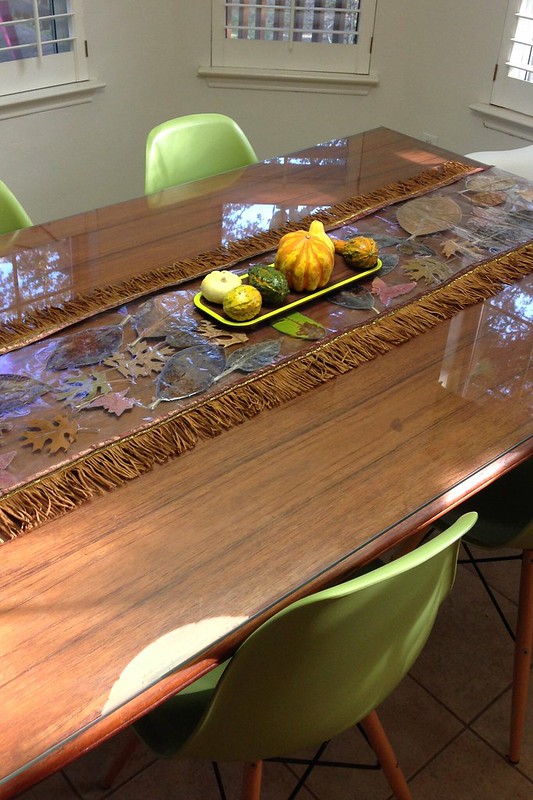
In my house we jump from Halloween to Christmas in the decorating department. That is until this year when my daughter went to dumb old kindergarten and started learning about fall. Gah, why did you guys have to let her in on the fact that there is a holiday to decorate for in-between my two biggies. Sure she knows all about turkeys and pilgrims, she just didn't know people decorated for it. I had no choice but to embrace fall this year. With the help of some Tacky Glue, colorful leaves and a laminating machine I might just be getting the hang of this fall decor thing.

Friday, November 22

3 Ways to Add Flair to Your Plastic Flatware

When it comes to my Thanksgiving Day, my family visits at least three houses. And each house has at least 20-50 people chowing down on turkey and pumpkin pie. Real silverware is out of the question! But here is a way to still look classy with all those peeps to serve - pick up a set of plastic silver flatware and dip them in Tulip Soft Paint. Here are three ways!

Friday, November 15

Faux Pallet Sign: Thanksgiving

I've been wanting to make Thanksgiving decorations for when people enter our house. Something to show happiness and love - but sans any turkeys or cornucopias. This was the perfect mix! It says "Con amor" which translates in Spanish as "with love." Here is how I made it - it looks really heavy, but it is so light because it was made with FloraCraft Foam, Aleene's Snow and scrapbook stickers!

Sunday, November 10

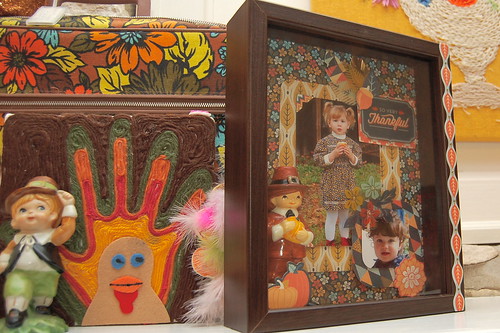
Thankful Thanksgiving Shadowbox

 
I love me a seasonal picture frame. Have I said that before? Anyway I also love me scrapbooking. Man I sound old. Anyway, all that being said Thanksgiving picture frames are far and few between so I grabbed a stack of scrapbooking paper and took matters into my own hands.

Wednesday, November 6

DIY Thanksgiving Pumpkin Vase Centerpiece

Halloween is over, so it's time to transition those decorative pumpkins to the Thanksgiving table.  I used a foam pumpkin (you can get these on super sale now), some faux fall foliage and gold Tulip Beads in a Bottle to make a rustic elegant centerpiece in four simple steps!

Thursday, November 8

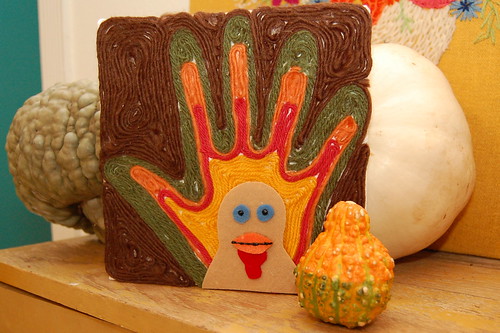
Yarn Turkey Tutorial

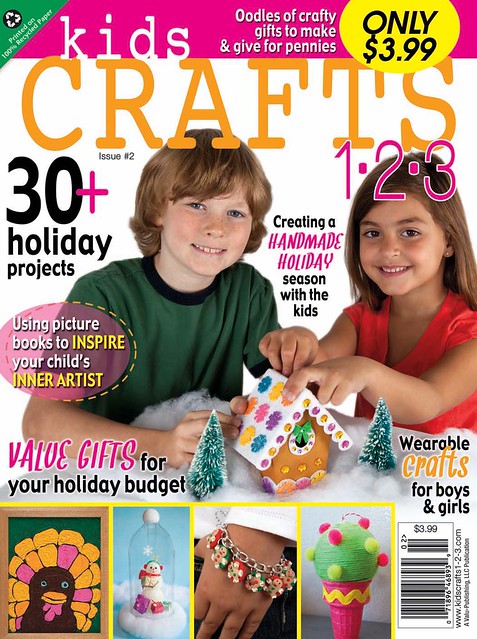
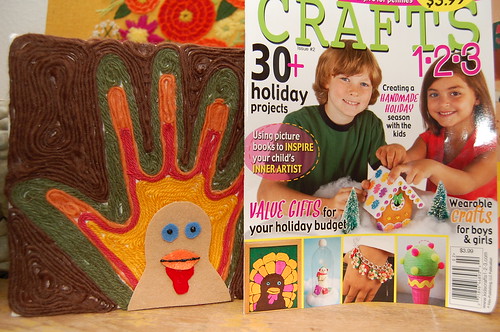
Have you heard the news that I am the Editor in Chief of a new kids crafts magazine for Walmart called Kids Crafts 1-2-3? It's true. Race out to Walmart and snag issue #2 with oodles of fall crafts, including a turkey 'painted' with yarn by Becky Joiner. You can see Thomas on the cover!

I thought today for I Love to Create it might be fun to reinterpret Thomas. Handprints and turkey crafts go together like sweet taters and marshmallows.

SUPPLIES

Yarn in fall colors

Black Tulip Slicks Paint

Small Canvas

Paper

Felt

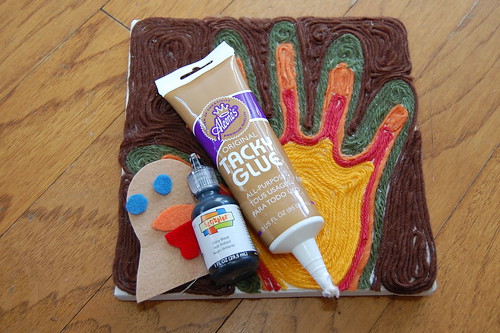
Aleene's Tacky Glue

Scissors

Pen

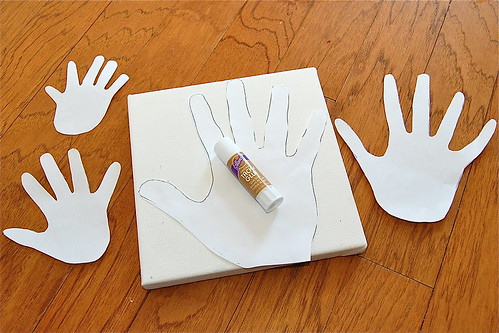
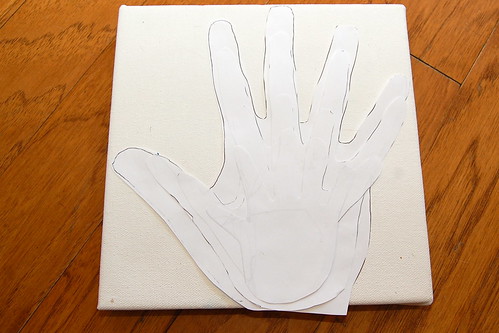
I decided to trace everyone's hands on paper first. Tracing squirmy, sick, cranky kids hands can be tricky.

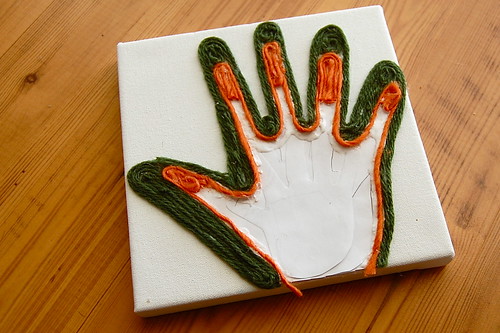
After I had everyone's hands cut out I used a glue stick to adhere them to the canvas. I did Chris' hand first, then mine, then Tallulah and lastly Baxter. In retrospect I wish I had used coordinating construction paper for each hand. That way there would be no white showing behind the yarn. Hindsight is always 20/20.

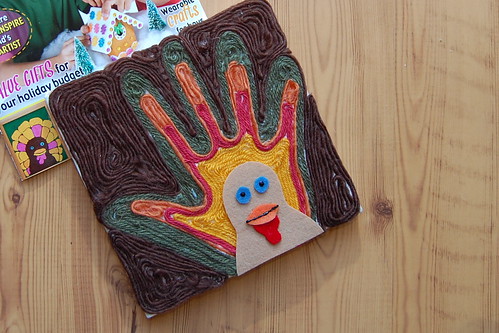
Next using Tacky Glue I started filling in each hand with yarn. Chris was green, I am orange, Tallulah is red and Baxter is yellow. I also filled in the back with brown yarn.

In the issue of Kids Crafts 1-2-3 we supply the template for you to trace to make Thomas. I kinda eyeballed his face and cut him out in felt.

I applied my felt pieces with Tacky Glue and using Scribbles paint in black I added a few features to his beak and eyes.

I'm super smitten on how he turned out! I'd love to hear if you try making your own. Yarn art is kinda addicting I see a Santa portrait in my near future.

P.S. Check out another fun Thanksgiving handprint tutorial with this cardigan project. Oh and someone might like a set of these gardening gloves for Christmas.

Monday, November 5

Giving Thanks DIY Thanksgiving Table Decor


iLoveToCreate
Giving Thanks DIY Thanksgiving Table Decor
Margot Potter

My new crafty gal pal Cheryl Burchett and I are co-hosting DIY segments for Gannett News here in Knoxville on WBIR Channel 10 called DIY on the FLY. We just filmed some fun Thanksgiving themed segments and the first one aired this week. I've embedded the video below AND here are the step by step instructions for some inexpensive and simple projects you can make to take your holiday table from drab to fab in seconds flat! You can make these projects as complex or as simple as you like, but whatever you do, Aleene's Tacky Glue dry adhesives make putting it all together a breeze!  

I think it's important remember the spirit behind this holiday.  When we 'give thanks', we rediscover the many things for which we can be grateful in our lives.  By writing them down and reading them out loud between dinner and dessert, we share our gratitude with our family and friends.  That's some very powerful and positive stuff right there! I think this would make a most lovely annual tradition, so we've decided to implement it here at Casa de Potter!

Materials
Card stock in fall colors
Coordinating patterned scrapbook paper
Printed sentiments in coordinating colors (thankful, give thanks, guest names)
Cut felt seasonal shapes (Genevieve Gail for Michaels)
Aleene's Tacky Double Stick Sheets
Aleene's Tacky Dot Runner
Tulip Dimensional Fabric Paint Glitter in gold
Tulip Dimensional Fabric Paint in pearl espresso
Mini glittered foam pumpkins or real mini pumpkins  
Large orange hollow foam pumpkin
Faux flowers


Tools
Computer with printer
Scissors
Decorative edge scissors
Paper trimmer
Ruler
Knife
Foam brush


Mini-Pumpkin Placecards
Print names.  Cut out with paper trimmer or scissors.  Cut a patterned scrapbook paper background using decorative edge scissors as in picture.  Cut solid colored card stock background.  Attach layers with Tacky Dot Runner.  Use knife to cut small slit in top of foam pumpkin.  Insert card!


'Give Thanks' Table Card
Print Give Thanks.  Cut out with paper trimmer or scissors into a fat rectangle as in picture.  Layer on a patterned solid color cardstock, cut to fit leaving a 1/4" edge.  Layer on patterned paper, cut to fit leaving a 1/2" edge.  Cut large solid color card stock to 7.5"x8.5" to make card.  Fold in half, using a bone folder or your scissor handles to score and fold card.  Attach layered papers to front of card with tape runner.  Attach shapes with sticker sheets to top left corner and lower right corner of papers.  I place one of these on either side of my centerpiece arrangement of gourds, mini-pumpkins, garland and glittered pumpkin vase.

'Give Thanks' Pouches
Print 'thankful' in several fall colors.  Cut word out with paper trimmer or scissors as in picture.  Layer on a solid colored card stock and cut to fit leaving a thin border at top and bottom as in picture. Layer on patterned paper and cut to fit leaving a thin edge at top and bottom.  Cut three 3"wx.5" wide pieces of light colored card stock (these will be used by guests to write three things for which they are thankful.)  Use a decorative miniature clothespin to secure to top of organza bag.


Glittered (Faux) Pumpkin Vase Centerpiece
Cut top out of pumpkin, this will be your vase.  You can use a foam pumpkin or if you prefer a real pumpkin (if using a real pumpkin, you will need to pat it completely dry with a paper towel before applying paint and glitter.)  Use foam brush to spread a thin layer of pearl espresso paint on surface of pumpkin, allow to dry until tacky, this should be thicker in some sections than others for a striated effect.  Squirt a generous amount of glitter medium on pumpkin and spread with fingers.  Work around entire pumpkin.  Allow to dry.  If using real flowers, a glass vase should be inserted into opening, if faux flowers cut to fit inside of pumpkin.  You can optionally add glitter to either fresh or faux flowers using the same glitter medium! (If you want to apply a solid layer of glitter to pumpkin, work in sections using Aleene's Tacky Glue and loose glitter.)


(Blogger was compensated for project and given some free product to feature in project. Opinions are 100% my own. If I don't like it, I don't blog it!)

Thursday, November 18

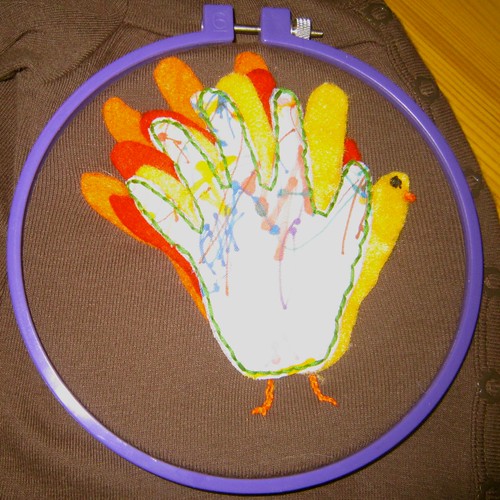
Tallulah's Turkey Top


Today for I Love to Create we have my spin on the obligatory hand print turkey Thanksgiving craft. Tallulah needed the perfect Thanksgiving outfit, so I decided to make it myself.


SUPPLIES
Pen
Tulip Fabric Marker (Fine Writers)
Cardigan
White Fabric
Steam a Seam
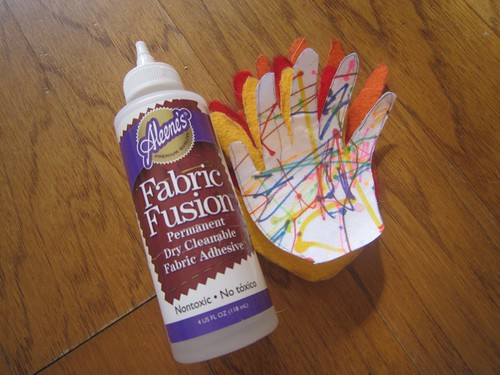
Fabric Fusion Glue
Iron
Scissors
Embroidery Floss
Felt
Embroidery Hoop


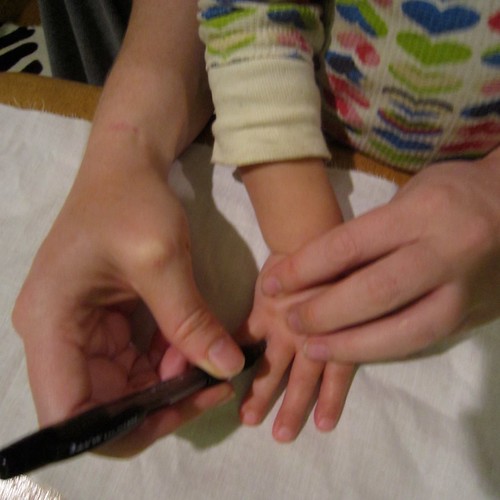
The hardest part of this project will be getting your toddler to hold still long enough to trace their hand onto a piece of white fabric. I find candy bribes help.


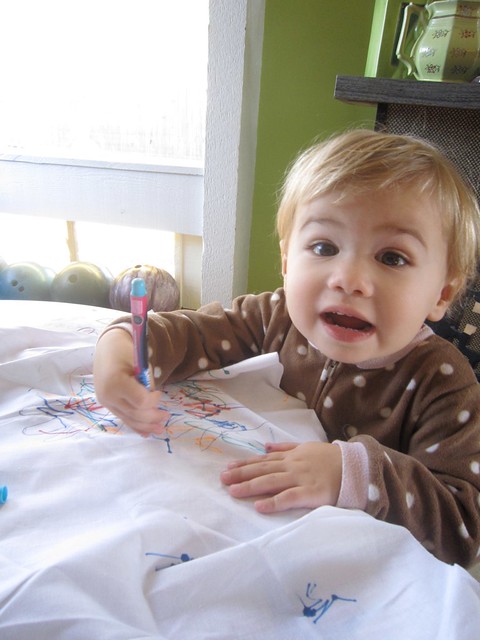
The easiest part of this project is letting your kiddlet go nuts with a pack of colorful Tulip Fabric Markers. Tallulah had never played with markers so this was quite the treat for her. I let her scribble all over the area where we had traced her hands.


Once Tallulah grew bored of coloring on the fabric I used a hot iron to adhere some steam a seam to the back of the fabric. This was primarily to stiffen the fabric and keep the edges from fraying.


I cut out Tallulah's colorful hands and used them as a template to cut out a red, orange and yellow felt hand. I used Fabric Fusion Glue to attach all the pieces together.


Using Fabric Fusion Glue I attached the turkey to a brown cardigan. After the glue dried I embroidered the edges for extra embellishment. I also added a beak and a French knot for an eye.


All that was left to do was slip Tallulah a lollipop so she would stand still and pose for this picture (I'm telling you it's so wrong, but those candy bribes work). I can rest easy now that Tallulah's turkey day outfit has been sorted out. Now I need to figure out what I'm wearing.

I'd love to know what some of your favorite Thanksgiving crafts are? Do you have something you and the fam make year after year? Seen something on a blog recently you want to try. This is my first time to dabble in Thanksgiving crafts so I'm curious what other options are out there.

Craft on!Click here for today's daily giveaway!

Thursday, November 11

Cozy & Cute Yarn Headband


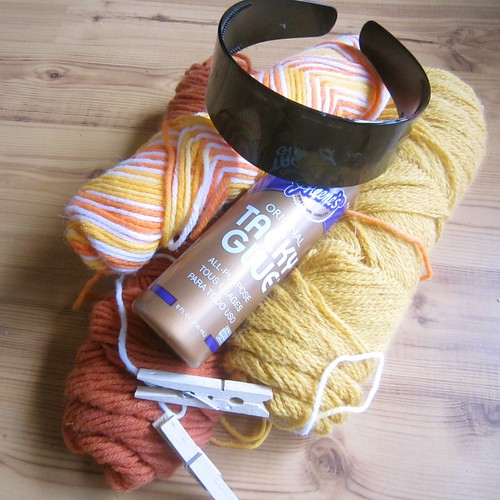
Yesterday I got inspired to make a yarn wreath. Looking at all the pictures of the adorable wreaths out there really got my creative juices flowing. However, in true form I looked at the wreaths and thought to myself: how can I make these wreaths wearable? I don't mean literally - I mean using the same techniques on something besides a wreath. Join me on my weekly I Love to Create journey as I bust out the yarn and Tacky Glue!


SUPPLIES
Yarn
Tacky Glue
Plastic Headband
Clothes Pins
Felt
Scissors
Acorns

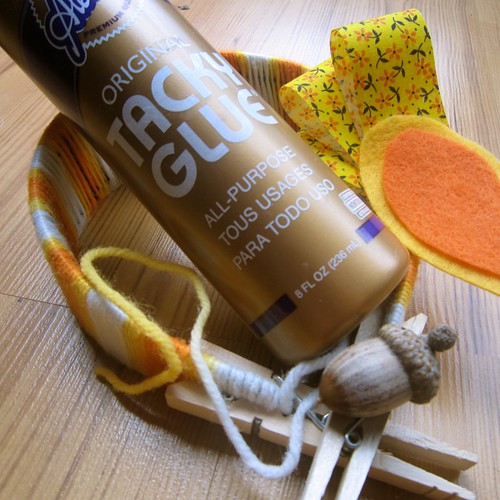
Is there such a thing as sentimental yarn? This yarn belonged to my grandmother and I can remember her having it when I was a little girl knitting on an empty spool of thread will nails stuck in the top. I have always wanted to do something with the funky retro variegated yarn and a fall themed headband seemed perfect.


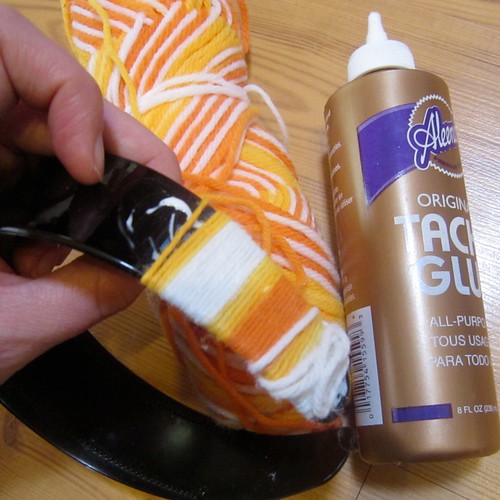
This project was super duper easy. I coated a section of my headband at a time with Tacky Glue and wrapped the yarn tightly around. The ends were a little tricky but that is where the clothes pins come in to hold all your handy work in place while the glue dries.


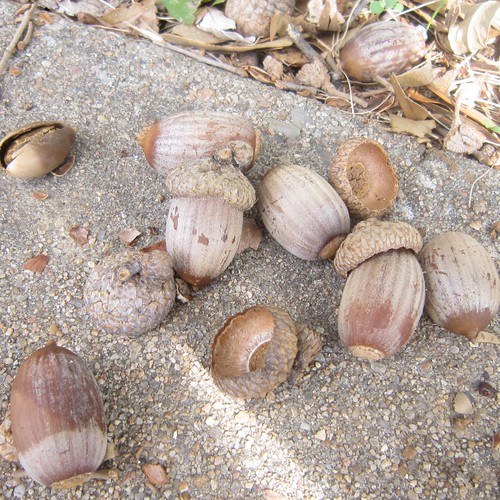
I wanted to incorporate some fall elements into my headband so I stole a few acorns from my neighbors yard. Shhhh don't tell. I used Tacky Glue to make sure their little toppers stayed on.


Nuts were not near enough pizazz for my special headband. I cut up felt, stapled ribbons and used Tacky Glue to make a cute little fall-ish arrangement.


Once the glue had dried on my arrangement all that was left to do was add it to my headband. I also trimmed up my yarn edges.


I know what I'm wearing to Thanksgiving dinner, at least in my hair.


Craft on!Click here for today's daily giveaway!

Monday, November 8

DIY Thanksgiving Dinner Party

Pilgrim Hat Centerpiece, Candles and Party Favors

If you can cut & glue, this is the perfect project for your Thanksgiving dinner decorations.

The base of each one of the pilgrim hats is a simple clay pot and the hat brims are circles of foam core boards that are cut to fit perfectly on the rim of the pots when glued on.  
I popped a pot of white daisy mums in the big one for a centerpiece.
The candles are pushed into foam and then tufts of tulle are poked around them.
The favors are circles of tulle filled with candy corn and tie up in a bow.
Super simple, and simple fun!


Here's what you'll need:
Clay Pots
Black Spray Paint
Black foam board
Pencil
Compass
Craft knife
Metallic Silver Scrapbook Paper
Grey Felt

Steps for the centerpiece:

  1. Spray paint the clay pot black, let dry completely.
  2. Turn the pot upside down on foam board.  Trace around the rim, then set aside.  Use a compass to draw a line 4 inches from the traced circle.
  3. Cut around the outside circle with a craft knife, being careful to cut a nice, smooth edge.
  4. Cut out the inside circle, 1/2-inch smaller than the traced line.  If you plan to use the pot as a cupcake tray instead of a flowerpot, don’t cut out the center hole.
  5. Glue the brim to the top of the pot.
  6. Cut out a buckle from silver scrapbook paper.
  7. Cut grey felt and thread through the buckle and glue around the rim of the pot.

Make the other pots the same way, only smaller.
Have fun!


Craft on! Click here for today's daily giveaway!
Clicky Web Analytics
Pin It button on image hover

Subscribe to our newsletter

* indicates required
I am interested in products and inspiration for...
Close