Welcome to SPRING. Well, not really. In Louisiana one day it's 80 degrees and the next day it's freezing rain. What's going on mother nature! I figured everyone was tired of seeing winter crafts so I am bringing a little bit-o-spring strait to your beautiful eyes! I have been playing around with tie-dye and eggs lately and I wanted to show you this fun tie-dye technique. This craft is great for a group of adults to do or for your little kiddos. Let's get started!
Showing posts with label easy tie dye techniques. Show all posts
Wednesday, February 19
Monday, June 3
DIY Pinch and Twist Technique
This DIY Pinch and Twist Beach Cover-up Shirt can be created in under ten minutes! As a fair skinned gal, I always cover up at the beach and often with a large men's shirt. They're comfy, cool and can be worn in the water. It was super easy to give this plain white shirt a little pizzazz with Tulip Fabric Spray. This is a whole new way to approach tie dye, using a spray instead of a bottle and your finger tips instead of rubber bands.
You will need
100% cotton man's shirt
Tulip Fabric Sprays in Metallic Silver, Metallic Gold and Fucshia
Tulip T-Shirt Form
Tulip Surface Cover
DIY Pinch and Twist Technique from DIY Doyenne TV for iLovetoCreate.com
1.) Make sure your shirt is pre-washed to remove sizing. 2.) Grasp shirt in spot where you want to center your pinch and twist. Twist shirt in a clockwise direction. 3.) Hold silver spray 12" from shirt and give it a few spritzes. 4.) Repeat to make three total pinched sections. 5.) Repeat with gold spray turning your twists counter clockwise. 6.) Repeat a final time using pink spray and turning clockwise. 7.) Allow shirt to dry for 72 hours before washing and 4 hours before wearing.
We'd love to see what you make with Tulip Fabric Sprays and the Pinch and Twist technique, be sure to join the iLoveToCreate.com Facebook page and share your projects with us!
Visit DIYDoyenne.com for more fashion and style and DIY Doyenne TV from Margot Potter on YouTube!
Cheers,
Margot (a.k.a.: Madge)
Tuesday, May 28
How to: Tie-Dye Your Life (Starting with Your Kids)
I always bring a craft project when I visit my niece, Dorothy. One time it was Embroidery Day, another it was Felt Cat Ear Day...this
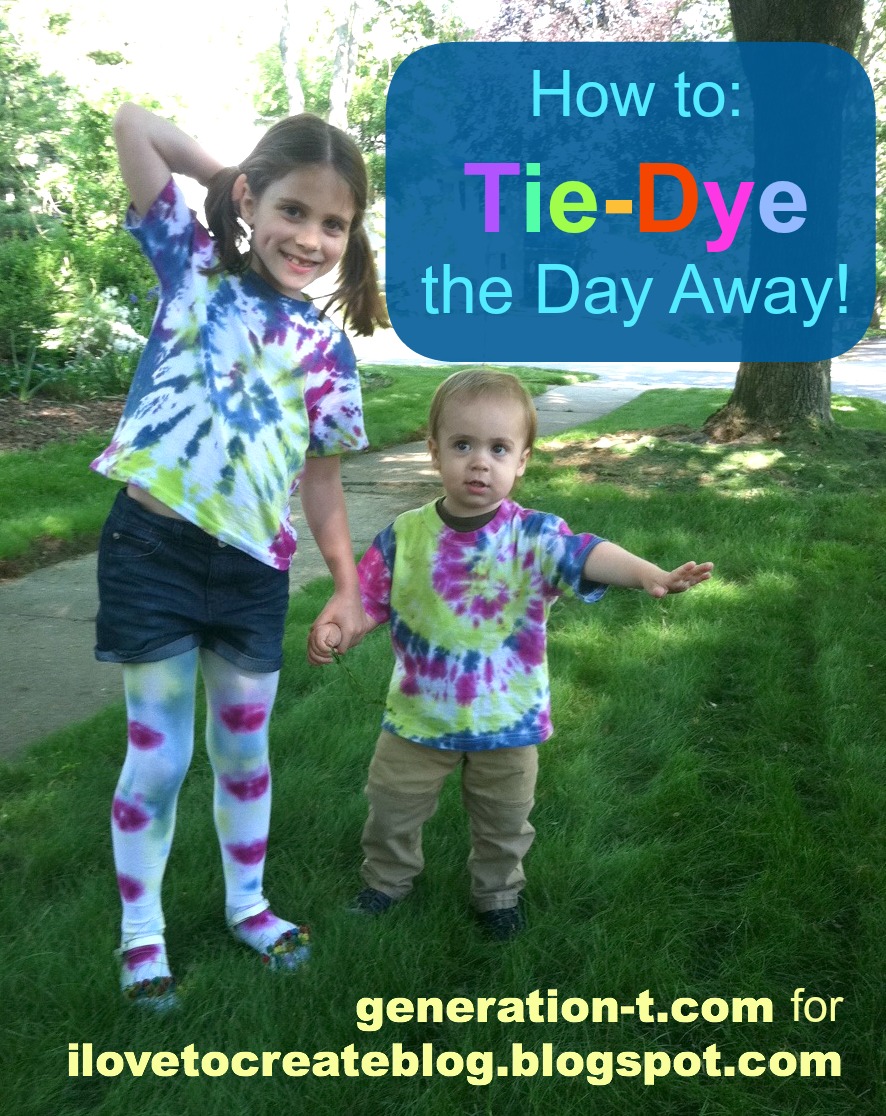
time it was Tie-Day Day! Our goal, which we nobly chose to accept: to tie-dye an entire wardrobe. As you can see, we got pretty darn close...
So, despite all my T-shirt proclivities, I have to
confess I actually have never tie-dyed in my adult life. I don't know
what made me think that it would be so hard, but honestly, the only
thing that could have made this easier was a nice picnic table outside
to craft on (and that's just me asking for a luxurious upgrade).
The takeway: Tie-dye. Is. So. Easy.
I would go so far as to say it's foolproof! Next
time you have a family reunion, skip ordering the printed T-shirts: Set
up a tie-dye station for all the siblings and cousins--by morning,
you'll have a full set of T-shirts perfect for a very colorful family
portrait!
What You Need:
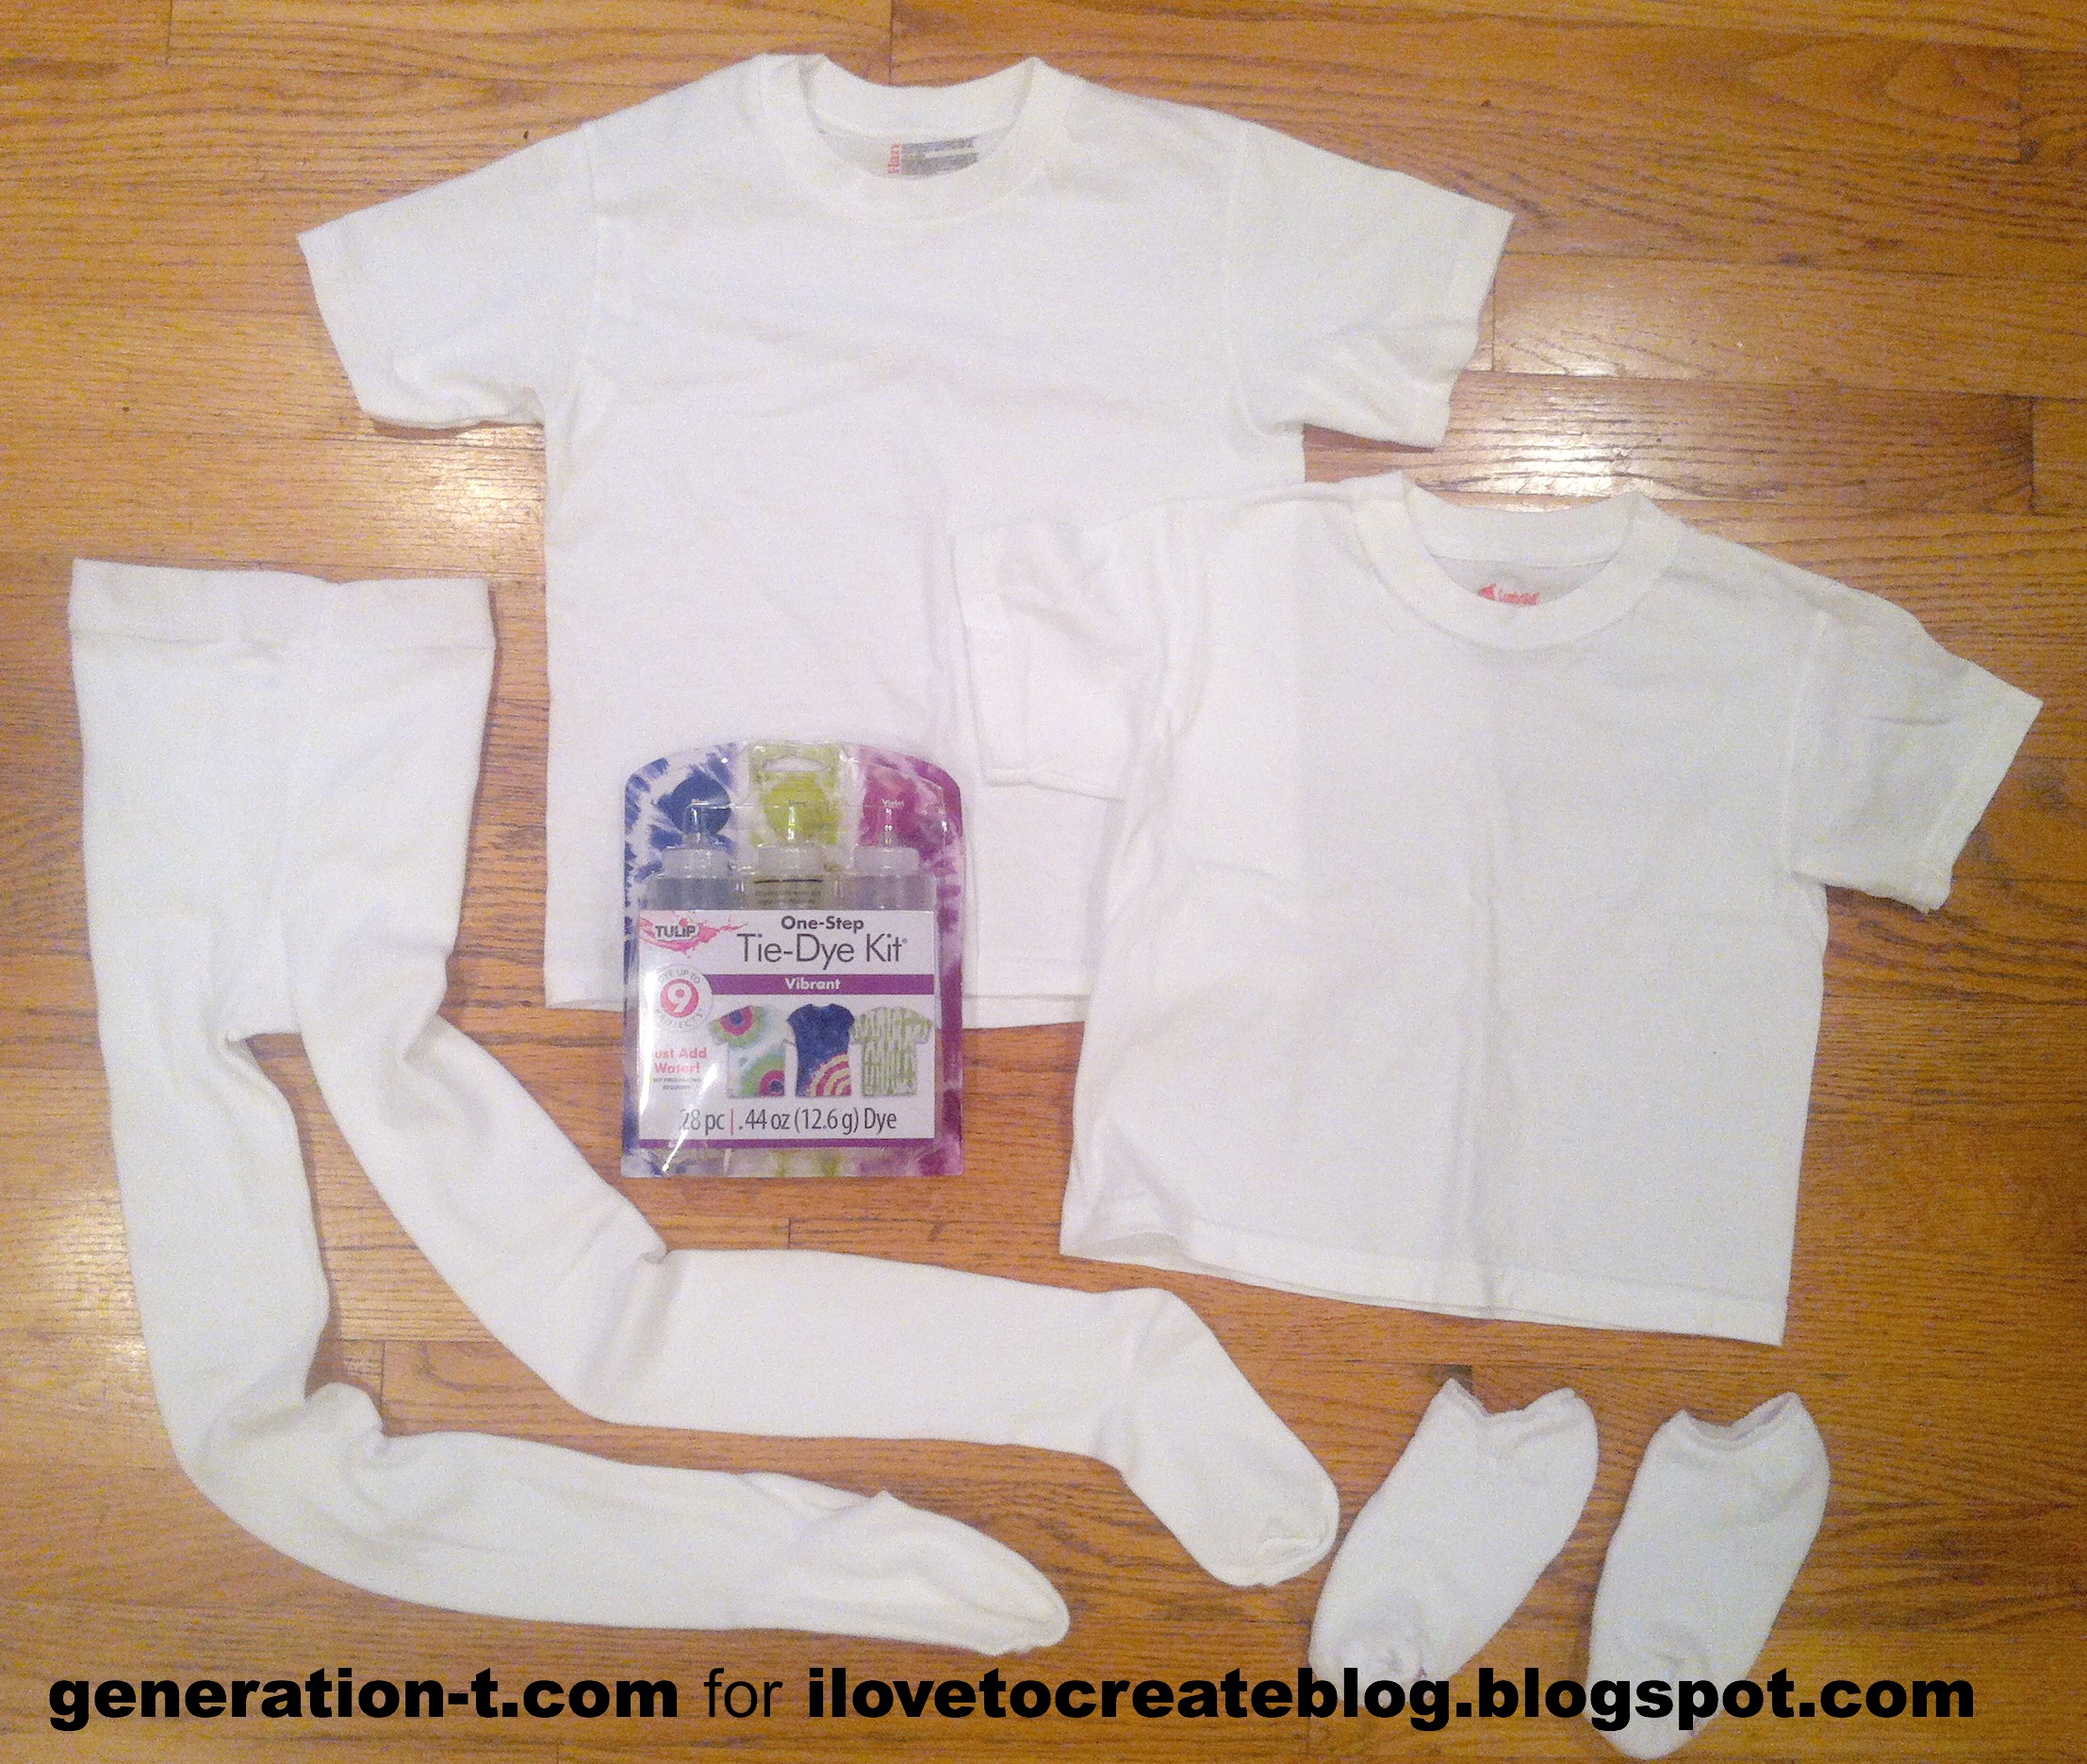
-Tulip One-Step Tie-Dye Kit (color: "Vibrant" -- includes rubber bands, bottles, dyes, two pairs of plastic gloves, and an instruction/inspiration sheet)
-Cotton things to dye: We picked T-shirts (in two sizes, for the two cousins), tights, and socks
-plastic table cloth or plastic garbage bag to cover your work surface
-paper towels
-plastic cling wrap or zip-lock bags
-Tulip One-Step Tie-Dye Kit (color: "Vibrant" -- includes rubber bands, bottles, dyes, two pairs of plastic gloves, and an instruction/inspiration sheet)
-Cotton things to dye: We picked T-shirts (in two sizes, for the two cousins), tights, and socks
-plastic table cloth or plastic garbage bag to cover your work surface
-paper towels
-plastic cling wrap or zip-lock bags
Note: If you're working with new T-shirts, pre-wash and dry them to make sure any shrinking that's going to happen has happened!
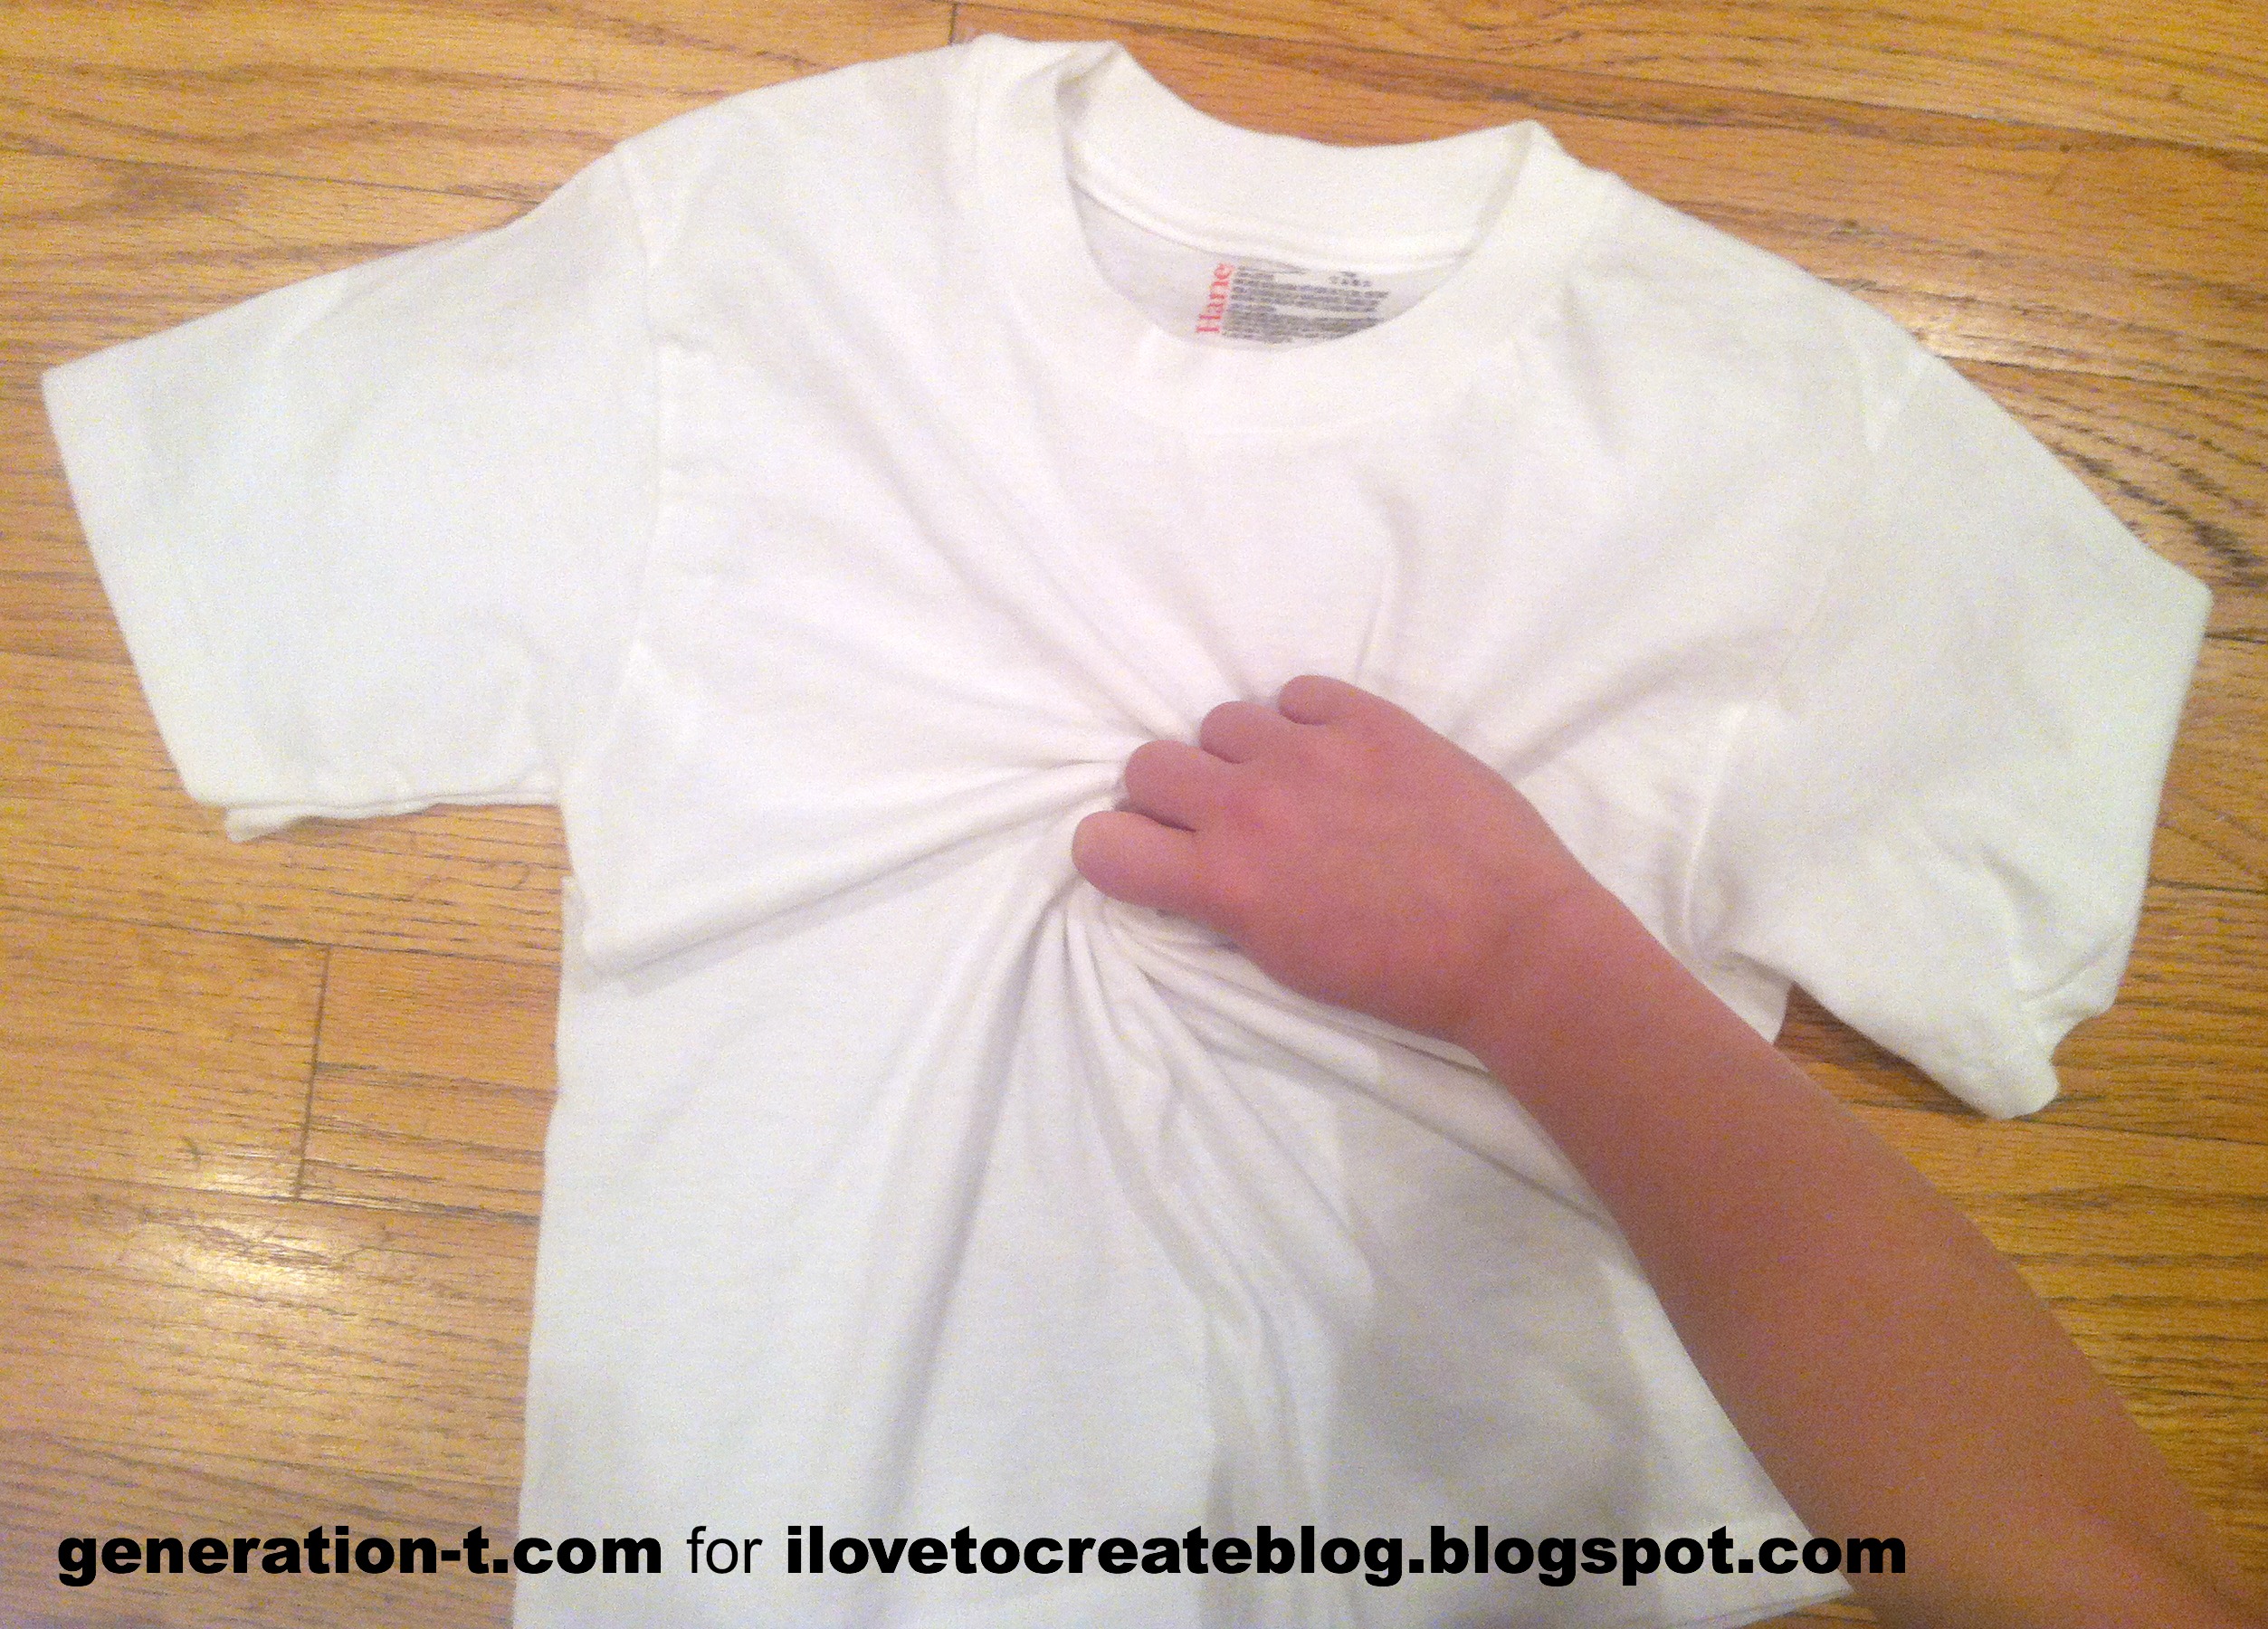
To start with, my niece picked the "Swirl" design from the instruction sheet that
comes with the kit. Following the instructions, she pinched the fabric
at the center of the T-shirt and twisted the T-shirt until she had a
round little, swirled T-shirt "biscuit."
We wrapped the T-shirt swirl with 3 rubber bands (also included in
the kit), and dampened it under running water, squeezing out the excess water.
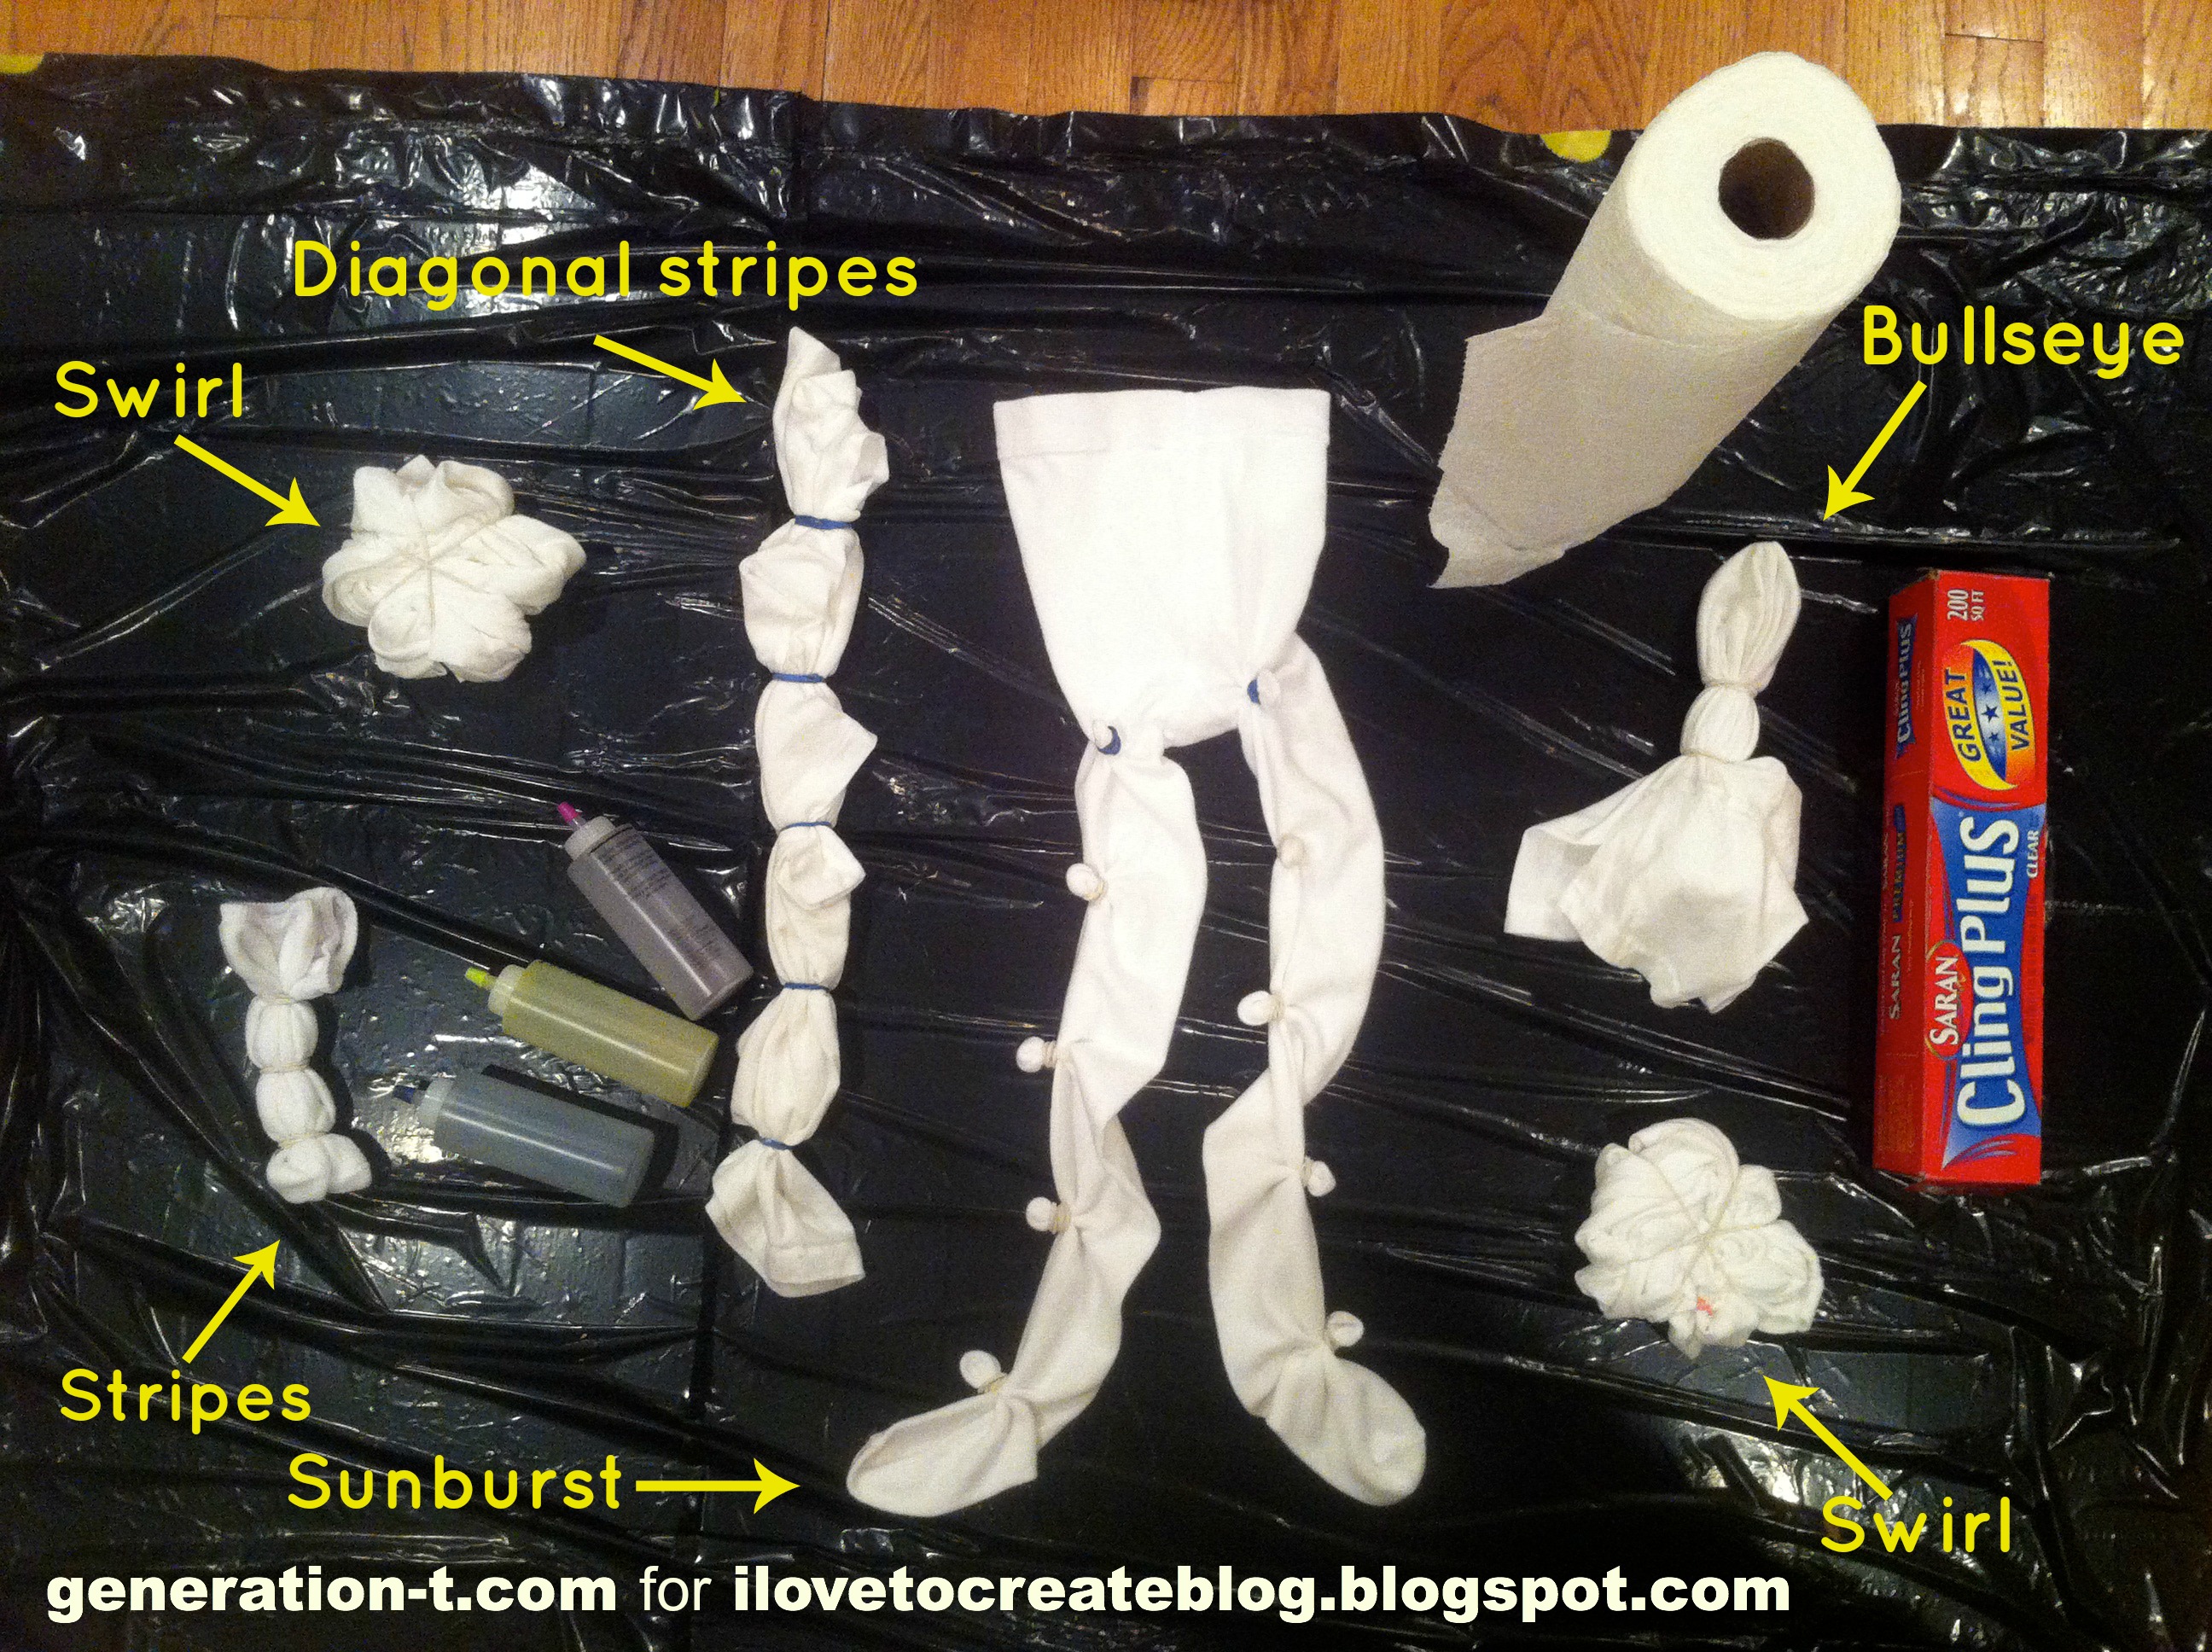
We cut open a plastic garbage bag to protect the floor and, armed with plenty of paper towels, we ended up preparing 4 T-shirts, 1 pair of tights, and 1 pair of socks to
try out 5 different tie-dye styles that were described in the kit (we
even did our own variation on one -- diagonal stripes!).
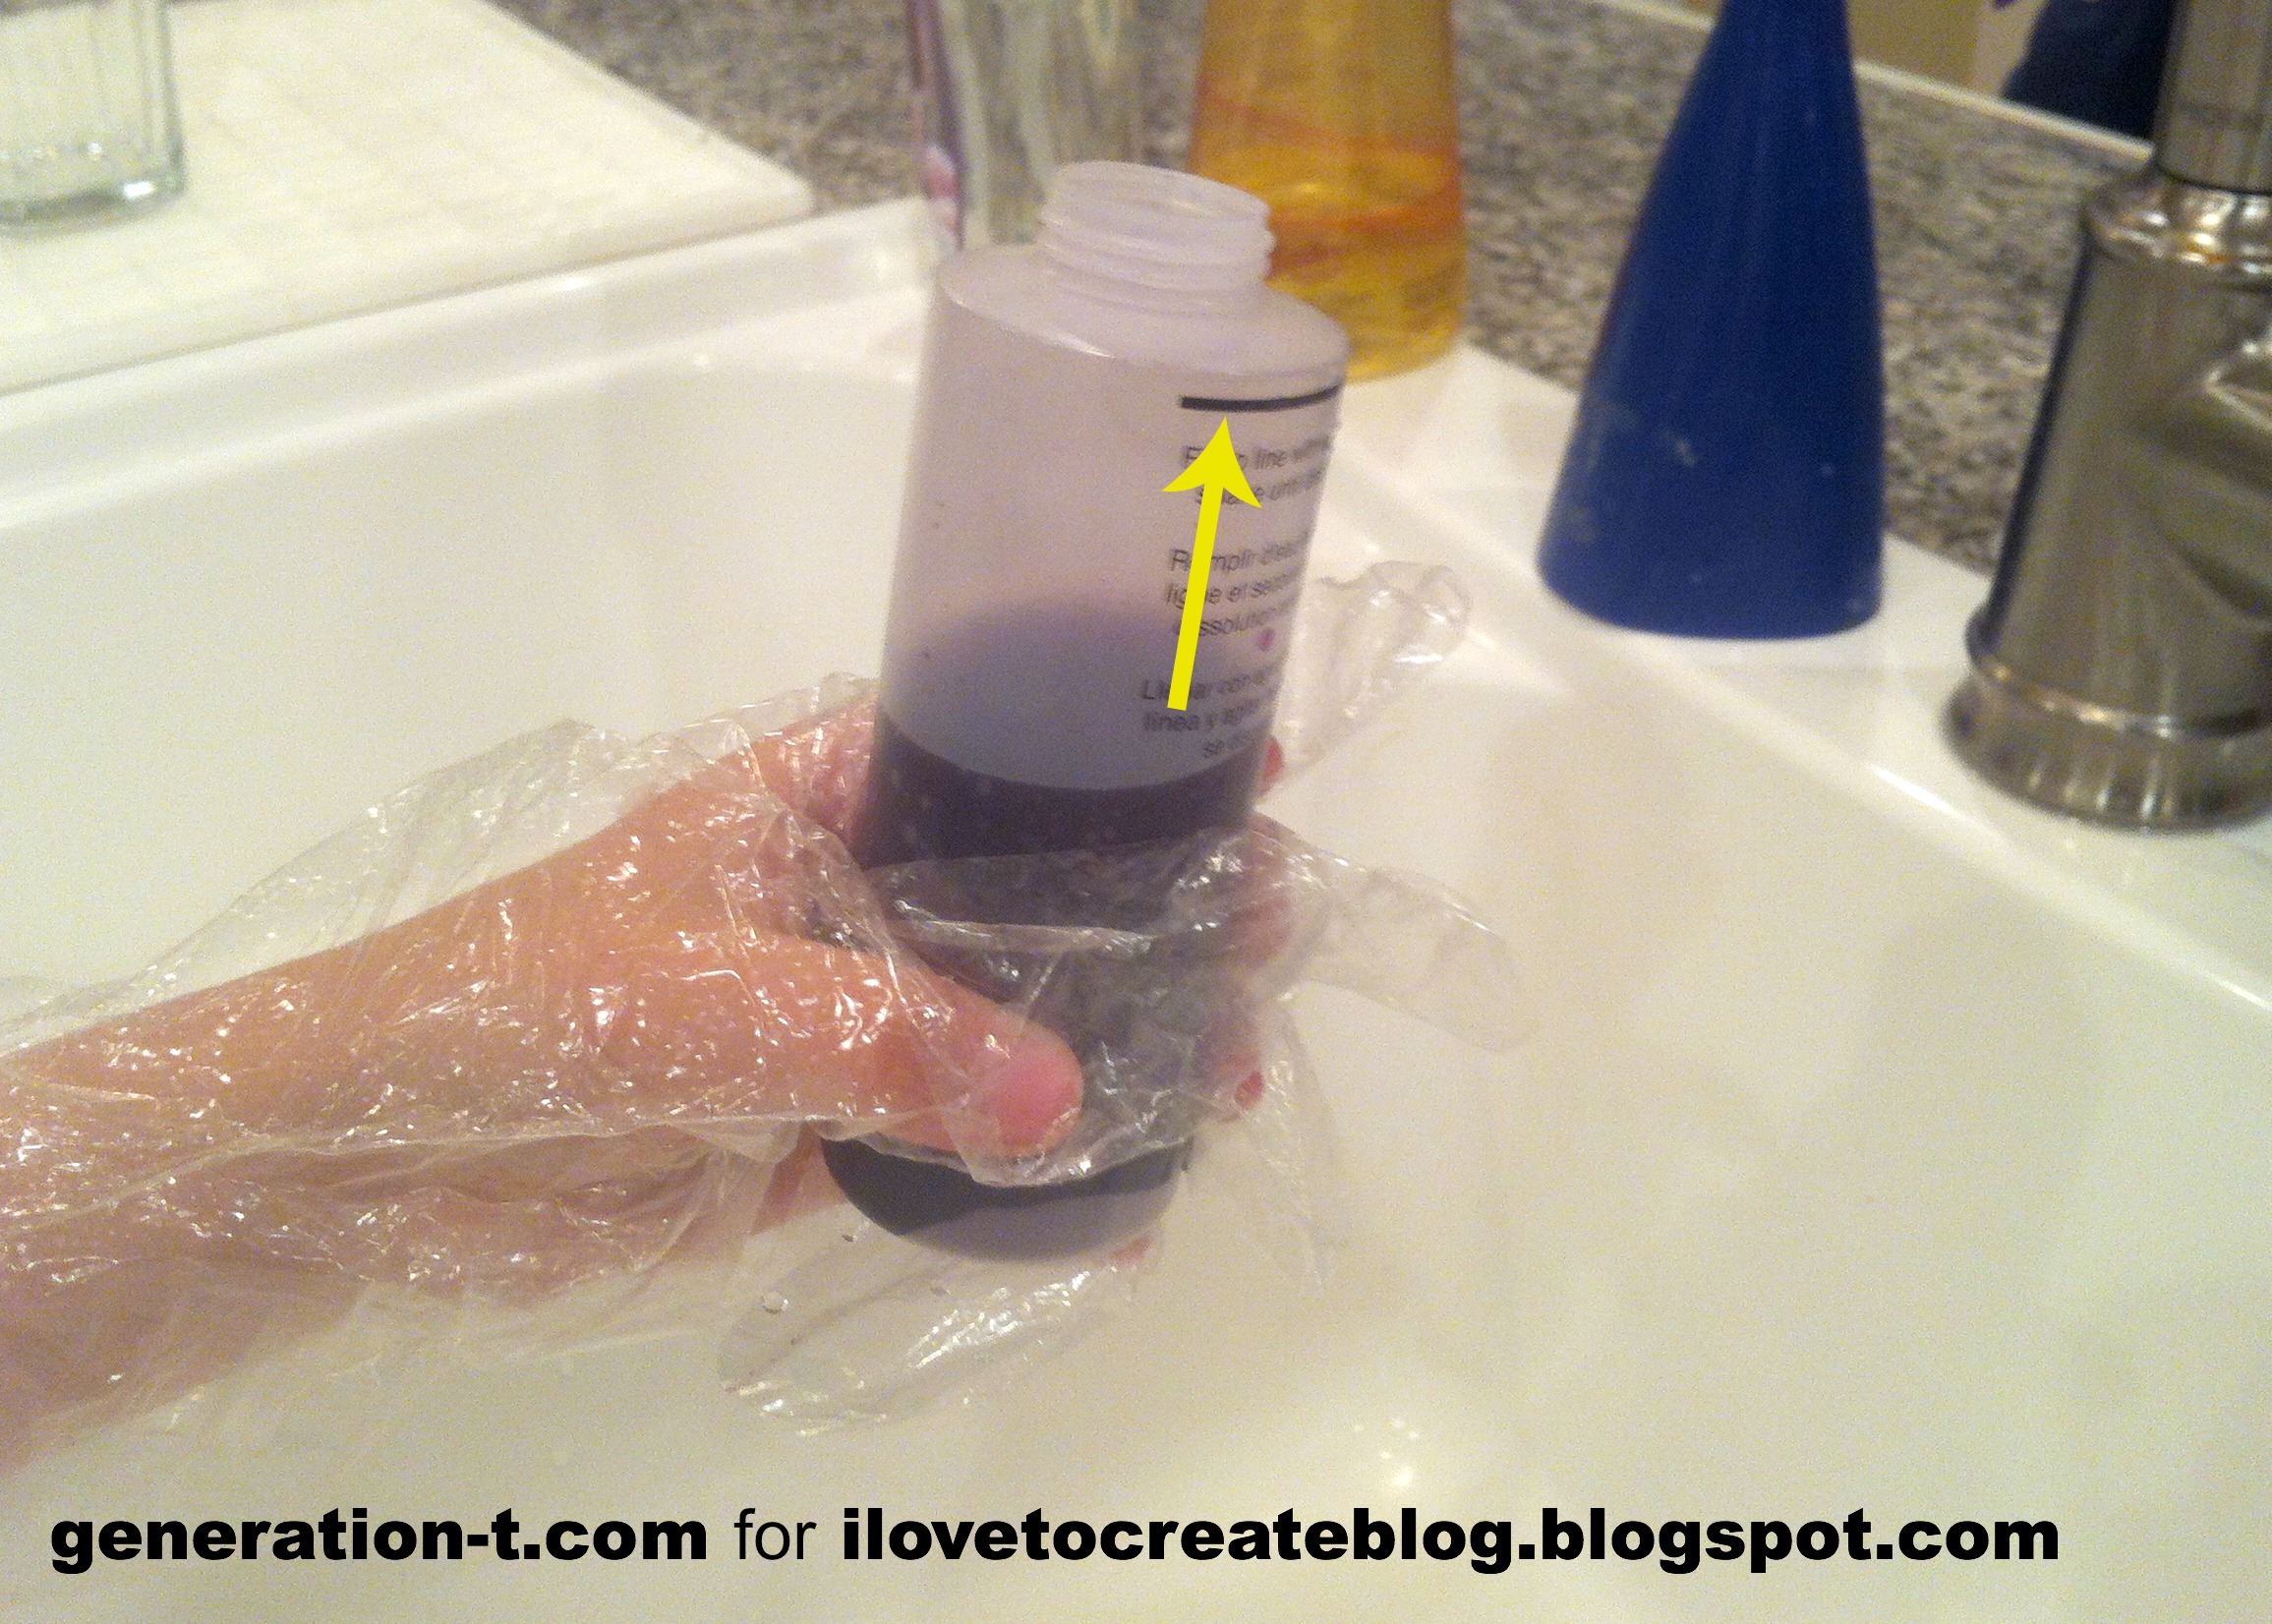
The powder dye comes already in the squeeze bottles; we filled the
rest of the bottle with water up to the thick black line, put the top on
tightly, and shook each bottle until the dye was mixed.
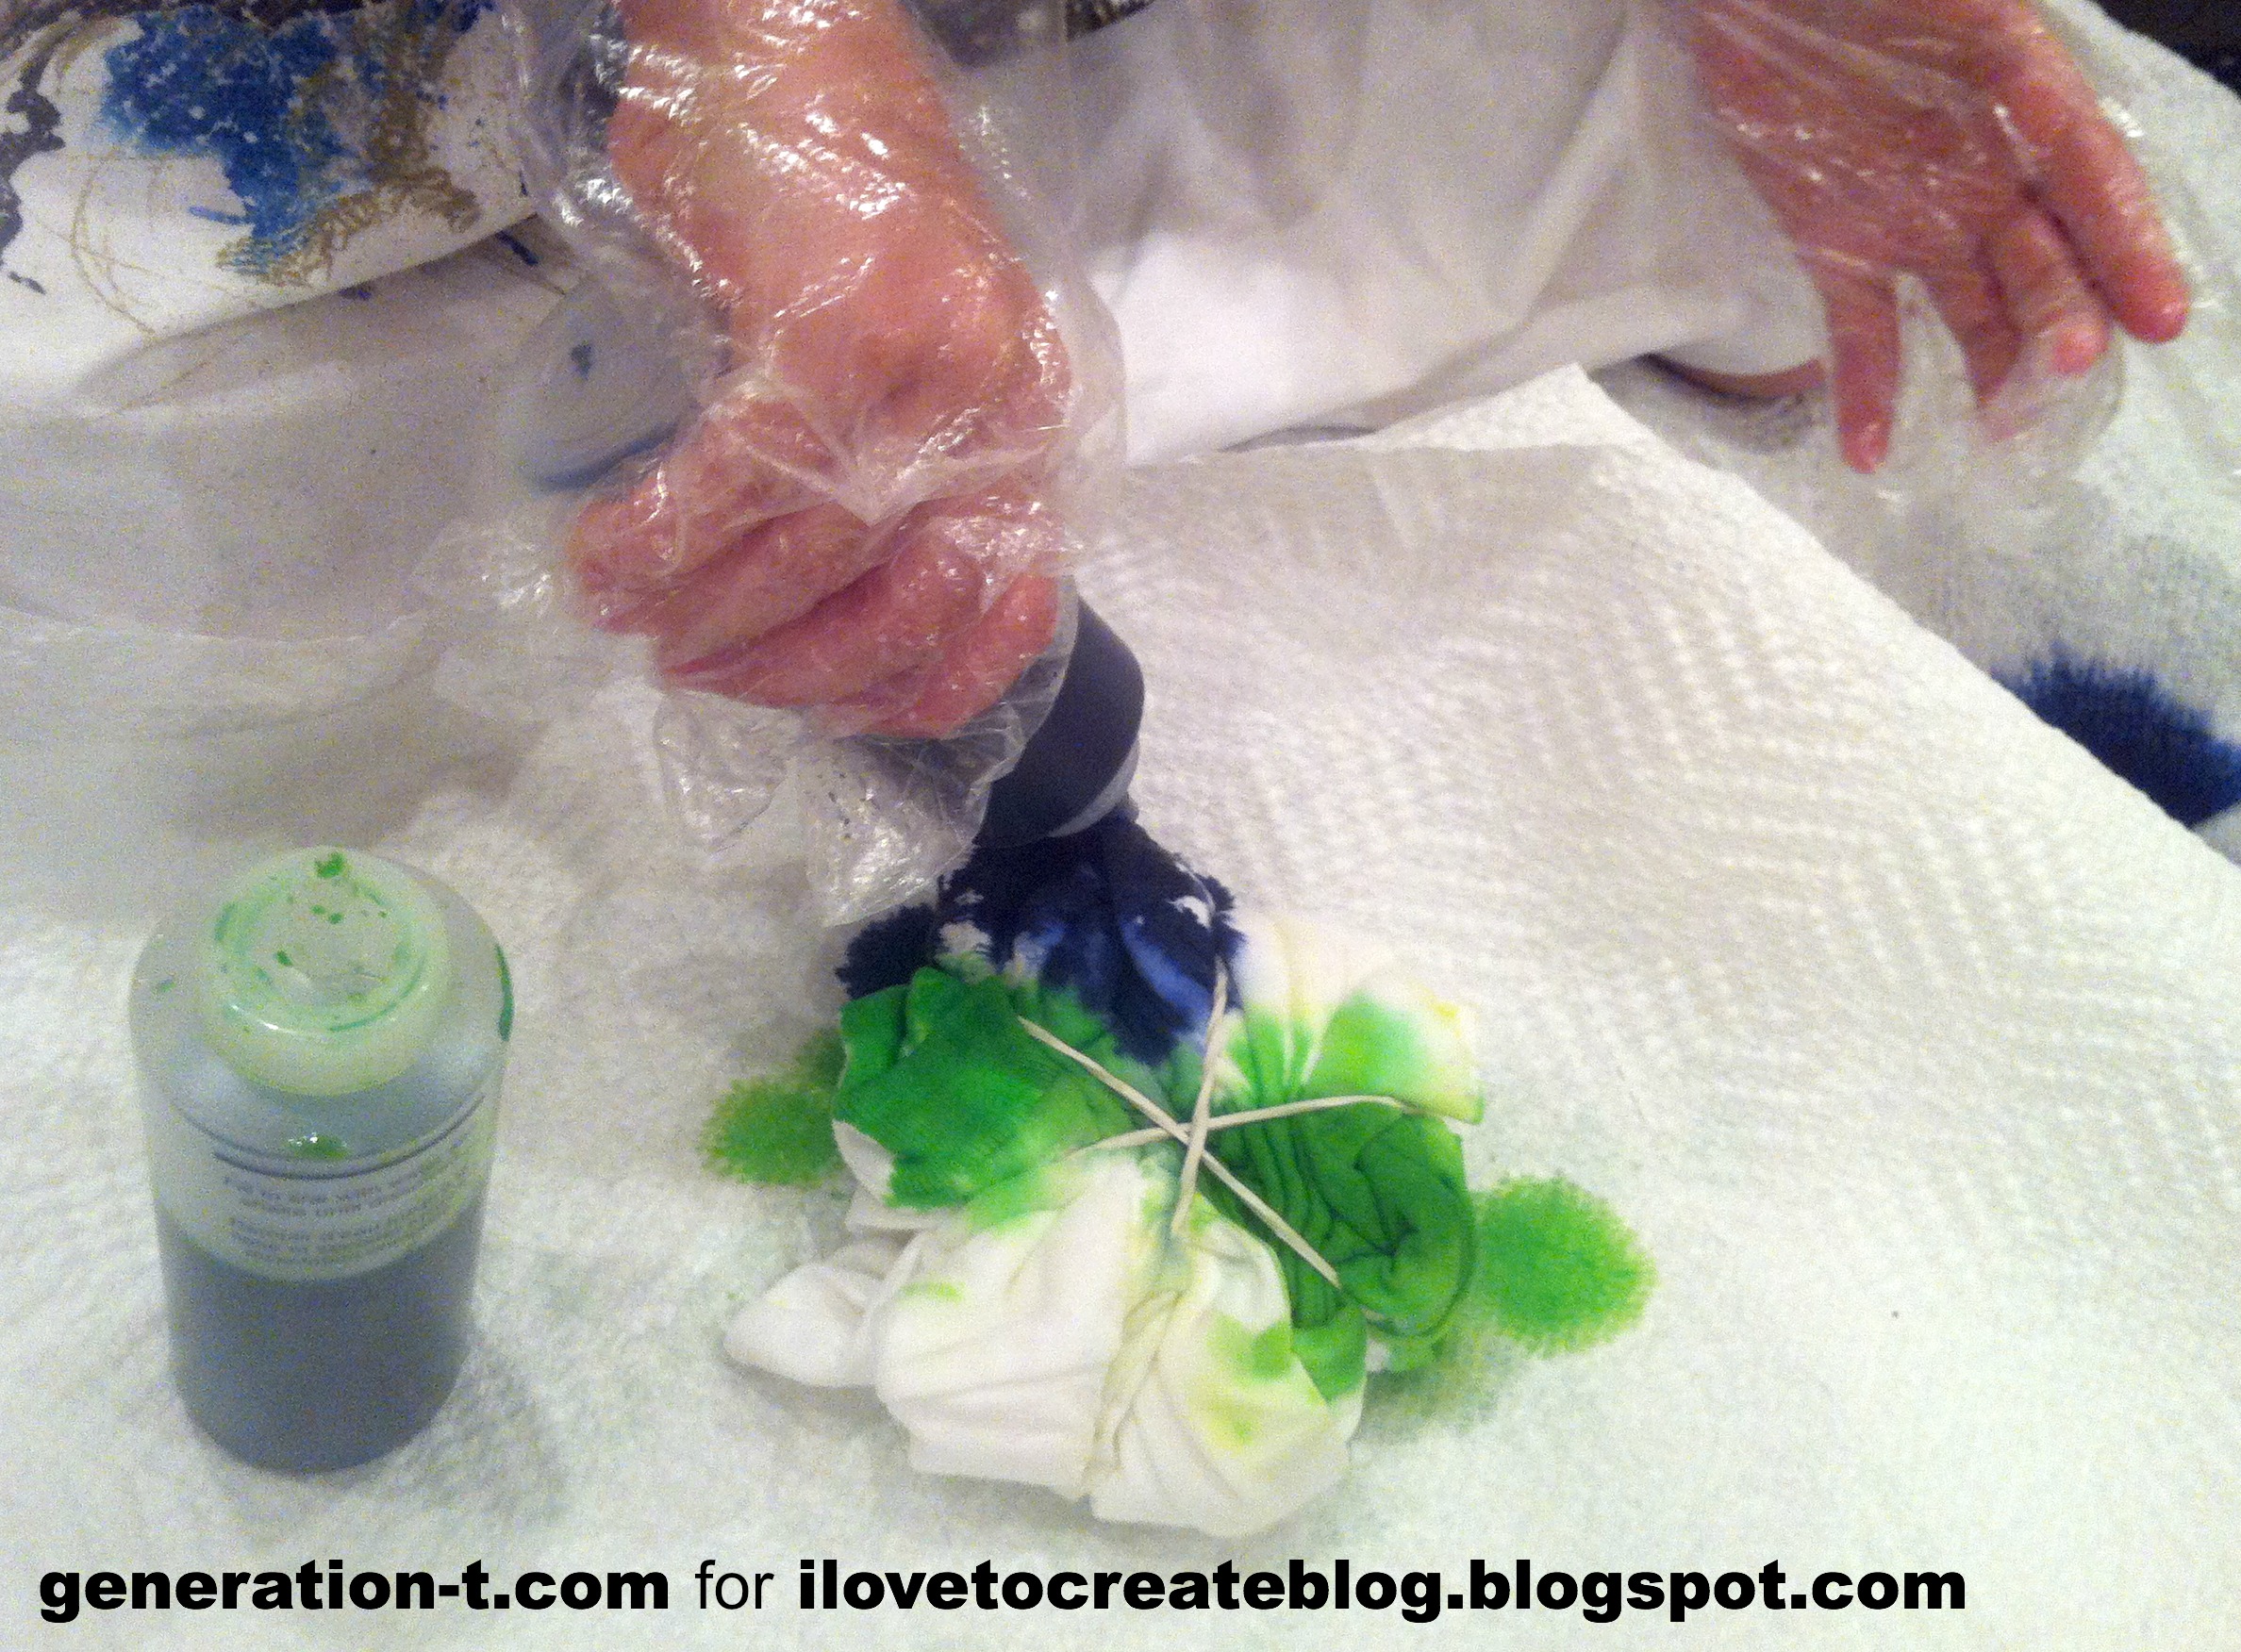
Dorothy squeezed the dyes onto the T-shirt segments
(delineated by the rubber bands) one color and one segment at a time.
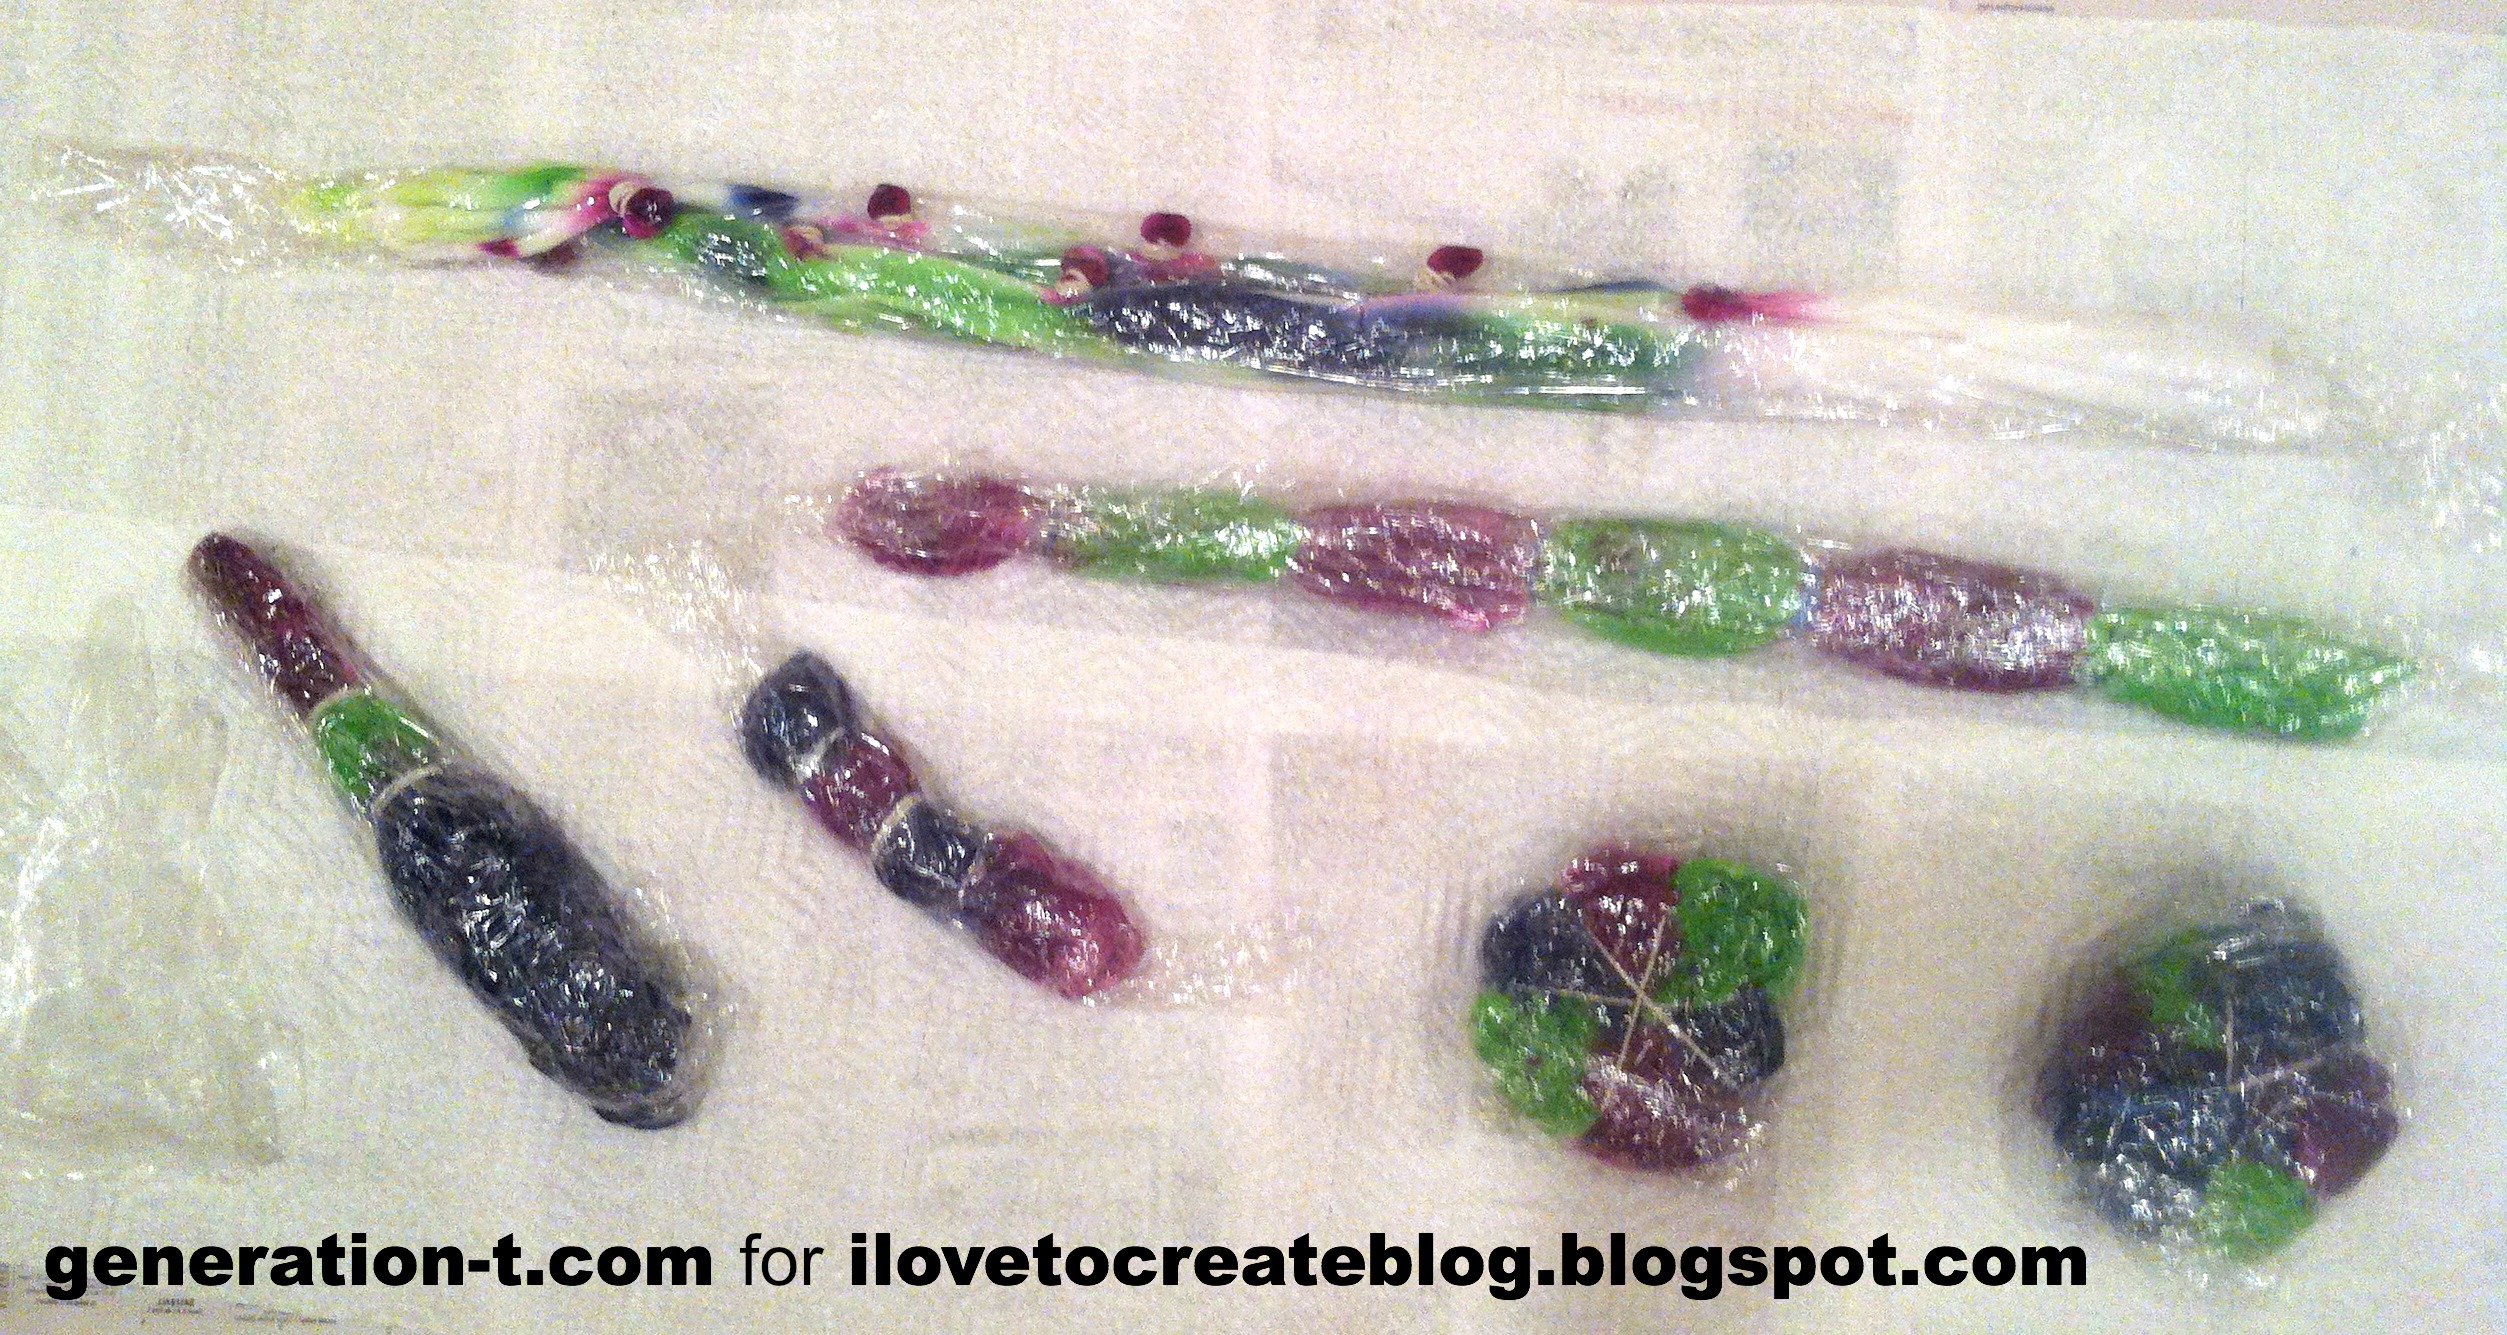
We wrapped each project in plastic cling wrap to sit overnight.
Dorothy tie-dyed 2 kid-sized T-shirts and the pair of socks, I tackled
the tights and a toddler-sized T-shirt, and Uncle Luke even got in on
the action with another toddler-sized T-shirt. Note: The package
says you can get up to 9 garments, but if you're crafting with kids,
make sure to estimate for fewer, since they tend to be a bit generous when squeezing out the dye (in addition to our 7 garments, we had the most beautiful paper towels!).
We let the dye soak in overnight (6-8 hours minimum), but we had a
busy day, so we left them wrapped up for longer. We unwrapped each
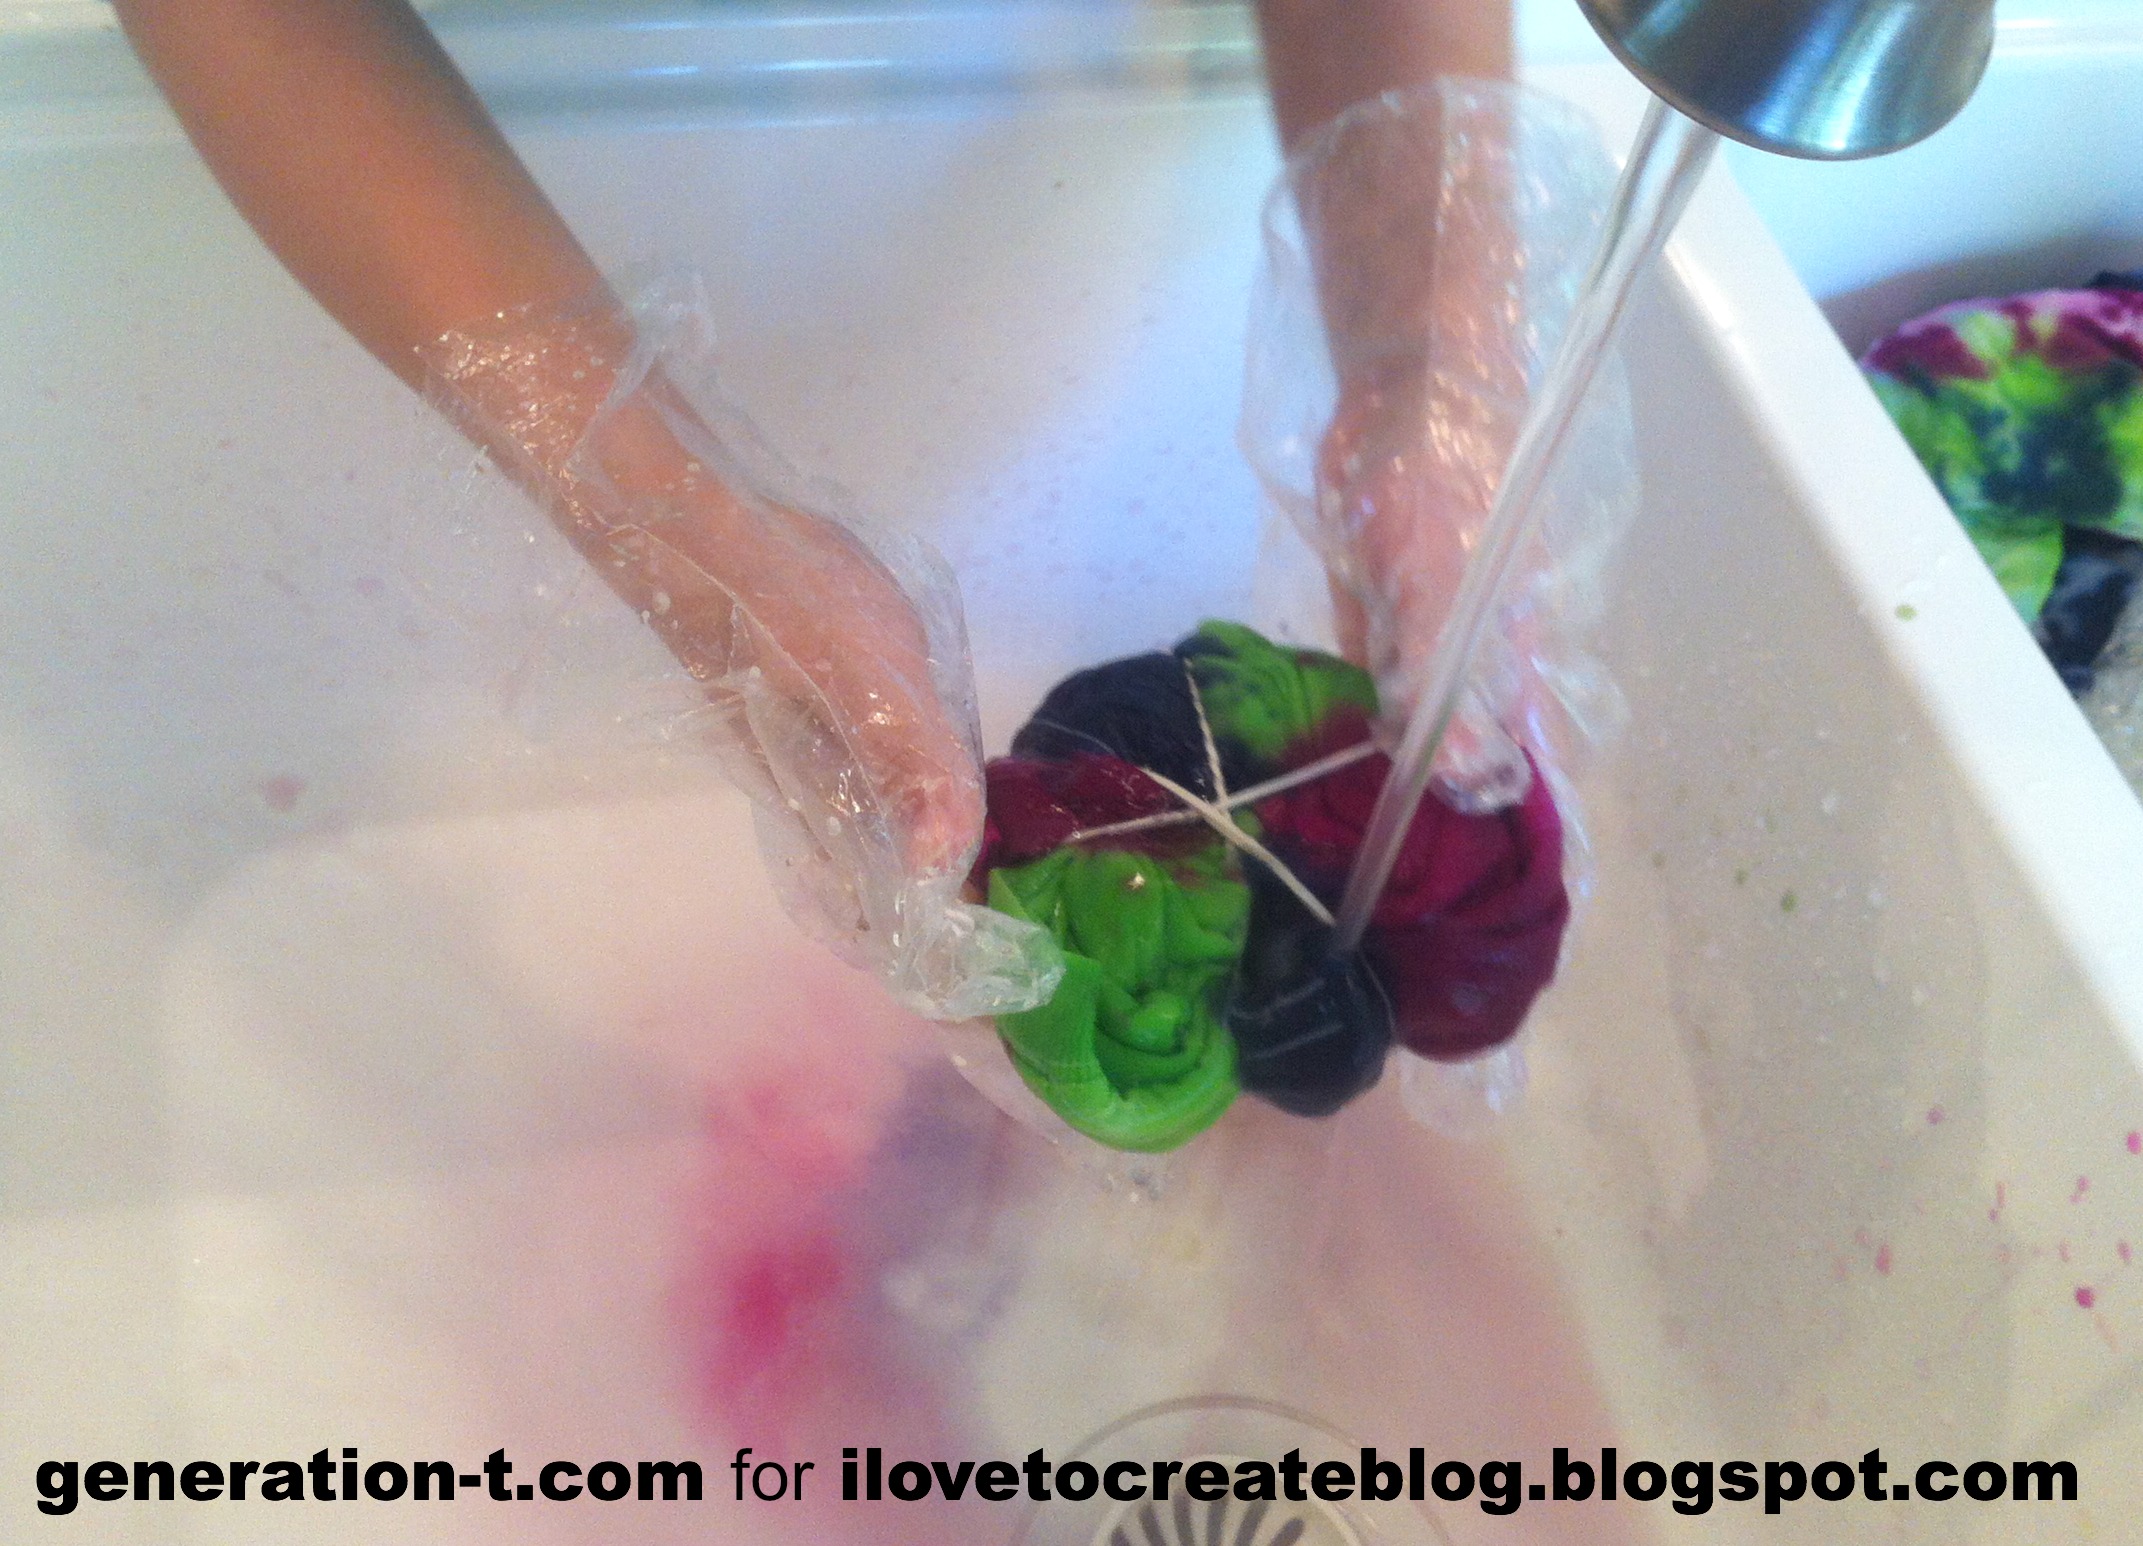
project over the sink, and rinsed and squeezed out as much excess dye as
possible. Then we peeled off the rubber bands, and gently shook out our
masterpieces!
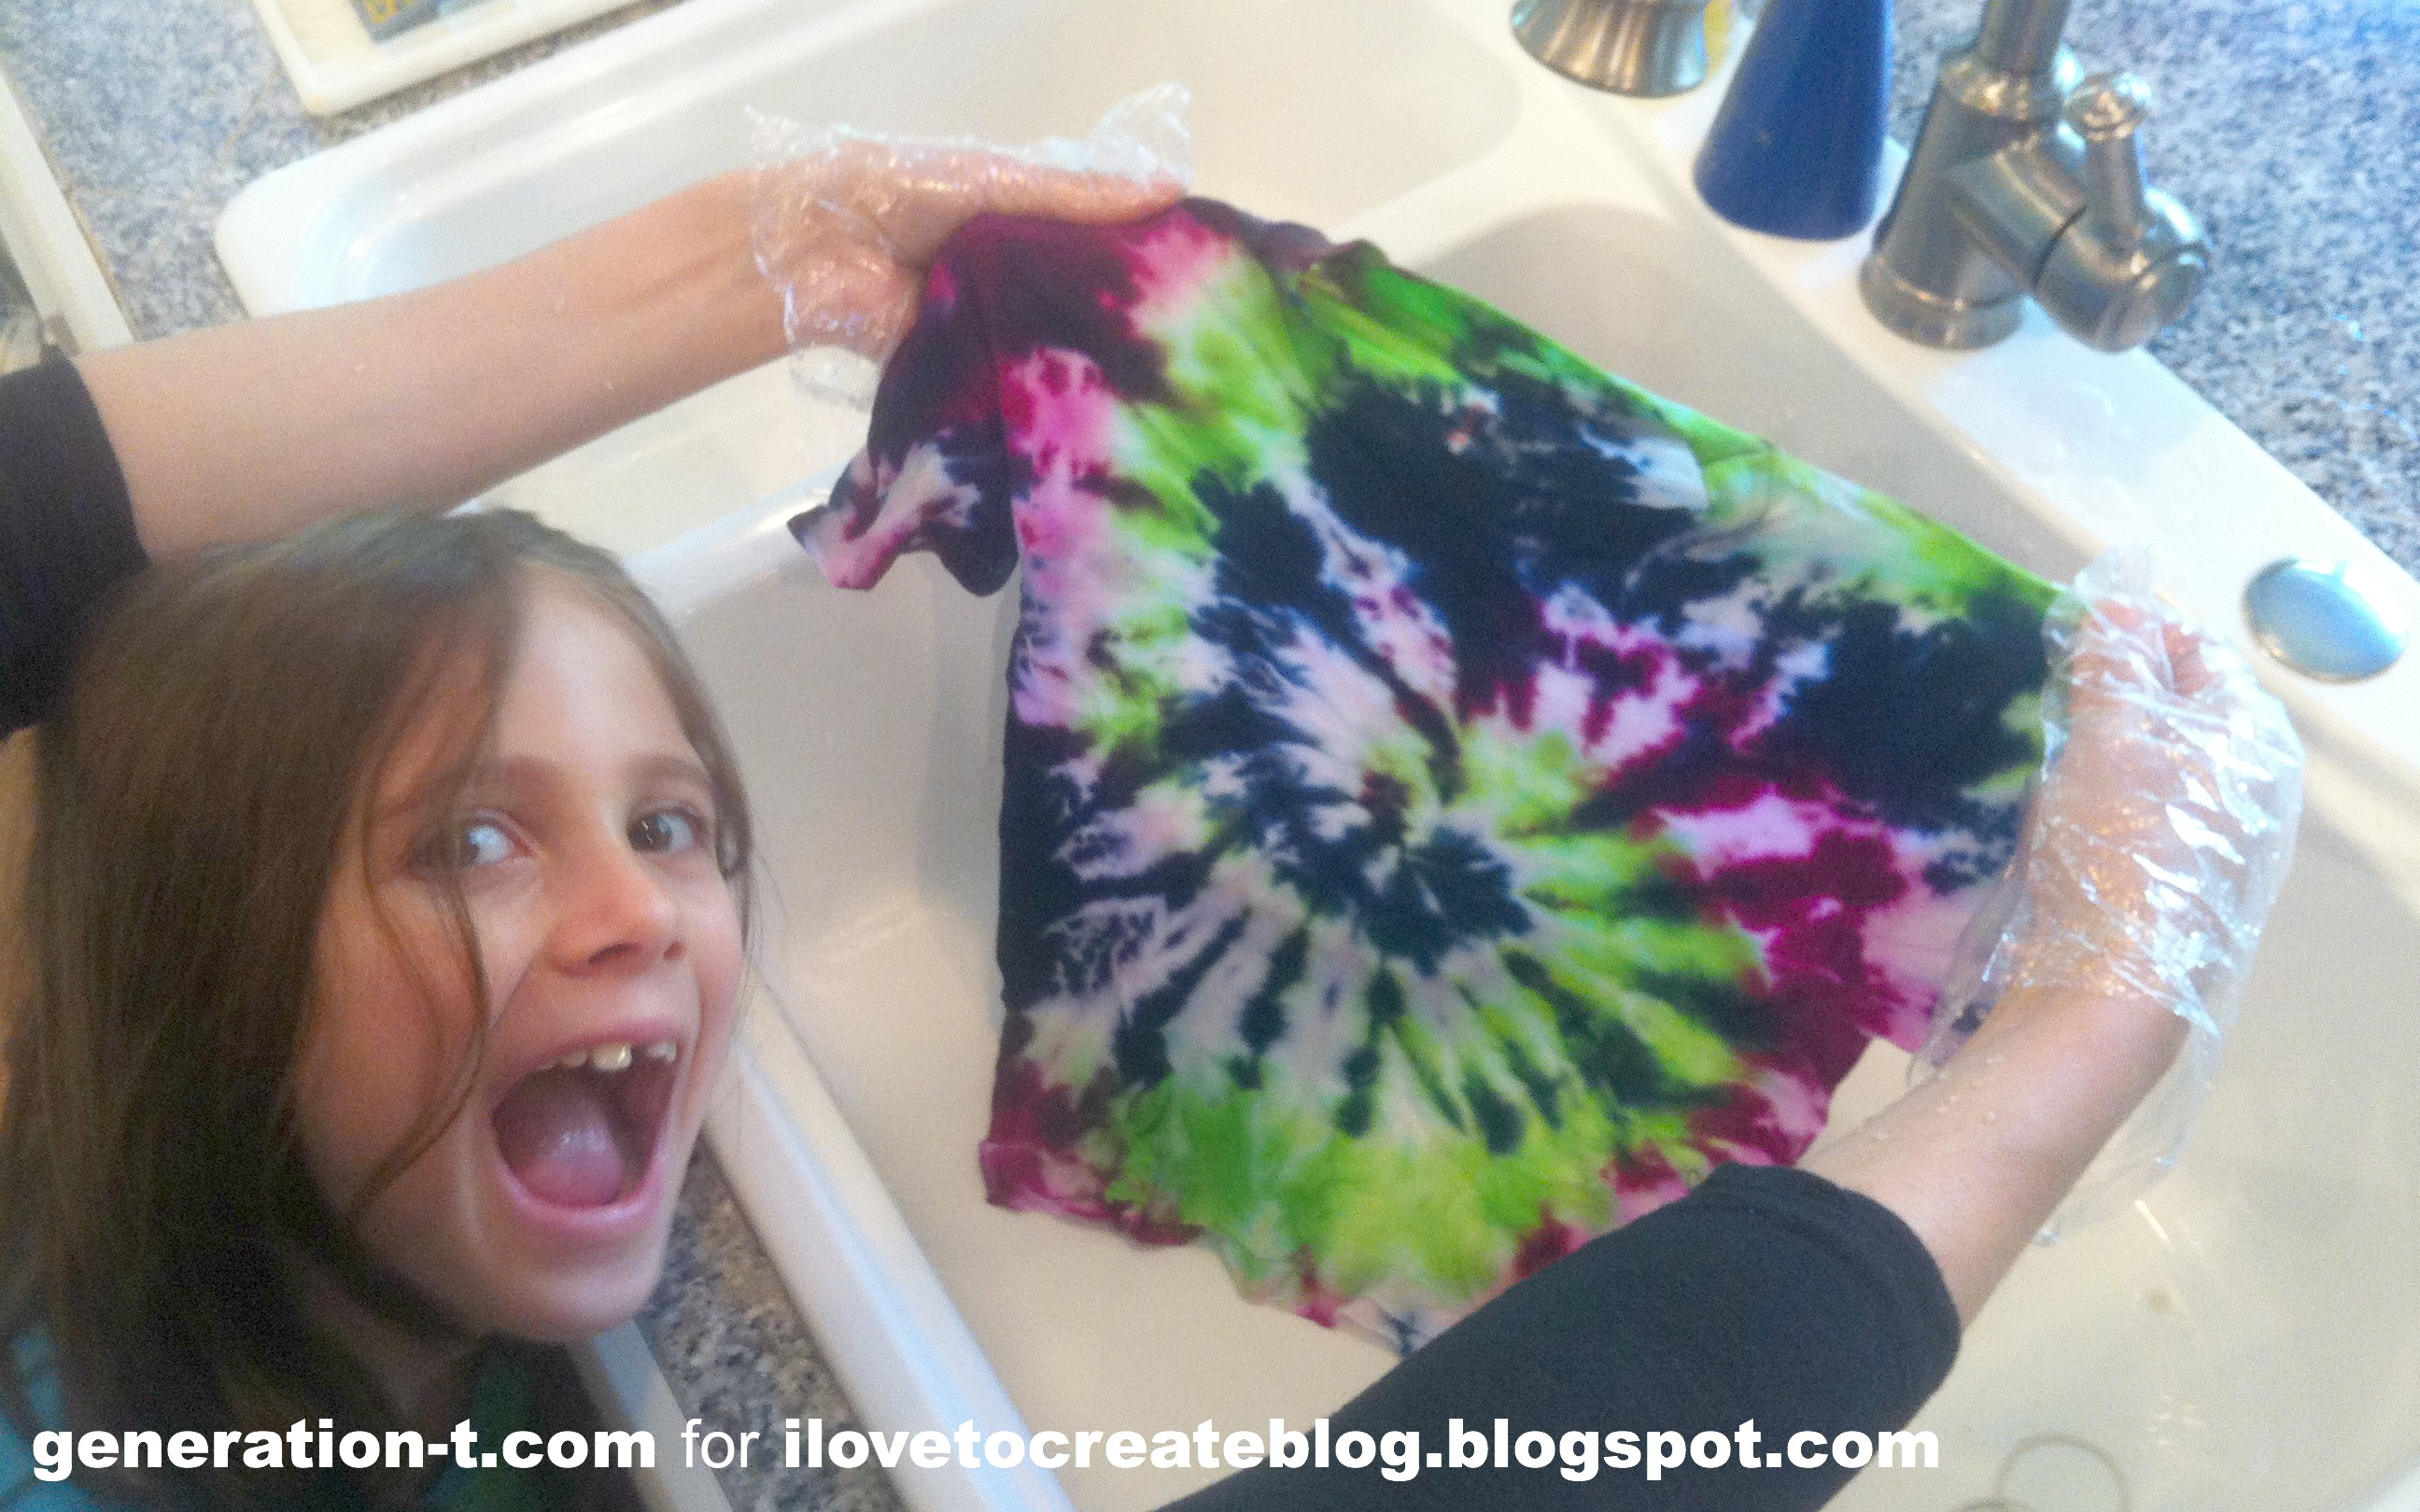
Dorothy was so excited/giddy/proud of the results of her T-shirt that
she photo-bombed the picture! Since we had a whole batch of garments
with the same color scheme, we tossed them all in the washing machine
and dryer together to finish the process. After her cousin, Niko, woke up
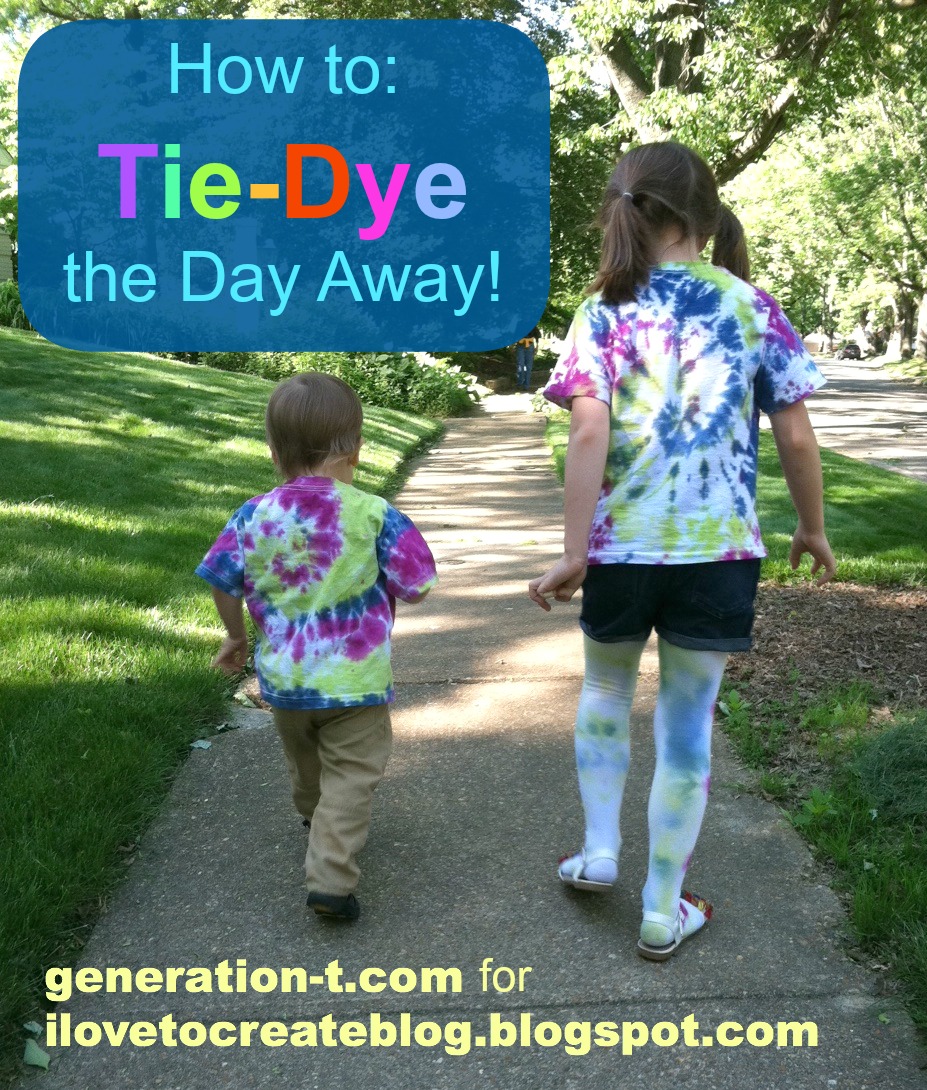
from his nap, it was time to try on the matching Swirl design tie-dye
T-shirts!
Because we were running low on dye by the time I did the tights,
they're a little more pastel-colored in the back than the T-shirts, but the violet
sunbursts on the front are perfect little rosettes (says Dorothy).
And because it didn't make sense to layer the socks over the tights
(though she was tempted!) or layer the second T-shirts, we're saving the
Bullseye T-shirt the Diagonal Stripes T-shirt and the Stripes Socks
tie-dyes from our tie-dye extravaganza for tomorrow's coordinating
cousin outfits.
Did I mention tie-dye is great for obscuring grass stains? An added bonus, for sure! There's definitely more tie-dye to come this summer --
and quite likely in my size this time.
Tuesday, April 16
How to Make a Spiral Tie Dye Tablecloth
Spiral Tie Dye Tablecloth
There is just something about a warm day and lounging outside. Sure, you could go buy a bright whimsical tablecloth but why do that when you can make your own. Since it's almost Summer I thought it would be a blast to make a tablecloth with tie dye. Yes even if you think this is "not" for you I promise it is. When you complete this it will make your heart feel warm and cozy.
The good thing about this crafty project is you can use it with your kids or a fancy dinner party.
So put on your gloves and let's get busy!
You will need:
*Tulip One-Step Die-Dye Kit : Vibrant (Blue, Lime & Violet)
*Tablecloth / Decorative Shower Curtain / Fabric
*Craft Brushes
*Container for Water
*Lot's of LOVE
When you tie dye a large surface like this you want to lay out a piece of visquin on the ground. Make sure you are working in a fairly large space. Trust me this will make you happy when you are moving from one end to the other.
I recommend filling each bottle to the fill line then squirting into glass containers. I only put a little in the container at a time. Next you will take a brush, lightly dip it into dye and brush it onto the spots you want to highlight on your fabric. You can absolutely do this same technique on fabric that has no design on it. I found this shower curtain at Ross and when I saw it I knew it was perfect. I wanted a piece of fabric that I could use in many different ways.
*Tablecloth
*Shower Curtain
*Curtain for your windows
Start by pinching parts of the fabric then wrapping a rubber band around it. You will get rubber bands in your tie dye kit. Since my fabric has a design on it I pinched the center of each big pattern. When you are done with the rubber bands scrunch the rest of the fabric. Grab the tie dye bottle and squeeze right on top of the rubber band. Continue adding more colors around the center, going in a spiral motion. I did not wet any of my fabric for this technique.
*Note the colors will bleed when placed next to each other.
Don't forget you can create "other" colors by following this:
*Red+Blue= Purple
*Red+Yellow=Orange
*Blue+Yellow=Green
*Red+Yellow=Orange
*Blue+Yellow=Green
*Yellow+Green=Lime Green
(These are just some colors you can create)
How beautiful are these tie dyed doilies! I used my left over dye to make these. Trust me they will fill your space with happiness!
What a great way to spend a warm summer afternoon. Lounging around, drinking water, eating chocolate covered coffee beans, eating strawberries all while admiring your unique tablecloth.
This tablecloth will make you smile, even if you are having a bad day. Tie Dye usually does that ya know. So what are you waiting for! Go get some and dye everything in sight!
P.S. When you start doing this you will not stop! (hehe)
Oh and check out my other posts for iLoveToCreate below!
Friday, August 10
CRAFTY CHICA: Tulip Fabric Dye as Wood Stain!
| Tulip Fabric Dyes work wonderful as wood stain! |
Here is a video I made!
LINK
Supplies:
Tulip® One-Step Tie-Dye Kits™
Wood canvas
Brushes, cup of water
Contact paper, craft knife, craft mat
Embellishments
Plastic cups
Aleene's® Spray Acrylic Sealer™
Mix the dyes according to package directions and pour into plastic cups. Base coat the wood, use an ombre effect for a cooler result!
Draw and cut your design on the contact paper, peel the backing and press on the wood. Add the other colors of dye, have fun blending them!
This is the second canvas I made, I outlined the design with paint and then added 3D dots. I also added some Collage Pauge too!
Tuesday, May 29
VIDEO TUTORIAL: How to dye fabric with yarn!
LINK TO VIDEO
Regular old tie-dyeing can get boring. not all of us are into the hippy style, you know/ I like to experiment and come up with non-traditional ways to use fabric dye. This is a good one - it's great for kids or people who just like to play and experiment!
What you're doing is soaking cotton yarn, holding it tight between your fingers and then pressing onto damp fabric. It gives a bit more control that just using the squeeze bottle.
You'll need to pick up a Tulip Tie Dye Kit and either cotton swatches or shirts, etc. Check out the video to see the full technique!
Here are some clutches I made using my fabric scraps from this experiment. I have the tutorial posted here.
Visit us on Facebook!
Craft on!
Labels:
craft video,
easy tie dye,
easy tie dye techniques,
yarn
Tuesday, May 15
CRAFTY CHICA: Ice Painting with Fabric Dye!
I've heard of people painting with ice cubes and have always wanted to try it - so I thought why not use Tulip One-Step Dye?I haven't exactly started on clothing yet, first I wanted to experiment with the technique. That's what this tutorial is about! I LOVED the process and am excited to do more!
Watch the tutorial!
LINK
Visit us on Facebook!
Craft on!
| For all things tie dye, visit: http://www.ilovetocreate.com/Tie-Dye |
| Drawing with ice. |
| Love this one, I used crumbled ice on this one. |
LINK
Visit us on Facebook!
Craft on!
Monday, May 23
4 Modern and Unique Tie Dye Techniques

Are you looking for a totally different way to tie dye? If you are ready for a new tie dye challenge, then here are 4 techniques to try to get the lastest fashion-forward looks! And they are just as fun and easy as the classic styles. They are ombre, shibori, urbanesque, and marble. Here’s how you do ’em!
All of these instructions are for the surface shown in the above photo; however, you can get the same look using different kinds of surfaces, just follow the instructions!
Shibori Tie Dye
Materials
– Tulip® One-Step Dye™
– Loose-fitting shirt – white – 100% cotton
– PVC pipe
– Plastic tablecloth
Instructions
1. Prewash shirt to remove sizing. Do not use fabric softener.
2. Cover work surface with plastic tablecloth. Lay damp shirt on prepared surface.
3. Wearing plastic gloves, add water to Fuchsia dye bottle to line indicated on bottle. Replace cap tightly and shake until dye is dissolved.
4. Place the PVC pipe at the top of the damp tee then roll tee around pipe, rolling down to the bottom of shirt. Scrunch fabric tightly around pipe.
5. Squeeze Fuchsia dye onto scrunched shirt, making sure to rotate pipe if necessary to cover shirt from top to bottom.
6. Unwrap shirt from pipe then cover with plastic tablecloth and let sit 4 to 6 hours. Wash in a large load of water with a small amount of laundry soap and dry in dryer.
Here's a video also showing this technique!
Tie dye using Marbles
Materials
– Tulip® Dye Techniques Kit™
– Tulip® Surface Cover™
– Extra rubber bands
– Large flat glass marbles
– Scissors
– Paper towels
– White T-shirt
Instructions
1. Wet shirt and wring dry or place in washer on spin cycle.
2. Cover work surface with Surface Cover™ then place shirt on surface and smooth with hands.
3. Place a marble inside front of shirt then tightly rubber band. Continue to add marbles where desired.
4. Wearing gloves from kit, fill Turquoise and Fuchsia dye bottles with water to line indicated on bottles. Shake until thoroughly mixed.
5. Squeeze Turquoise onto shirt, avoiding marble sections and carefully lifting shirt to dye back if needed.
6. Replace lid of Fuchsia dye bottle with sprayer from kit. Test on a paper towel, then spray top of each section of fabric with marble, letting overspray blend with Turquoise dye to create Purple color.
7. Let set for 4-6 hours. Carefully cut off rubber bands and remove marbles then wash in washer with small amount of laundry soap. Dry in dryer.
Urbanesque Tie Dye
Materials
– Tulip® Dye Techniques Kit™
– Trash bags or plastic tablecloth
– 100% cotton ¾ sleeve tee – white
Instructions
1. Prewash fabric to remove sizing. Do not use fabric softener.
2. Cover work surface with trash bags or plastic tablecloth. Lay damp fabric on prepared surface.
3. Wearing rubber gloves, add water to the Turquoise, Lime and Fuchsia dye bottles. Replace caps tightly. Shake until dye is dissolved.
4. With the shirt lying flat on tabletop, squeeze Lime dye in an abstract flower petal design. Refer to photo.
5. Squeeze the Turquoise dye onto shirt, bordering the Lime flower petal design. Repeat step with Fuchsia dye bordering the Turquoise portion.
6. Cover fabric with trash bag or plastic tablecloth. Let sit 4-6 hours. Wash in a large load of water with a small amount of laundry soap. Line dry.
Ombre Skirt
Materials
– Tulip® One-Step Dye™ in brown, fuchsia, and orange
– Plastic tablecloth
– Skirt – 100% cotton
Instructions
1. Prewash skirt to remove sizing. Do not use fabric softener.
2. Cover work surface with plastic tablecloth. Lay damp skirt on prepared surface.
3. Wearing plastic gloves, add water to dye bottles to lines indicated on bottle. Replace caps tightly and shake until dye is dissolved.
4. Squeeze Brown dye on the top portion of skirt, Fuchsia in the center section and Orange on the bottom section. Refer to photo.
5. Cover fabric with plastic tablecloth and let sit 4 to 6 hours. Wash in a large load of water with a small amount of laundry soap and dry in dryer.
Here's a video showing the Ombre technique!
Are there any tie dye techniques you've done that are different from the norm? Tell us about them!
Visit us on Facebook!
Craft on! Click here for today's daily giveaway!
Subscribe to:
Posts (Atom)


.png)