Showing posts with label easy tie dye. Show all posts

Sunday, July 6

Abstract Drip Dye T-shirt


I love when summer tie dye season rolls around, cause I'm always bursting at the seams with new ideas with our Tulip One-Step Tie-Dye!  I love coming up with fun new ways to use it!  This technique is very Jackson Pollack-inspired!  I absolutely love making my own abstract art on canvases, so I just transferred that idea to a shirt and I love the results, don't you? Here's how you can make your very own!

Friday, July 12

Glittered Tie-Dye Totes


Last month I helped run a booth for the Tie-Dye Your summer campaign and we had leftover totes. These weren't normal boring totes, they were really nice ones - fully lined with a big roomy area for decorating. I knew I wanted to dye them, but to give them even more personality, I added some glittered elements! Here is a video I made showing the process! It was really fun!

Wednesday, January 9

Make a Striped Tie Dye Shirt using Tulip One-Step Dye

Have you always wanted to tie dye, just didn't know where to start? Here's an easy way to get your feet wet using Tulip One-Step Tie Dye available at Wal-mart, Michaels, Jo-Ann, Hobby Lobby, AC Moore, and other craft stores nationwide. This is the easiest tie dye out there to try and it's not intimidating to use at all, which makes it great for all ages to use.

What you need:
– Cotton shirt of your choice
– Tulip One-Step Tie Dye Kit
– Spray bottle

1) Break open your Tulip One-Step Dye packaging. Inside you will find everything you need to do your project (dye, plastic gloves, rubber bands, and an easy-to-follow instruction guide). 2) Wet a plain 100% cotton shirt. Gather your shirt horizontally from side to side. Tie rubber bands around your shirt in regular intervals, so that it is consistantly banded. We recommend wrapping your rubber band around 3 times for each band. 3) Fill up your entire bottle of Tulip One-Step Tie Dye with water and shake well. Now apply a generous amount over your entire shirt and around the bands. Flip over and do other side as well.  We did this process in a small plastic shoebox-shaped container to prevent a messy work area. Seal the dye with the lid and let it set inside for 6-8 hours (this makes for more vibrant results). 4) After 6-8 hours, fill up your plastic container with water to rinse out the excess dye. We filled up the plastic container and poured out the water several times until the water ran clear. You can wash and dry your shirt in your washer and dryer as normal, just wash separate from other clothes for the first couple washes so that the dye doesn't get on your other clothes!
Here's what it looks like when you are dyeing multiples of different colors using this technique.
And here's what our finished orange shirt looked like!  It turned out pretty fabulous, don't you think? What color would you like to make?

Tuesday, May 29

VIDEO TUTORIAL: How to dye fabric with yarn!


 Check out the video tutorial below!


 LINK TO VIDEO

Regular old tie-dyeing can get boring. not all of us are into the hippy style, you know/ I like to experiment and come up with non-traditional ways to use fabric dye. This is a good one - it's great for kids or people who just like to play and experiment!

What you're doing is soaking cotton yarn, holding it tight between your fingers and then pressing onto damp fabric. It gives a bit more control that just using the squeeze bottle.

You'll need to pick up a Tulip Tie Dye Kit and either cotton swatches or shirts, etc. Check out the video to see the full technique!

Here are some clutches I made using my fabric scraps from this experiment. I have the tutorial posted here.
Visit us on Facebook!
Craft on!

Tuesday, May 22

CRAFTY CHICA: How to Make Tie Dye T-shirt Yarn! (Video)

T-shirt yarn is so easy and addicting to make, well now you can take it a step further and tie dye your T-shirt yarn!

There are several way sto go about it - you can:

A. Use a shirt that is already tie-dyed OR
B. Cut up the shirt to make the yarn and then dye it. That is what I'm showing in my tutorial video.

SUPPLIES:
Tulip Tie Dye Kit
Shirt
Scissors

Watch the video and give it a try!


LINK Visit us on Facebook!
Craft on!

Wednesday, May 18

10 Ways to Tie Dye a Pillow

Have you ever seen tie dye pillows and thought - "I can make that!" We're here to say - yes, you can! Pillows are easy to create and make a bold statement, no matter what dye technique used.

Here are some pictures to get your creative wheels turning. Don't forget, all it takes is one of our all-inclusive Tulip kits and you are ready to rock (or dip...or tie...or squirt...)

Use these as inspiration to make your own signature version - come up with your own designs and techniques. Don't forget to share your creations in our online gallery!

1. A version of this striped pillow cover from West Elm would look pretty snappy on your couch, don't you think?


 2. How about a tie dye pillow bed for your poochie? Here are the directions!


3. We love this scarlet and white bedding circular centerpiece that finishes this global look just right from House to Your Home.


4. Everyone loves cupcakes! Here is a sweet project for a girly girl bedroom - and directions too!


5. Old school '70s style is a timeless look. Even ElleDecor says so! (TIP: Tie dye two cloth napkins, sew together, add a pillow form and you are set!)


6. Check out this gorgeous indigo bedding from Ralph Lauren. This would make a great wedding or housewarming gift for someone special.  You know you can make your own version of this!


 7. How about this Wild Peace Pillow?


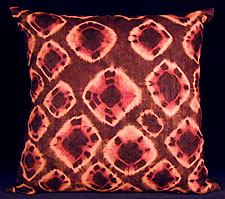
8. Kuba pillows. From IndigoArts.com:
Kuba pillows use the bold geometries and rich textures of vintage hand-woven raffia cloth from the Kuba people of the Congo. Left in its natural color or dyed with organic red, brown and ochre dyes, it is sewn into applique and reverse-applique, traditionally used in long wrap-around dancing skirts. The flat-weave fabric may also be tie-dyed, embroidered or decorated with cowry shells.


9. Look at this gorgeous tie dye pillow that Etsy seller, DyedStitches, made from diapers and towels! Once she adds her mixed media magic, those fabrics are transformed! We love that she thinks out of the box - cloth diapers? Awesome and oh-so-artful!


10. Tie dye can be used to make beautiful floral designs, just like this! Here is how to do it!


Visit us on Facebook!
Craft on! Click here for today's daily giveaway!

Thursday, March 3

MAYA IN THE MOMENT TEEN CRAFT: Jumbo T-Shirt Flower Pins


Have you ever had a tie dye t-shirt FAIL? You know, like when it doesn't come out exactly the way you thought?  I did. Well, what do you do with the shirt? After all my sweat and tears, I didn't want to throw it out. I decided to try and make those cool poofy fabric flowers!


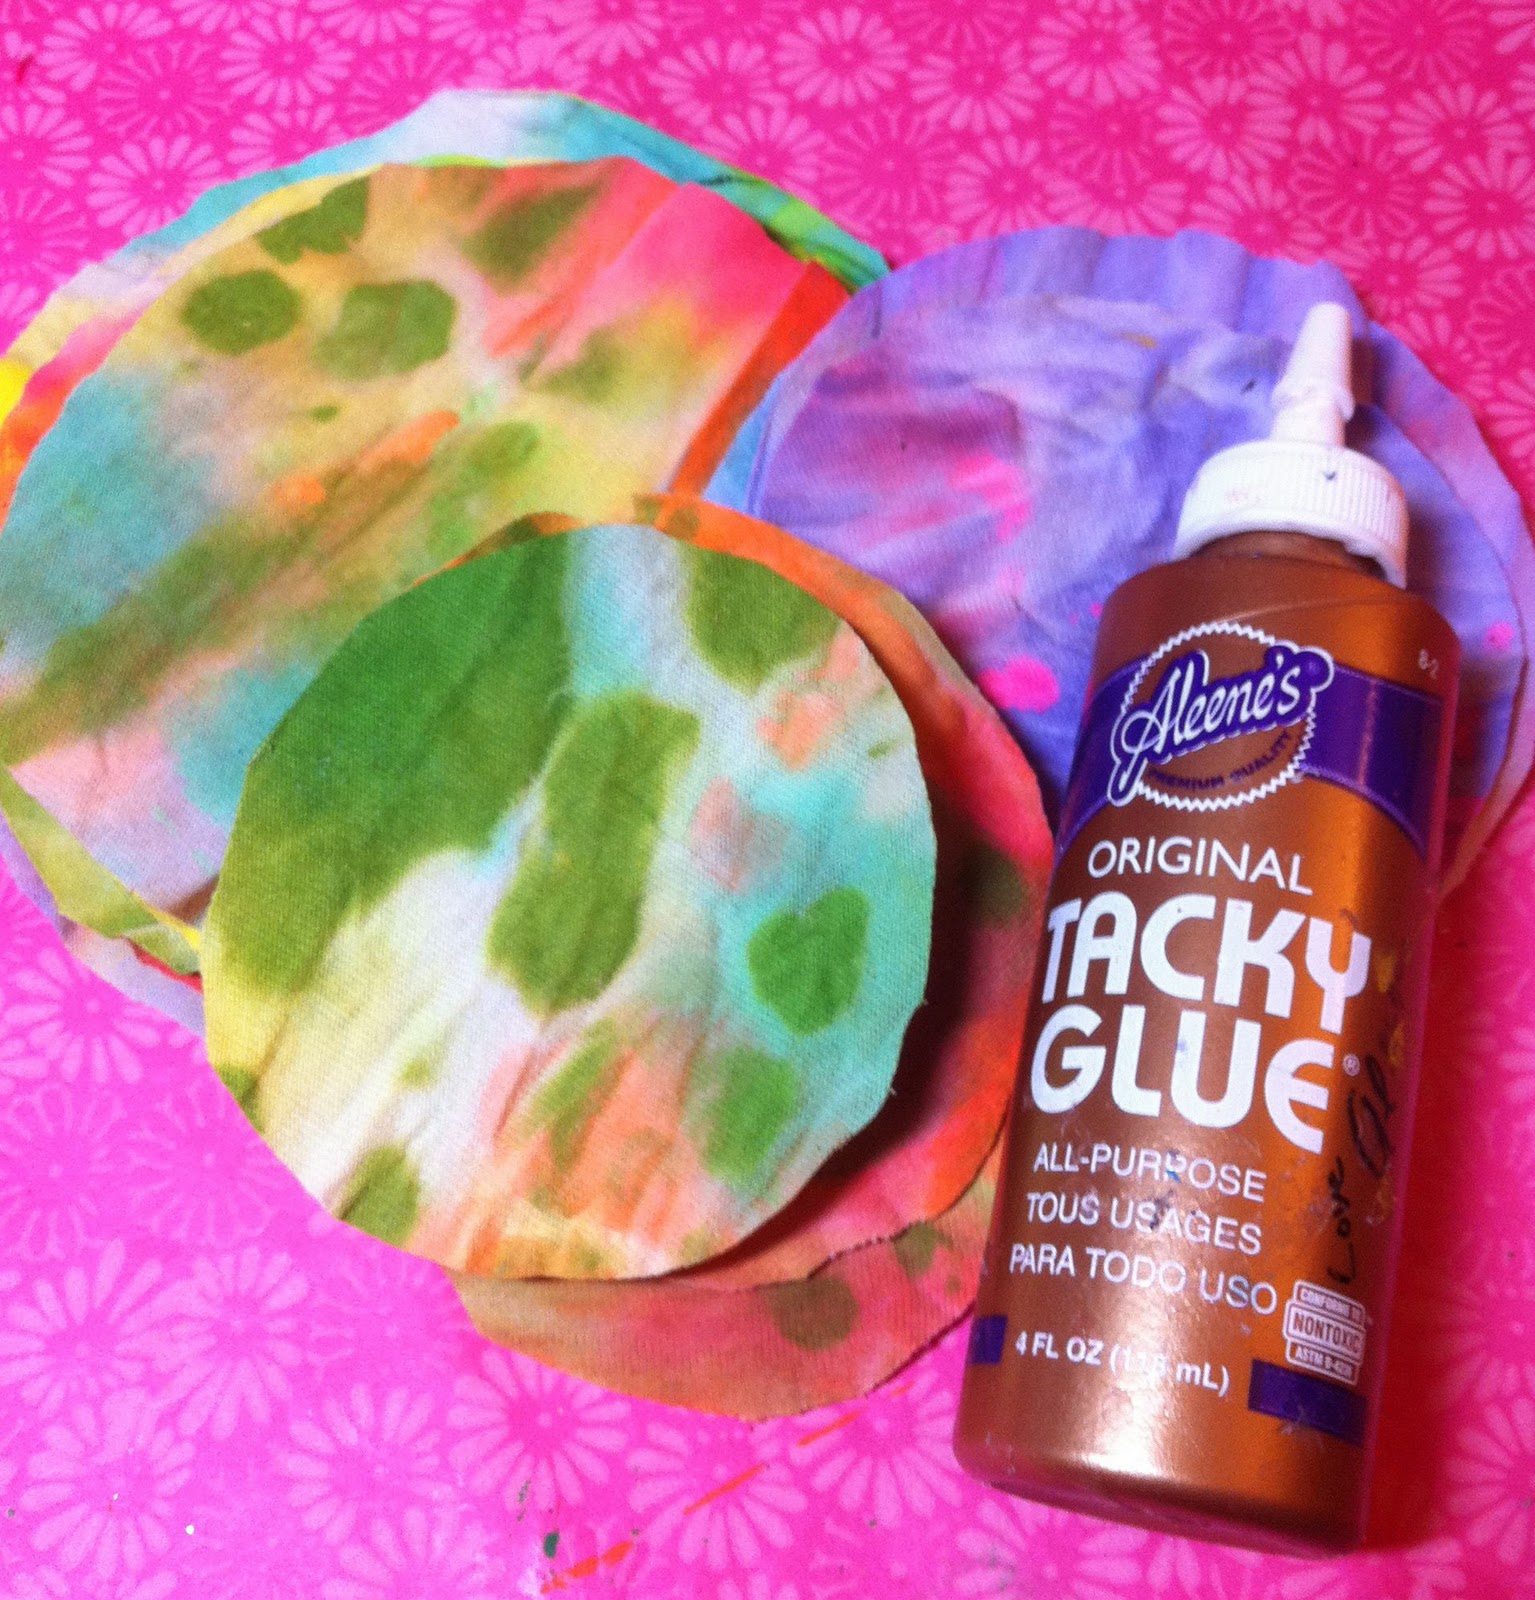
  I took my shirt and cut it up into squares. I didn't measure, I just cut different sizes. Then I sprayed them with Tulip® Fabric Spray Paint™.

Next I added dots and splatter by taking apart the bottle and drizzling the paint. I used bright colors on dakr and vice versa so they would show up good.

I love the pink on the purple!

I let them dry for four hours and washed and dried them. I cut out different sizes of circles. Honestly, I didn't know how I was going to make my flowers at this point, I had to ask my mom for help.

We took each circle and added Aleene's® Original Tacky Glue® in the center of each one and pinched it so it looked ruffley. (Is there such a word as ruffley?) Let them dry.

I used the big piece as the base and glued the tips of each pinched circle towards the center so they looked super poofy!
 See the pin back in the picture? I used the Tacky Glue and added those too, so that I can use the flowers on whatever I want. I also covered them in Tulip® Glitter Spray Paint for sparkle.


Here they are on a blouse of mine. There are super JUMBO! I will end up wearing only one on my blouse and use the other two on other things, like my purse or a hat. Maybe I'll give one to my little cousins Sarah and Bella! Next time I'll definitely make mini versions. You can also add crystals if you want!


Visit us on Facebook!
Craft on! Click here for today's daily giveaway!

Tuesday, January 18

Wild Peace Pillow

Designed by Allee Marderosian
Go wild over hip home décor! Create this colorfully cool pillow with the Wild Thing Tulip® Tie-Dye Fashion Kit™ and toss in any room for a funky fun accent.

Materials List

  • Tulip® Tie-Dye Fashion Kit™

    Wild Thing
  • Tulip® Surface Cover™

  • Miscellaneous

    •   White fabric – 100% cotton – 2½ yards
    •   Straight pins
    •   Chalk pencil
    •   Plastic wrap
    •   Sewing machine
    •   Paper towels
    •   Pillow insert or Polyfill
    •   Thread – black and white
    •   Scissors 

    Instructions

    1. Prewash fabric to remove sizing. Do not use fabric softener or dryer sheets.
    2. Cut fabric to create one 2-yard section and one ½-yard section.
    3. Cover work surface with plastic tablecloth. Dampen 2-yard fabric section and lay on prepared surface.
    4. Wearing gloves from kit, add water to dye bottles. Replace caps tightly. Shake until dye is dissolved.
    5. Fan fold fabric section, with each fold about 3” wide. Fasten zip ties about 4” apart along length of folded fabric.
    6. Squeeze Black dye onto fabric in between zip ties.
    7. On clean part of work surface, lay flat the ½-yard section of dry fabric.
    8. Place spray nozzle on Turquoise dye. Lay Zebra stencil on top portion of fabric and spray Turquoise dye into stencil. Continue process along top portion of fabric.
    9. Repeat process with Leopard stencil and Fuchsia dye across entire bottom section of fabric. *Tip: To avoid overspray, lay paper towels around stencils while spraying dye.
    10. Cover fabric with plastic wrap and let set 6 to 8 hours or longer for most intense color. Thoroughly rinse in running water until excess dye is removed, cutting off zip ties, then wash separately in a large load of water using hottest water suitable for fabric and a small amount of laundry soap. Line dry.
    11. Once dry lay animal print fabric on a clean surface. Use a chalk pencil and lightly draw a large peace sign on fabric to use as a guideline when cutting.
    12. Cut out peace sign.
    13. Lay the black striped fabric flat on work surface and use straight pins to pin peace sign to one side of fabric.
    14. Sew peace sign to fabric with black thread.
    15. Cut fabric evenly in half.
    16. Make sure all four corners are even. Place right sides together and sew three sides together.
    17. Pull pillow cover right side out and stuff using Polyfill or a pillow insert.
    18. Stitch remaining side closed


Visit us on Facebook!
Craft on! Click here for today's daily giveaway!

Saturday, January 8

Fierce Fashionista-in-Training Onesie

Designed By Allee Marderosian
Dress your little fashionista in an outfit she’ll go wild over! Create this fiercely fun look with the Wild Thing Tulip® One-Step Tie-Dye Kit™.

Materials List

  • Tulip® Tie-Dye Fashion Kit™

    Wild Thing
  • Miscellaneous

    •   Baby cap – white – 100% cotton
    •   Plastic tablecloth
    •   Paper towels
    •   Onesie – white – 100% cotton 

    Instructions

    1. Prewash onesie and cap to remove sizing; do not use fabric softener or dryer sheets.
    2. Cover work surface with plastic tablecloth. Lay damp onesie and cap flat on prepared surface.
    3. Wearing plastic gloves from kit, add water to Fuchsia and Turquoise dye bottles. Replace caps tightly and shake bottles until dye is dissolved. Place spray nozzle on Fuchsia dye bottle.
    4. Position leopard print stencil onto top section of onesie.
    5. Spray Fuchsia dye over stencil. Remove stencil. Repeat on top part of baby beanie.
    6. Squeeze Turquoise dye onto the bottom section of onesie, letting the color bleed upward and fade into the leopard pattern for an ombré effect.
    7. Add Turquoise dye to boarder of cap as shown.
    8. Cover onesie and beanie with plastic tablecloth to keep damp and let set 6 to 8 hours or longer for most intense colors. Rinse thoroughly in running water until water runs clear then wash in a large load of hottest water suitable for onesie and cap, adding a small amount of laundry soap. Dry separately.

Visit us on Facebook!
Craft on! Click here for today's daily giveaway!

Friday, January 7

Cushy Love Pillow

Designed by Cheryl Ball

Fall in love with home décor that’s cute and comfortable! Turn simple T-shirts into a cushy crocheted pillow with vibrant color from your favorite Tulip® One-Step Tie-Dye Kit™.

Materials List

  • Tulip® One-Step Tie-Dye Kit™

    Good Vibrations
  • Miscellaneous

    •   Pencil
    •   Polyfil
    •   Sewing pins
    •   Crochet hook – 15.00 mm
    •   Scissors
    •   Plastic wrap
    •   Needle and white thread
    •    (4) T-shirts – white – large or extra large
    •   Plastic tablecloth
    •   Newspaper
    •   Fleece or felt yardage – white – ½ yard
    •   Sewing machine

Instructions

  1. Wash shirts without fabric softener to remove sizing. Cover work surface with plastic tablecloth then place damp shirt on surface. Following dye instruction sheet, crumple each shirt.
  2. Wearing gloves from kit, create dye according to package instructions.
  3. Squeeze ¾ bottle of Red dye on one shirt, turning and squeezing fabric and creating a mottled look. Repeat step, dyeing one shirt Fuchsia and one Purple. Squeeze remainders of three dye bottles on last shirt. Cover dyed fabric with plastic wrap to keep damp.
  4. Follow instructions on guide included with kit for dye set time and laundering shirts.
  5. To create strips for project, cut just under sleeves across shirt then cut off hem, forming a tube shape. Starting at one cut edge, cut in an a slight angle then cut about a 1” strip from tube creating one long strip of fabric. Repeat with all shirts. Roll fabric into a ball if desired.
Creating heart:
Using purple strip, chain 20. Single crochet into one side of chain stitch for next eight. Crochet next three stitches together to create dip of heart. Single crochet in one side of stitch to end of chain. Add two double crochet in last chain, creating curve of heart. Single crochet in one side of chain for nine stitches then add two double crochet in tenth chain to create point of heart. Single crochet in one side up to last stitch then add two double crochet in last, creating curve of heart. Repeat steps, crocheting with purple until it is used up, stopping or starting at tip. Tie on next color and continue around heart, adding Fuchsia strips last.
  1. Edging: Use tricolor strip to create scallop edge. Starting at tip of pillow, single crochet in first stitch then sc, dc, sc in next stitch then single crochet in next. Repeat pattern around entire pillow, ending at tip.
  2. The heart can be blocking into shape if needed by gently pressing, pulling and stretching as needed.
Finishing Pillow:
  1. Place pillow on newspaper, use pencil to trace around, then cut out.
  2. Pin pattern onto double thickness of felt or fleece and cut out.
  3. Sew around entire heart using a 1” or larger border. Trim seam to ¼”.
  4. Cut a 7” slit along lower edge on one side of pillow. Fill with Polyfil to desired size. Pin opening closed, overlapping cut edges, then use needle and thread to sew closed.
  5. Place stuffed pillow to back of heart. Use pins to attach pillow seam to crochet stitches just under trim. Use needle and thread to whipstitch together.

Visit us on Facebook!
Craft on! Click here for today's daily giveaway!

Thursday, August 19

BACK TO SCHOOL: Haute Lunch


Haute Lunch

Designed by Allee Marderosian

Embellish your lunch gear with Tulip Fashion Design products for a lunch bag that looks über tasty!

CLICK HERE FOR PRINTABLE DIRECTIONS!

See even more back to school projects HERE!

Friday, June 5

Check out our latest tie dye video


If you've been "dyeing" to try tie dye (yes we meant the bad pun), check out our new video showing you a wide range of techniques! It is so easy and soooo fun using our Tulip® One-Step Fashion Dye™.

If you do make a creation with our tie dye, share it with us and it may be featured here on our blog! E-mail us at ilovetocreateblog@yahoo.com and attach your project! We'd love to see what you do!
Clicky Web Analytics
Pin It button on image hover

Subscribe to our newsletter

* indicates required
I am interested in products and inspiration for...
Close