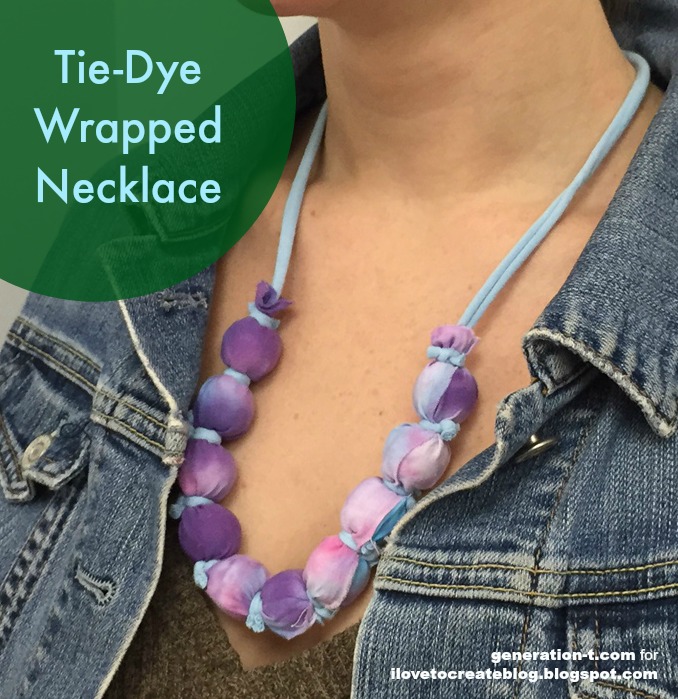
This quick and easy accessory heralds in a Bohemian springtime. It's the perfect project to use any failed tie-dye attempts on -- or you can tie-dye a whole T-shirt or piece of fabric and host a party! (You can make at lease 10 necklaces from one large T-shirt.) This particular version is directly inspired by the Fabric-Covered Bead Necklace from The Jewelry Recipe Book by Nancy Sorian0 -- substituting in T-shirt fabric (of course) whenever possible!
Showing posts with label Tulip One-Step Tie-Dye. Show all posts
Showing posts with label Tulip One-Step Tie-Dye. Show all posts
Tuesday, April 28
Tuesday, September 23
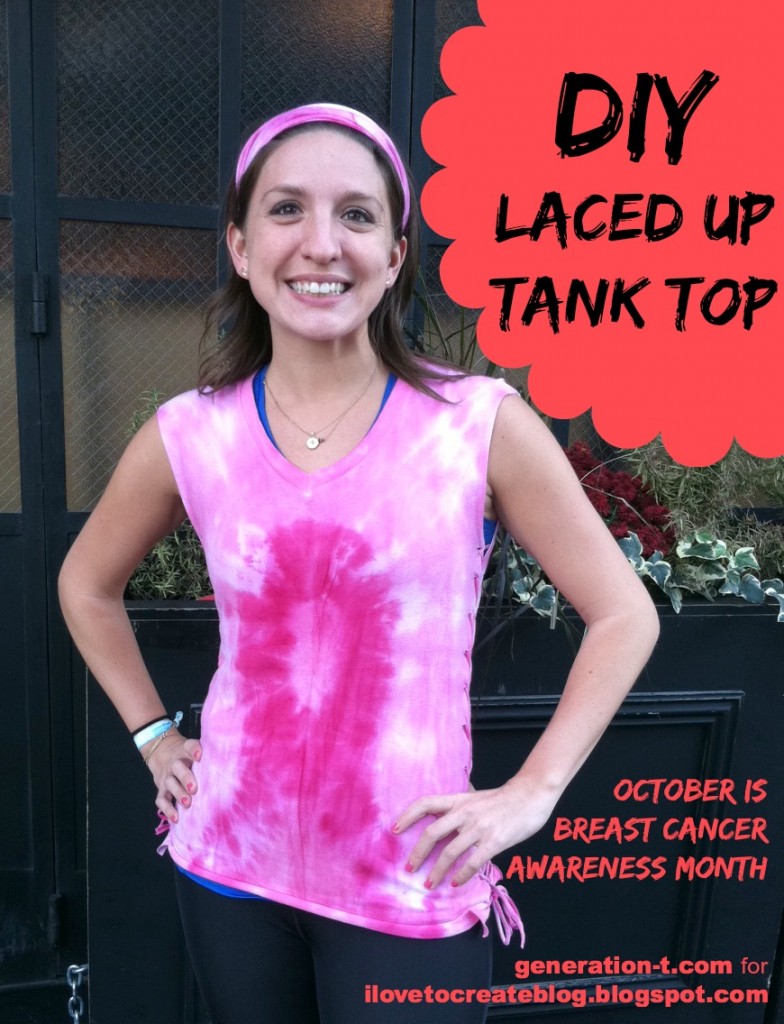
No-Sew Laced Up Tank Top
Mark your calendars: October is National Breast Cancer Awareness Month. Whether you walk, run, or responsibly conduct a breast self exam for the cause (do it once a month!) here's a T-shirt transformation tutorial (plus a bonus throwback!) to honor all of you making a difference and supporting those affected by breast cancer. Just set aside an old baggy T-shirt, a pair of scissors, and in 10 minutes you've got yourself a fitted tank top (inspired by the Outer Lace tank top in Generation T: 108 Ways to Transform a T-shirt). Get the team together and tie-dye and snip your way to its completion, then wear it for yourself, or wear it for a loved one--I know I will be!
Tuesday, August 26
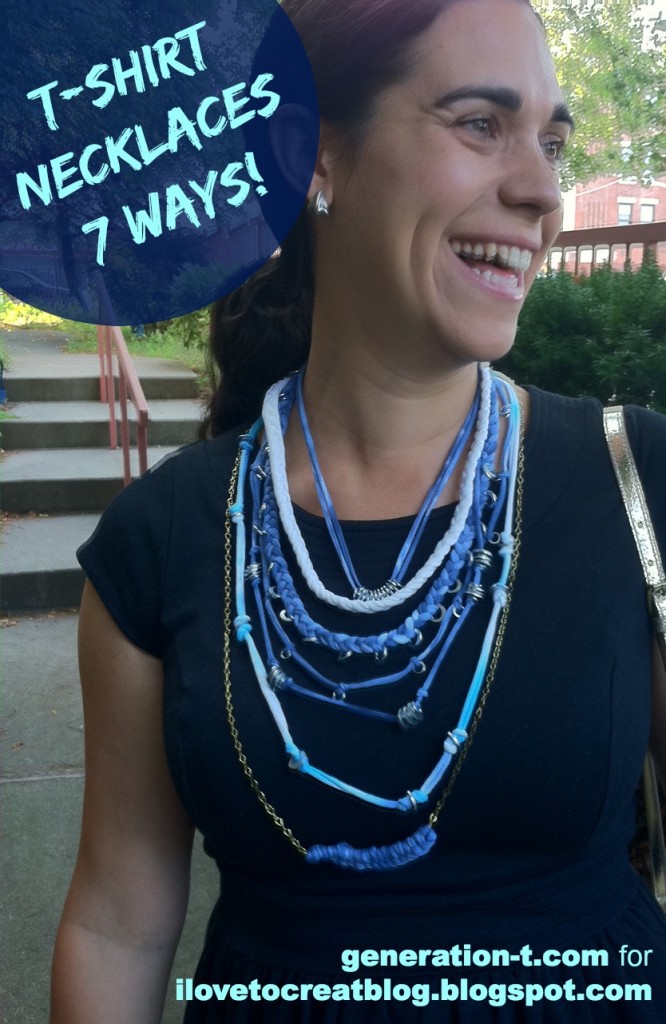
Tie-Dye T-shirt & Hardware Necklaces: 7 Ways!
Whether
you're celebrating back to school or back to work, here are a handful
of quick-and-easy, no-sew techniques to accessorize on the cheap. Just
grab all those scraps you've cut from your white T-shirts, rejuvenate
them with a splash of tie-dye, and macramé your way to a statement
necklace or two (or seven!)
I've always loved shopping at hardware stores for my materials -- washers and hex nuts and some of the more delicate chains lend a nice physical weight to a fabric-based piece while adding an industrial edge to the overall aesthetic.
I've always loved shopping at hardware stores for my materials -- washers and hex nuts and some of the more delicate chains lend a nice physical weight to a fabric-based piece while adding an industrial edge to the overall aesthetic.
Wednesday, July 30
Tie Dye Curtains
Hey Everyone! Today's post is going to rock your socks off! I'll be showing you how to make your very own tie dye curtains out of a clearance shower curtain! You are for sure going to want to check this one out! It so simple but has killer results! Use different colors of dye depending on the color of your room.
and
Tuesday, July 22
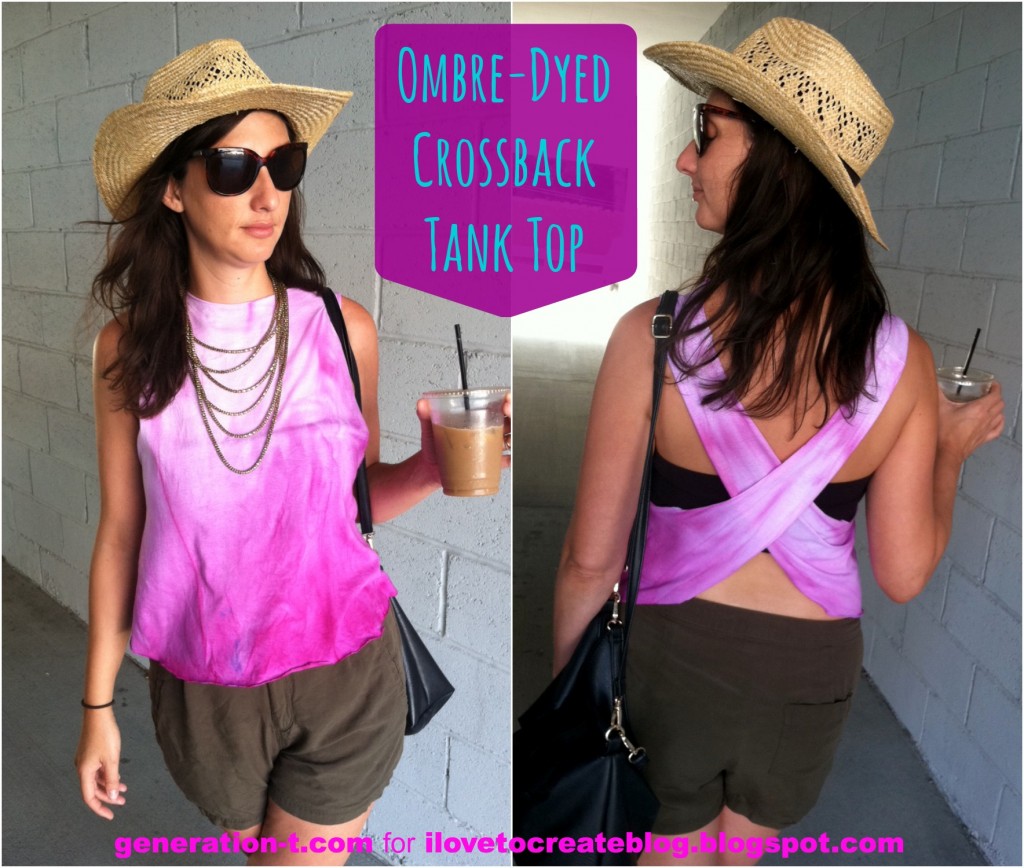
Ombre-Dyed Crossback Tank Top
Summer is all about easy, breezy fashion (stay cool) and tie-dye (stay fun!). Here's an ombre-style surface treatment for a quick-and-easy T-shirt transformation. From plain white T-shirt to a smock-styled, crossback tank top that's nearly no-sew (about 6 inches of stitching) in no time. Smock it to me!
Monday, July 21
Deep Sea Tie-Dye Bedspread
Tie dye is always a popular summer project, but isn't it nice to make something to be used indoors year round? This blue-on-blue deep sea inspired bedspread would make a great addition to any bedroom in the house!
Want to make your own? It's easy!
Labels:
Aunt Peaches,
bedding,
decor,
tie-dye,
Tulip One-Step Tie-Dye
Saturday, July 5
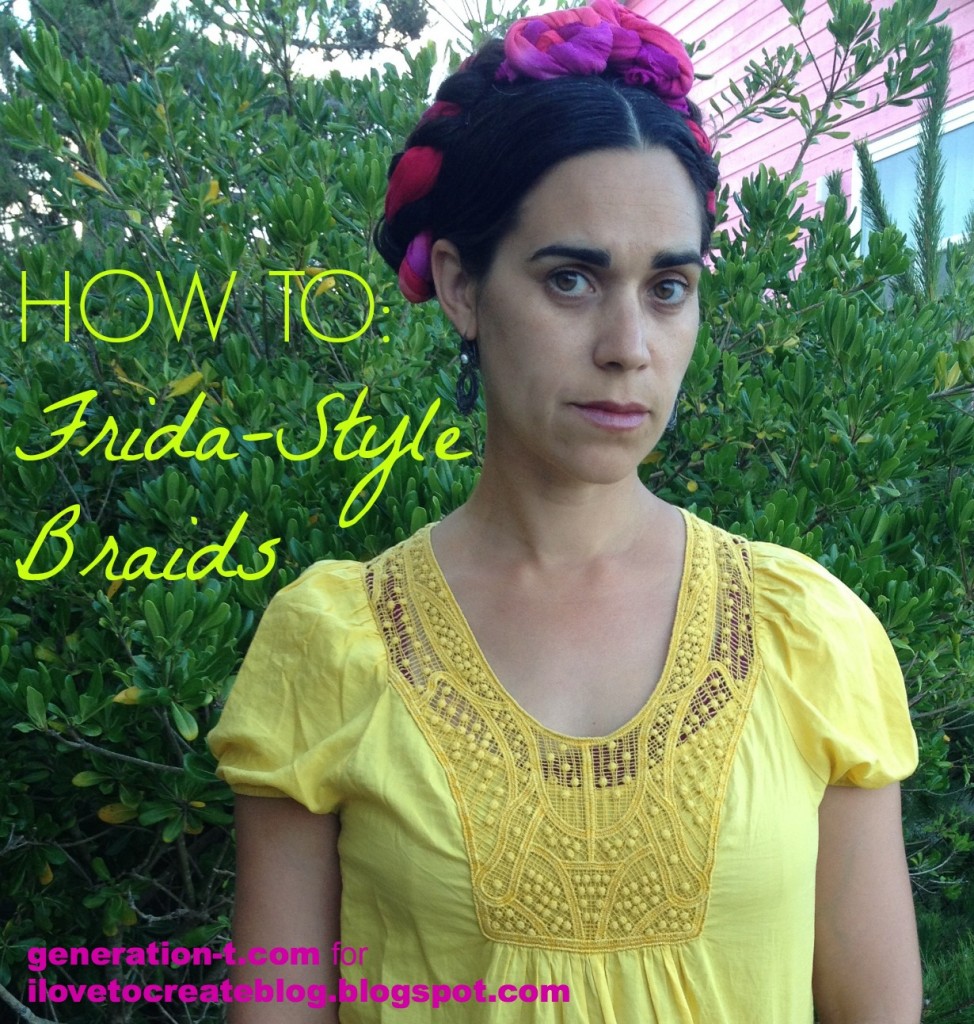
How to: Make Frida-Style Braids
Happy Birthday to one of my favorite artists: Frida Kahlo. I've been wanting to post this tutorial for awhile now, and the occasion of her birth is the perfect opportunity. Here's a simply way to dress up your hair using an old T-shirt, tie-dye, and scissors. But first, some images of those inspiring braids from the queen of the Mexican art scene, who would be turning 107 if she were alive today...
Friday, March 14
Make your own tie dye socks
I know it's still winter in a lot of places (sorry, East coast), but one sure way to hurry up spring and summer is to make yourself a pair of one-of-a-kind tie dye socks using Tulip One-Step Tie-Dye! If these socks don't SCREAM warmer weather, I don't know what does! Here's how you can create your own vibrant pair for every day of the week!!!!
Sunday, July 7
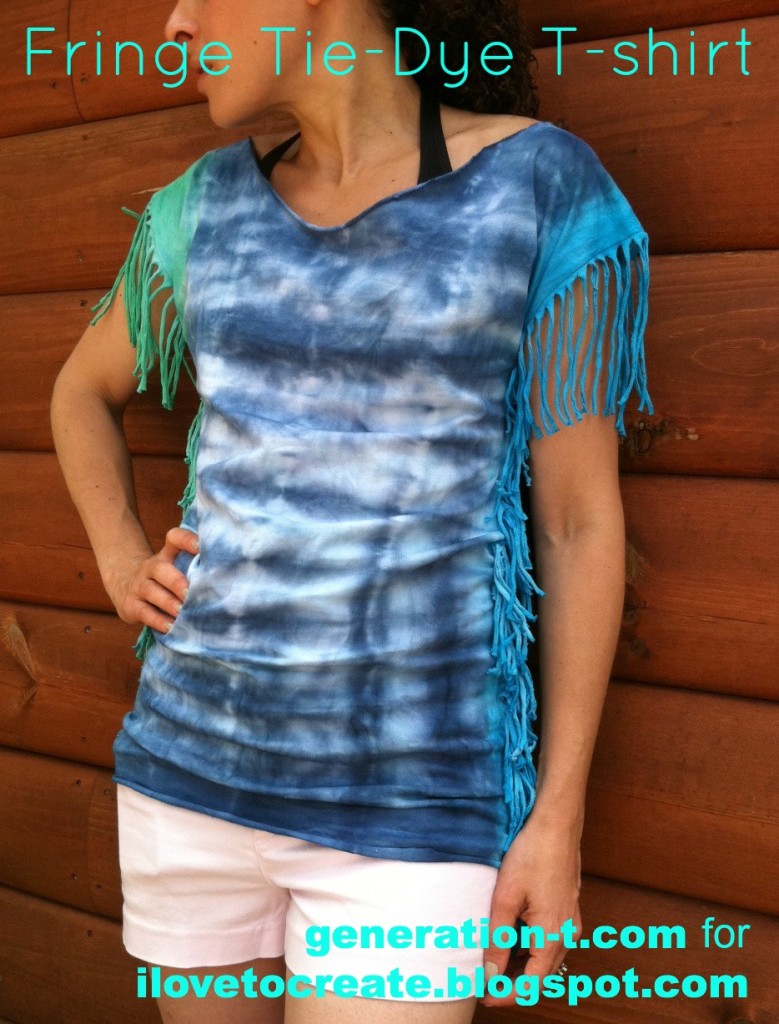
Altered Tie-Dye T-shirt Challenge Featuring Megan of Generation T
While most fringe T-shirts have the fringe tailing off the bottom, I
went with horizontal fringe on this one. The side fringe gives nice
movement and flow to the tee, and it's a great project for making a
slightly-too-big T-shirt into a just-right T-shirt. Add a touch of ombre
tie-dye, and it's a perfect summertime staple. Throw it over your
bathing suit, and head beachward!
Friday, June 7
Shibori Summer Sheets!
Summer is here and my bedroom needed a makeover! I've been doing a new tie-dye video every week and now it was time to give my bed some rainbow love!
Here is what you need:
PVC pipe, about 24" long
Rubberbands and twine or string
Scissors
Scissors
Here is my video on how to tie-dye your sheets! My suggestion is to get at least 6-8 bottles ofr a queen set, that's what I did. I LOVE how my sheets turned out. I decided at the last minute to use some Tulip® Fabric Spray Paint™ and add stenciled designs...
LINK
Thursday, May 30
Tie-Dye Hawaiian Halter Top


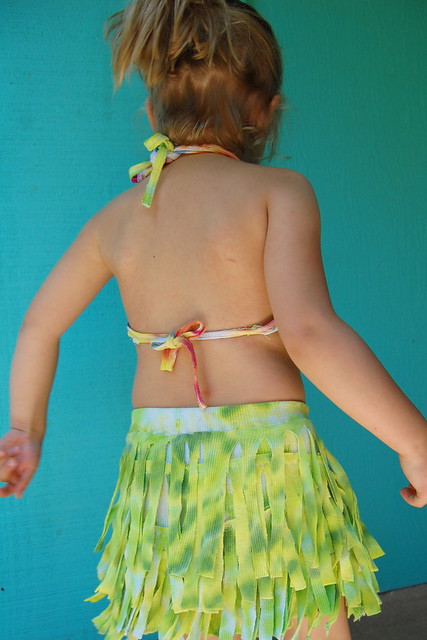
Today concludes my 3 part series on tie-dye hula gear for summer. We made a hula skirt, onesie with lei and today I’ll show you on to transform an old tank top into a tye-die halter.
SUPPLIES
Tank Top
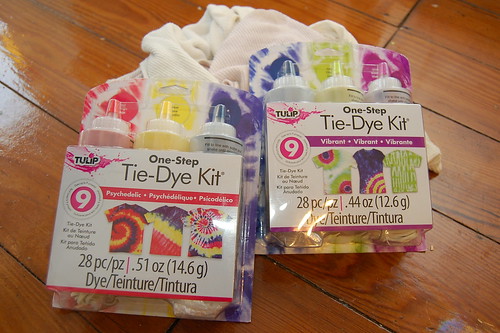
Tulip One-Step Tie-Dye Kit
Sewing Machine
Elastic
Scissors

This whole look was inspired by a post on Make It and Love It where the blogger made a fringed ombre skirt out of 3 different colored red shirts. This skirt inspired me to make a hula skirt for my daughter. Putting her in a plain T-shirt seemed like a shame so I tie-dyed another tank top and my sewing Goddess of a mother transformed it into a tank top.
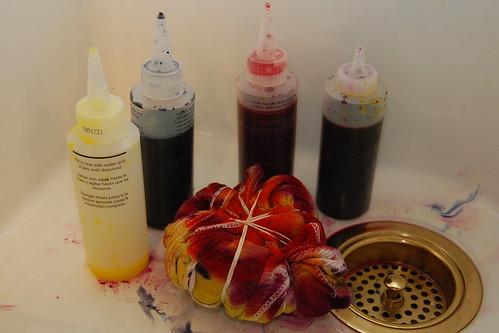
The Tulip One-Step Tie-Dye kit is super easy to use. The package comes with dye, rubber bands, gloves and a handy dandy guide to how to bind your shirt to achieve different patterns. I used old (adult sized) tank tops to create the halter and skirt. I went with a twisty multi-colored look. Once the tank had been dyed, washed and dried I set my mother to work on making a halter top.
Cut a your tie-dyed tank top apart just under the arm holes.
Next, cut the back from the front where they are joined at the shoulders.
Finally, cut the back away where it is joined to the front under the arm holes.
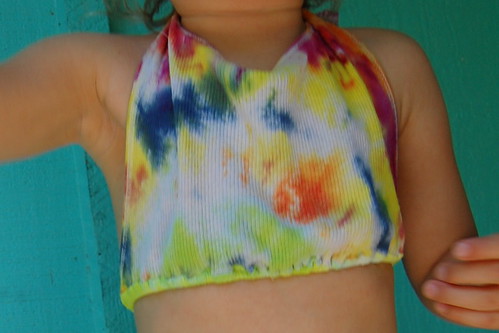
This will be the halter top. Use left over arm and neck binding for the neck and back ties. Trim them close to the finished edge. Fold what is left of the shoulder around a length of the salvaged binding. Do this for each side. Do the same for the back straps.

Finish the bottom of the halter with a binding made from long, two inch strips of the left over tank top. For a better fit, run thin elastic inside the binding. Tie straps around back and neck.

I suddenly feel compelled to make the cupcake liner leis on the cover of the latest issue of Kids Crafts 1-2-3 to finish off the complete outfit.
Tuesday, May 28
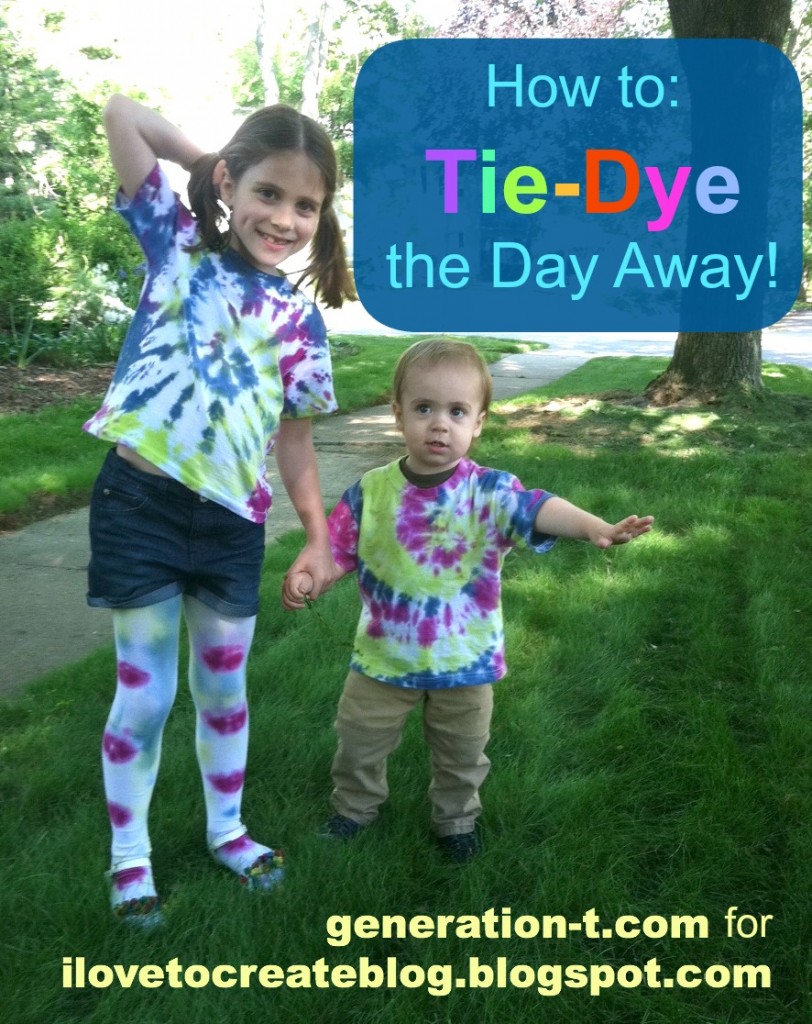
How to: Tie-Dye Your Life (Starting with Your Kids)
I always bring a craft project when I visit my niece, Dorothy. One time it was Embroidery Day, another it was Felt Cat Ear Day...this
time it was Tie-Day Day! Our goal, which we nobly chose to accept: to tie-dye an entire wardrobe. As you can see, we got pretty darn close...
So, despite all my T-shirt proclivities, I have to
confess I actually have never tie-dyed in my adult life. I don't know
what made me think that it would be so hard, but honestly, the only
thing that could have made this easier was a nice picnic table outside
to craft on (and that's just me asking for a luxurious upgrade).
The takeway: Tie-dye. Is. So. Easy.
I would go so far as to say it's foolproof! Next
time you have a family reunion, skip ordering the printed T-shirts: Set
up a tie-dye station for all the siblings and cousins--by morning,
you'll have a full set of T-shirts perfect for a very colorful family
portrait!
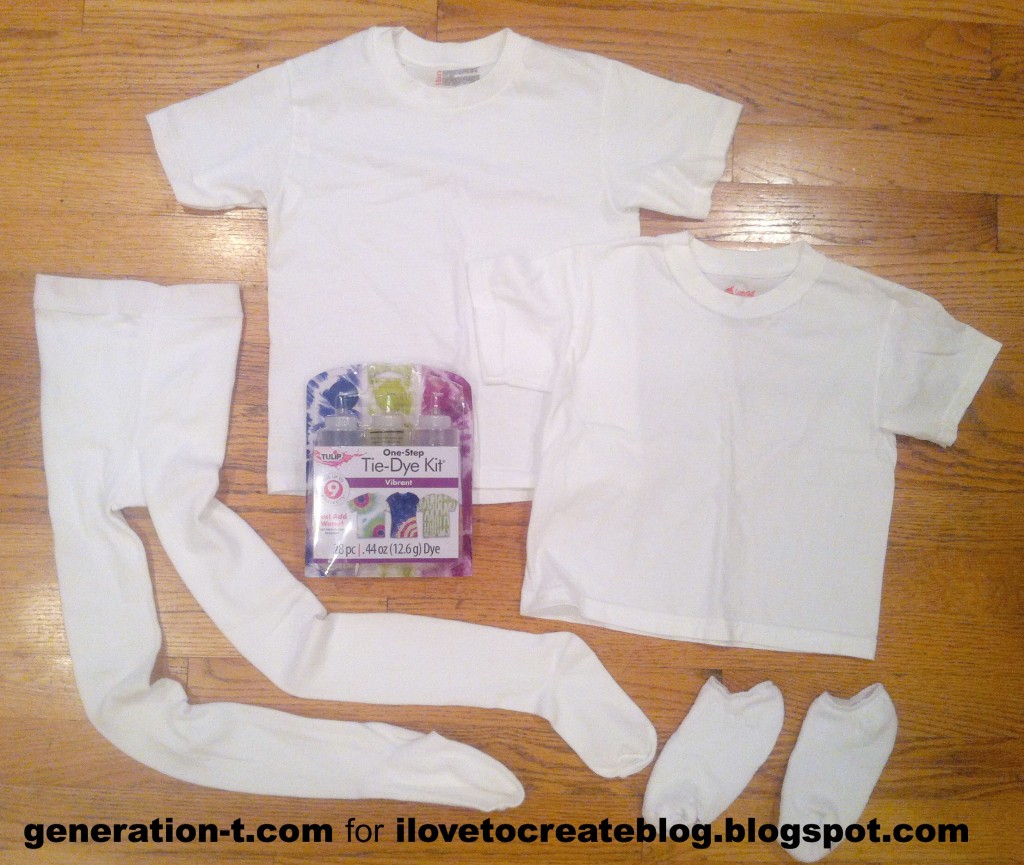
What You Need:
-Tulip One-Step Tie-Dye Kit (color: "Vibrant" -- includes rubber bands, bottles, dyes, two pairs of plastic gloves, and an instruction/inspiration sheet)
-Cotton things to dye: We picked T-shirts (in two sizes, for the two cousins), tights, and socks
-plastic table cloth or plastic garbage bag to cover your work surface
-paper towels
-plastic cling wrap or zip-lock bags
Note: If you're working with new T-shirts, pre-wash and dry them to make sure any shrinking that's going to happen has happened!
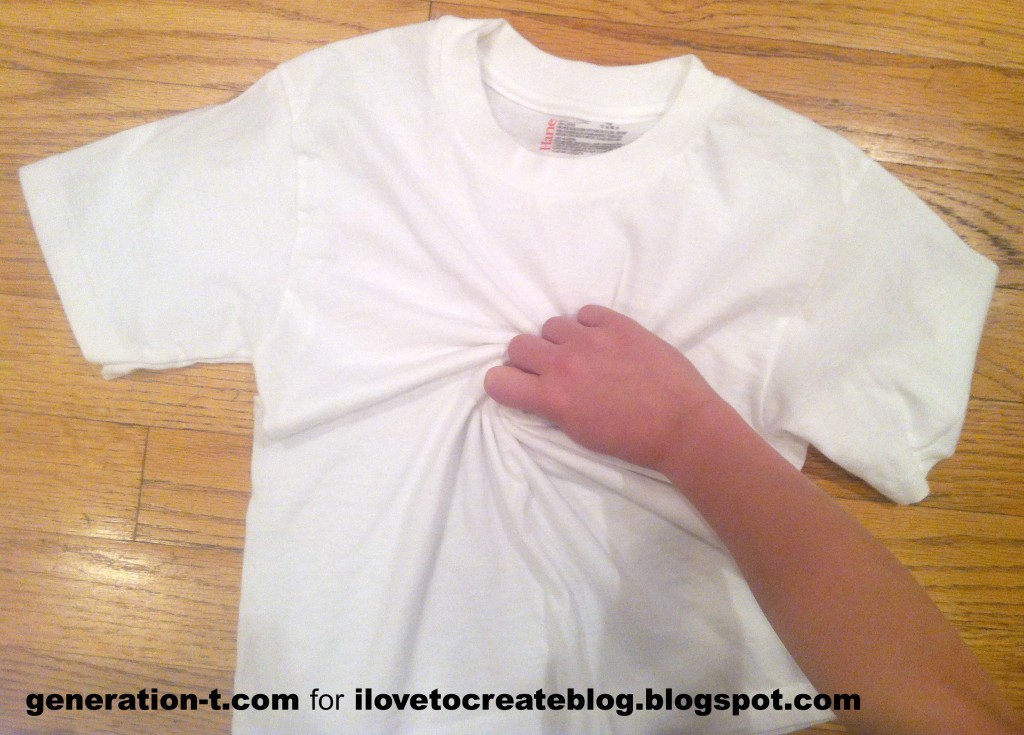
To start with, my niece picked the "Swirl" design from the instruction sheet that
comes with the kit. Following the instructions, she pinched the fabric
at the center of the T-shirt and twisted the T-shirt until she had a
round little, swirled T-shirt "biscuit."
We wrapped the T-shirt swirl with 3 rubber bands (also included in
the kit), and dampened it under running water, squeezing out the excess water.
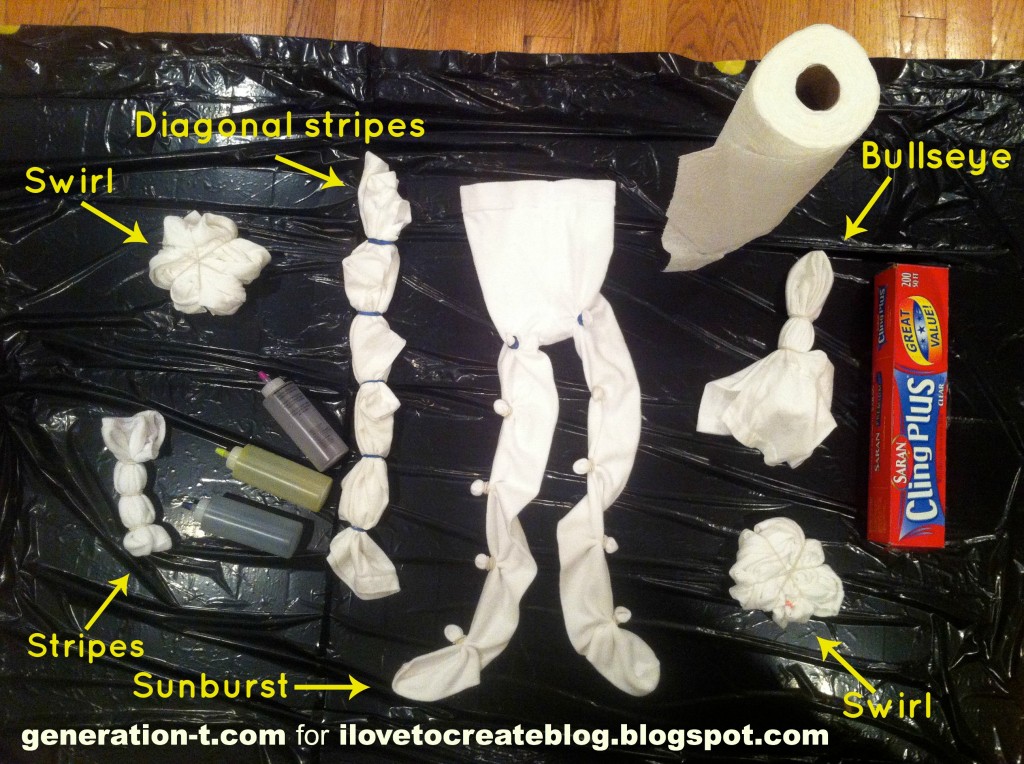
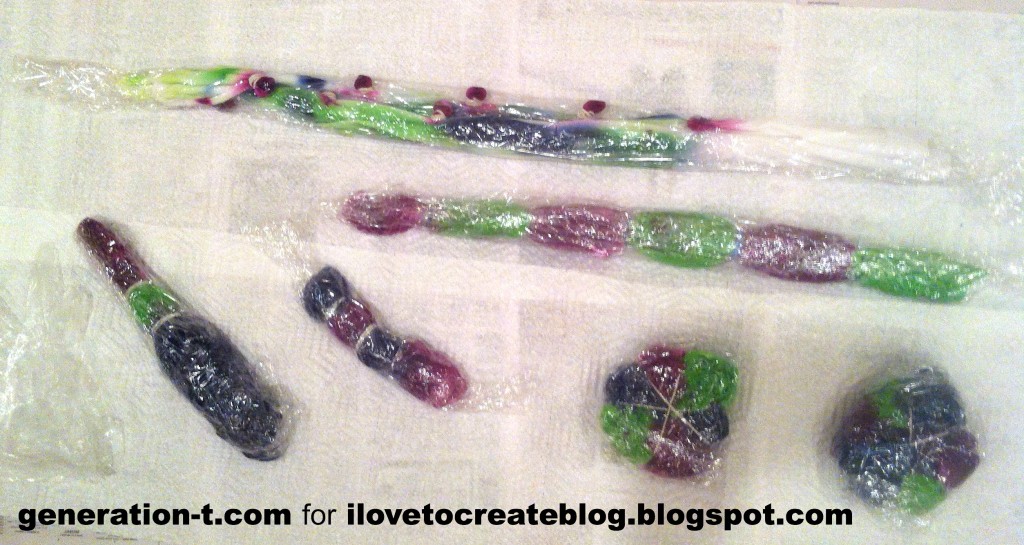
We cut open a plastic garbage bag to protect the floor and, armed with plenty of paper towels, we ended up preparing 4 T-shirts, 1 pair of tights, and 1 pair of socks to
try out 5 different tie-dye styles that were described in the kit (we
even did our own variation on one -- diagonal stripes!).
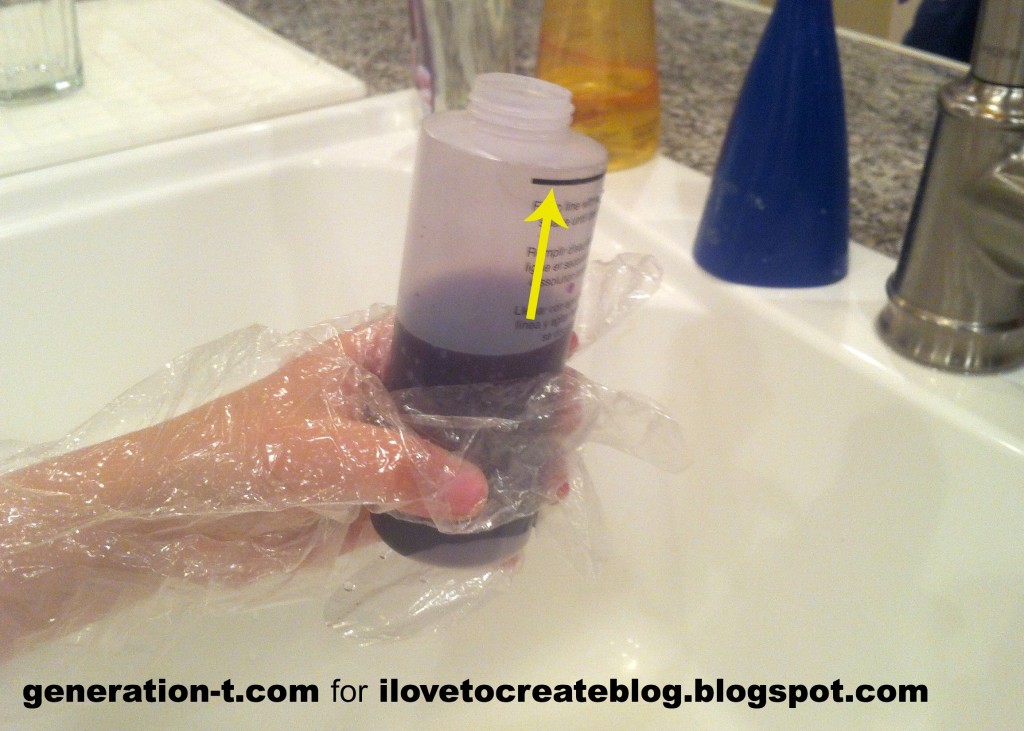
The powder dye comes already in the squeeze bottles; we filled the
rest of the bottle with water up to the thick black line, put the top on
tightly, and shook each bottle until the dye was mixed.
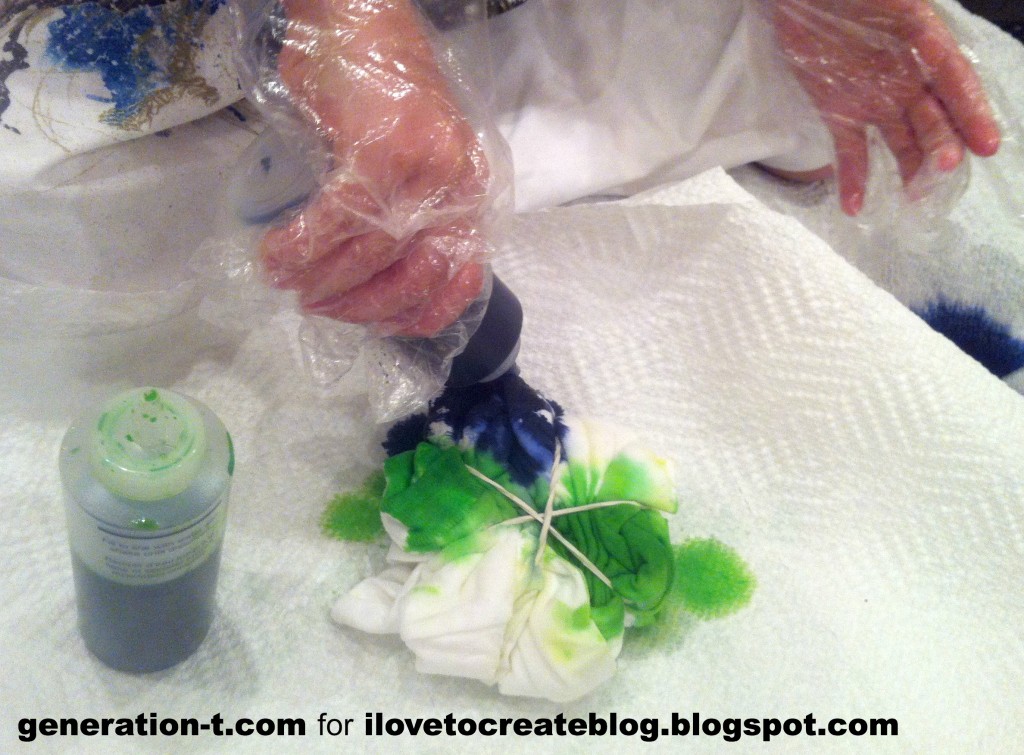
Dorothy squeezed the dyes onto the T-shirt segments
(delineated by the rubber bands) one color and one segment at a time.
We wrapped each project in plastic cling wrap to sit overnight.
Dorothy tie-dyed 2 kid-sized T-shirts and the pair of socks, I tackled
the tights and a toddler-sized T-shirt, and Uncle Luke even got in on
the action with another toddler-sized T-shirt. Note: The package
says you can get up to 9 garments, but if you're crafting with kids,
make sure to estimate for fewer, since they tend to be a bit generous when squeezing out the dye (in addition to our 7 garments, we had the most beautiful paper towels!).
We let the dye soak in overnight (6-8 hours minimum), but we had a
busy day, so we left them wrapped up for longer. We unwrapped each
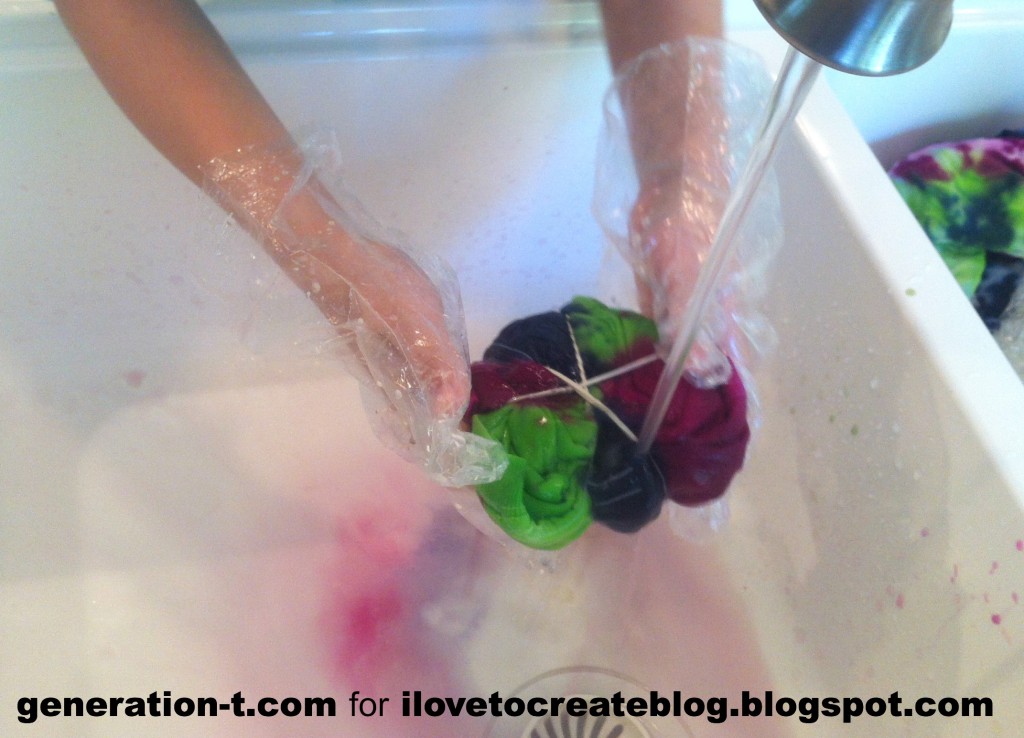
project over the sink, and rinsed and squeezed out as much excess dye as
possible. Then we peeled off the rubber bands, and gently shook out our
masterpieces!
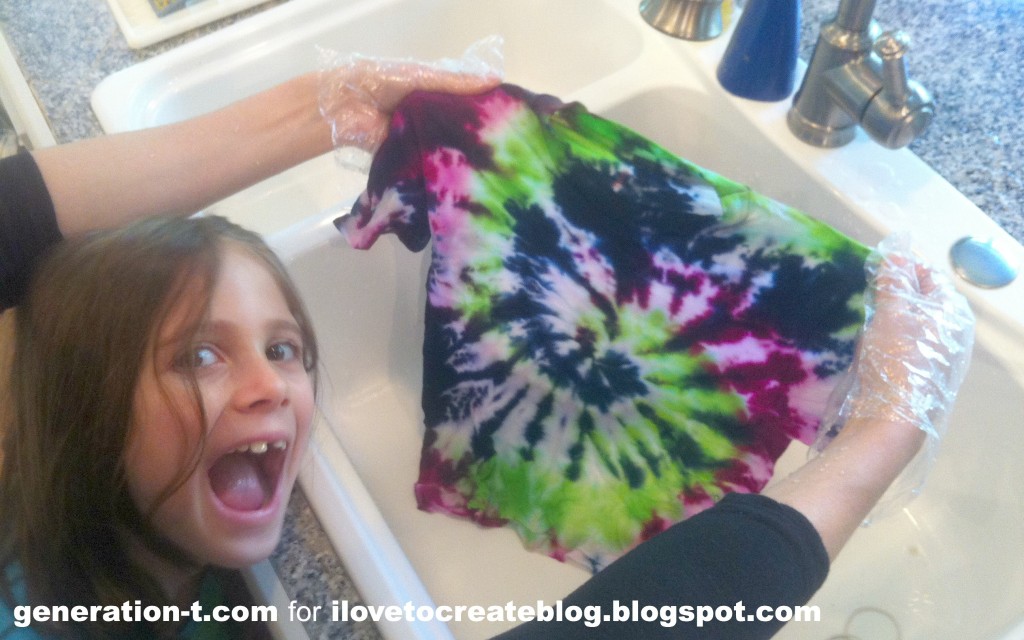
Dorothy was so excited/giddy/proud of the results of her T-shirt that
she photo-bombed the picture! Since we had a whole batch of garments
with the same color scheme, we tossed them all in the washing machine
and dryer together to finish the process. After her cousin, Niko, woke up
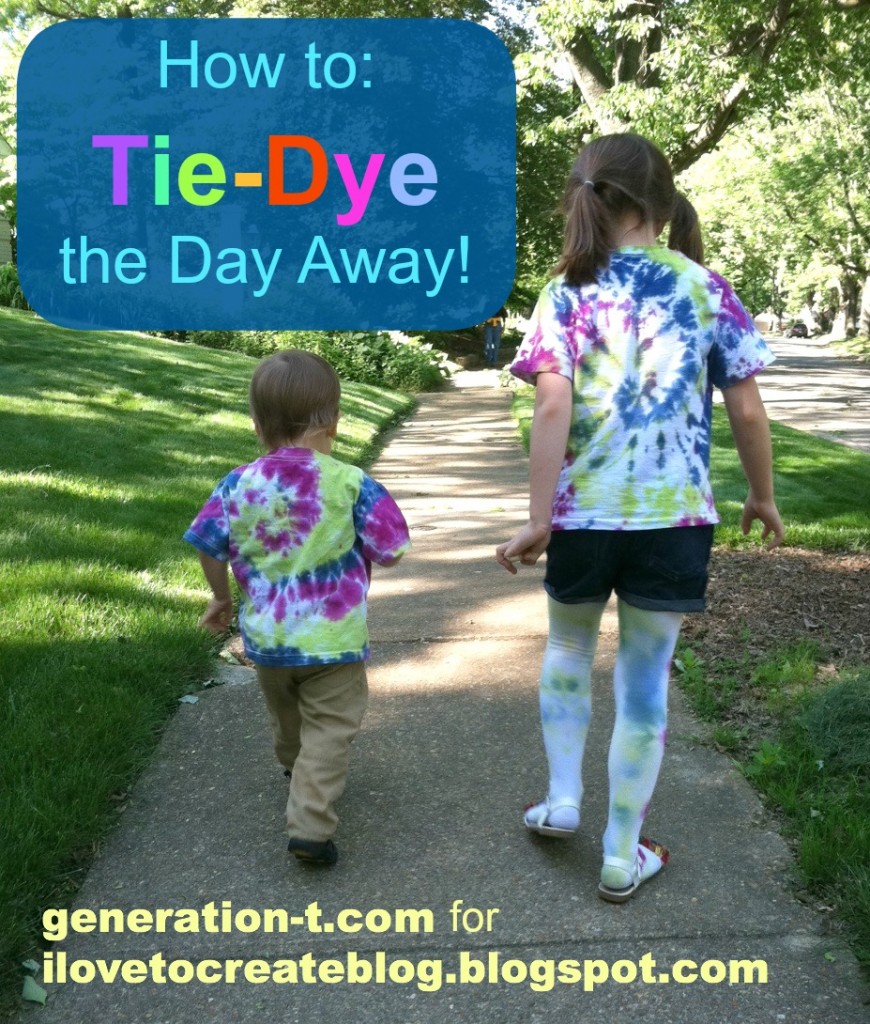
from his nap, it was time to try on the matching Swirl design tie-dye
T-shirts!
Because we were running low on dye by the time I did the tights,
they're a little more pastel-colored in the back than the T-shirts, but the violet
sunbursts on the front are perfect little rosettes (says Dorothy).
And because it didn't make sense to layer the socks over the tights
(though she was tempted!) or layer the second T-shirts, we're saving the
Bullseye T-shirt the Diagonal Stripes T-shirt and the Stripes Socks
tie-dyes from our tie-dye extravaganza for tomorrow's coordinating
cousin outfits.
Did I mention tie-dye is great for obscuring grass stains? An added bonus, for sure! There's definitely more tie-dye to come this summer --
and quite likely in my size this time.
Monday, May 6
Dip-Dyed Eyelet Dress DIY
We've been obsessed with dip-dye and ombre as of late around our studios! While ombre involves a big paintbrush and dye, dip dye is exactly how it's named...you simply dip the bottom of the garment into a container of dye! We're so, so excited with how this technique is working on the pretty white eyelet dresses from Old Navy! They add an extra punch to a plain white dress.
What you need:
– White Eyelet Dress (100% cotton material, ours was from Old Navy)
– 4 bottles of Tulip One-Step Tie-Dye in Fuchsia
– Medium-sized bucket
– Clothesline and clothespins
– Tulip Surface Covers or plastic bag to protect your work surface.
Dip dyeing isn't hard to do at all! Here's the steps you will need to follow: 1. Prewash dress without fabric softener and do not try. 2. Add dye powder from all four Fuchsia dyes to plastic shoebox. Fill box
with water and use stirring spoon to mix until dye is completely dissolved. 3. Cover floor with plastic sheeting. Hang dress from clothesline using
plastic clothespins. 4. Bring the box with the dye up to the dress so that the bottom of the
dress is touching the bottom of the box. Tip: only allow the bottom hem of the dress to barely
touch the bottom of the box…otherwise, the fabric will lay oddly in the dye and
you’ll end up with white spots. 5. Let soak 24 hours to allow the dye to travel up the dress. 6. Carefully remove dress from dye and rinse out excess dye in sink until
water runs clear. Be very careful to not splash dye on upper part of dress.
Line dry.
You will want to wash this dress by hand for the first 3-4 washings using a product like Woolite. This way, you will be guaranteed that the white part of the dress won't be dyed a light pink.

Here's the bottom of another dress that we dip-dyed. The reason that the dye does not take to the ornate detailing is because the threads used on this dress are not 100% cotton. They are made up of a polyester blend and that blend rejects the dye. It turns out to be such a cool effect.
Here's Alyson wearing the finished dress! It looks perfect on her!
So, do you think you wanna give dip-dyeing a try? What color of dip-dyed dress would you want?
So, do you think you wanna give dip-dyeing a try? What color of dip-dyed dress would you want?
Saturday, April 27
Inside the iLoveToCreate studio via Instagram

There's always a lot of action going on in our studios on a daily basis! This past week, there was a whole lotta tie dye going on, as well as a couple photo shoots. One of the mom's of a model who came in brought this pretty conure. We had to put him on a tie dye shirt and he also left a present for us on said shirt. Haha. Oh, and by the way, he was born with his little feet that way, so nothing is wrong with him if you were wondering.

Lauri dip-dyed this shirt from Forever21. She used the Tulip One-Step Tie-Dye in coral. It left it a cool purple tone!

We are making shirts in the studio using various products that can be mass-produced for shirts to be displayed in stores. This neon shirt is using Tulip Fabric Sprays.

Pattiewack was painting Tulip One-Step Tie-Dye on specialty paper for an upcoming tradeshow. The colors are so full and rich!

During our sales and marketing meetings, we all bring a craft to work on! Alexa is working on a new Puffy Paint Canvas in honor of PUFFY PAINT! See what she's going to do with it in this blog post.

We're decorating our human resources area with bright and vibrant pieces that we've created for our web site. This rainbow-covered stool is so bright and cute...find the instructions to make it here.

And finally, we, once again are mass-producing shirts for retail stores! We think we've hit the BULLSEYE on this one.
Subscribe to:
Posts (Atom)

